
.svg)

The Complete Guide to Creating A Memorable Facebook Event

A Facebook Event is a built-in marketing tool that lives right where your audience already scrolls, chats, and clicks. It lets you turn a date on the calendar into a full-blown experience, with space for visuals, updates, reminders, and community interaction. Whether you're hosting in-person or online, it's one of the easiest and most effective ways to rally interest and attendance.
Why does it matter? Because visibility equals engagement. A well-created Facebook Event boosts discoverability, keeps your event top-of-mind with automated reminders, and makes it easy for attendees to share the news with others.
In this article, we’ll walk you through how to create Facebook Events that are memorable and perform well. From setting the tone with the right visuals to optimizing for engagement and reach, consider this to be your step-by-step playbook for making an impact that lasts well beyond the RSVP.
The 5 Must-Haves To Create A Facebook Event People Actually Want to Attend
Most Facebook events get ignored because they’re rushed, vague, or forgettable. If you want people to actually show up, you need to treat your event like a product launch: clear, polished, and built for engagement. To achieve this, certain essential elements must be in play. These elements are the baseline for earning attention, building credibility, and making it easy for someone to say yes.
When creating a Facebook event that converts, certain fundamental elements serve as the foundation for all your promotional efforts. Getting these basics right signals professionalism and reliability to potential attendees.
1. Write a Clear and Clickable Title
Your title needs to be attention-grabbing, descriptive, and searchable. Aim for a title that balances SEO-friendly keywords with human appeal. For example, instead of "Annual Company Gathering," try "TechCo's 2025 Innovation Summit: Shaping the Future of AI."
Your event title is your first impression. It needs to captivate and compel action while striking a balance between clarity and intrigue. Try the action word + unique value + event type formula: "Master Data Science: Interactive Workshop with Industry Leaders." Or use the exclusive descriptor + topic + format approach: "Insider's Guide to Crypto: Live Q&A with Industry Experts."
Employing brand positioning strategies helps your event stand out from the crowd. Test your titles by asking, “Would I stop scrolling for this?” Ensure your title sets the right expectations, and that your event meets them. Nothing damages trust more than a spectacular headline followed by a forgettable experience.
2. Cover the When and Where (Without Making People Hunt)
Include the day of the week, date, start time, and end time. For multi-day events, clearly state the whole duration. Nothing frustrates potential attendees more than having to hunt for basic timing information.
For physical events, include the venue name, address, and any relevant parking or transportation details. For virtual events, specify the platform and how attendees will access it. Vague location information makes even the most exciting event seem disorganized.
3. Write a Description That Sells the Experience
Your event description should include a brief overview of what attendees can expect, key speakers or highlights, the value proposition, any special features, and ticket information. This is where you sell the experience, not just the logistics.
Open with a compelling statement or question that communicates the value of attending. Make them feel what they’ll miss out on if they don’t join. Highlight standout features, world-class speakers, interactive sessions, and exclusive takeaways, and use formatting to keep the content scannable, especially for mobile users.
Let your brand’s personality come through. If you’re quirky, lean into it. If you’re buttoned-up and sleek, reflect that. Create urgency without being pushy: “Early bird tickets available until Friday” is far more effective than all-caps hype. End with a clear next step, so your audience knows what to do and why they shouldn’t wait.
4. Choose the Right Privacy Settings
Determine whether your event should be public, private, or invite-only, taking into account your goals and target audience. Each option creates a distinct perception and attracts a different type of attendee.
The technical aspects of your Facebook event significantly affect its discoverability and reach. Public events are discoverable by anyone on Facebook and can be shared widely. Private events are only visible to guests, creating a sense of exclusivity. Select options based on your event's goals and target audience.
5. Optimize Setup for Discoverability and Conversion
Select the most specific categories that fit your event to improve discoverability. Facebook's algorithm uses categories to suggest relevant events to users. Update categories if your event evolves during the planning process.
Use Facebook's recognized venue locations when possible to improve discoverability in location-based searches. This also provides attendees with directions and additional venue information, eliminating the need for extra effort on your part.
Partner with complementary brands or influencers as co-hosts to expand your event's reach and audience. This can significantly increase visibility to new audiences and add credibility to your event through association. Avoiding common branding mistakes is crucial during your event setup to maintain professionalism and trust.
If selling tickets, integrate with Facebook's ticketing partners for a seamless purchase experience. This reduces friction in the conversion process, making it easier for people to commit to attending.
Why Smart Design Makes or Breaks Your Facebook Event
To be honest, poor design doesn't just make your event look unprofessional, it actively convinces people your event isn't worth their time before they even read your description. Every visual choice, from your cover photo to promotional graphics, either builds credibility and excitement or undermines it, and there's no middle ground on a platform where people make split-second decisions. When your design elements work seamlessly with your messaging, they create an experience that transforms casual scrollers into committed attendees.
Make Your Cover Photo Do the Work
Your event's cover photo is often the first visual element people see. To maximize its impact, use the optimal size of 1920 x 1005 pixels with a 16:9 aspect ratio to ensure your image appears crisp on all devices.
Select eye-catching imagery that reflects the tone and purpose of your event rather than generic stock photos. To make your visuals as impactful as possible, consider principles from strategic poster ad design.
Boring visuals = boring event (at least that's what people will assume). Keep the text on the cover image minimal, focusing on essential information such as the event title, date, and location.
Use contrasting colors for text overlays to ensure legibility, especially on mobile devices where most Facebook browsing happens. Consistently integrate your brand's logo, color palette, and fonts to reinforce brand identity and build trust. Utilizing elements like patterns can transform your brand identity. Your visual identity should be as recognizable as your best friend's laugh!
Create Graphic Graphics That Tell Your Story And Build Trust
Beyond the cover photo, develop a suite of visual content that supports your promotional strategy throughout the event timeline. Design graphics that work across different promotional contexts, from Facebook feeds to email campaigns and other social platforms.
Maintain visual consistency with your written voice, whether it's playful, professional, or edgy. Utilizing tools and techniques can help you elevate your brand visually. If your copy is fun and irreverent but your graphics look corporate and stuffy, you're sending mixed signals that confuse potential attendees.
Use graphics to amplify key messages without overwhelming your written content. Consider the power of typography in conveying your brand message. Create visuals that highlight speaker quotes, showcase event highlights, or present key statistics related to your event's theme.
Integrate elements of brand iconography to enhance recognition and appeal. Consider adopting creative approaches to your event design to make a lasting impression and stand out from the crowd.
Consider creating a series of countdown graphics to build anticipation as the event date approaches. Nothing builds excitement quite like seeing "Only 3 days left!" paired with an enticing image of what awaits attendees.
Partner With Design Professionals Who Actually Get Events
Contrary to what you might think, you don't have to figure it out your design solo. Professional designers who understand event marketing know exactly how to translate your vision into visuals that stop the scroll and start conversations, plus they handle all the technical requirements like file sizes and platform-specific dimensions that can make or break how your visuals appear.
The right design partner doesn't just make pretty pictures; they create strategic visual experiences that guide people from curiosity to commitment while you focus on what you do best. Whether you need a complete visual identity for your event or just want to elevate specific pieces, partnering with designers who specialize in event marketing can transform your promotional materials from forgettable to unforgettable.
How To Make Your Facebook Event Buzz Before, During, and After
Most Facebook events die a quiet death with zero engagement and empty seats, while others generate the kind of buzz that makes people genuinely excited to attend. The difference isn't budget or connections, it's treating your event page like the strategic marketing tool it actually is, not just a digital flyer. Your Facebook event becomes your first impression, ongoing conversation starter, and relationship-building platform that transforms casual browsers into committed attendees.
Know What To Say and When To Say It
A well-planned promotional timeline can make the difference between a packed venue and empty seats. Start 3-6 months before the event by creating your Facebook event page with preliminary information. Begin sharing teaser content to build awareness and launch "Save the Date" campaigns to generate early interest.
Two to three months before, increase posting frequency with more detailed event information. Implement early-bird ticket promotions and start engaging with your community through Q&A sessions or polls to gauge interest and gather feedback.
One month before, intensify your messaging with a sense of urgency. Share the finalized agenda and highlight key attractions. Launch retargeting campaigns for users who've shown interest but haven't registered yet.
Two weeks before, focus on last-minute registrations with countdown posts. Share practical information about the event like parking, what to bring, and other logistics. Leverage testimonials from past attendees to build trust and excitement.
During the event, post real-time updates and highlights. Encourage attendees to share their experiences using a specific hashtag. Use Facebook Live to broadcast key moments for those who couldn't attend.
After the event, share highlights and thank attendees. Collect feedback through polls or surveys and begin nurturing the community for future events. This post-event engagement helps maintain momentum and build a loyal following.
Build Recognition That Sticks Through Smart Messaging
Maintaining visual and verbal consistency throughout your promotional period is crucial for building recognition and trust. Develop a visual theme with a cohesive identity that can be adapted across all promotional materials, including a specific color palette, font choices, and graphic elements. Understanding the impact of strategic branding changes can help you maintain consistency.
Establish main themes or messages about your event. Rotate through these themes to maintain consistency while avoiding repetition that could bore your audience. Mix up your content types to keep things interesting—alternate between text posts, images, videos, and interactive content.
Encourage attendees from previous events or early registrants to share their experiences, adding authenticity to your promotion. People trust peer recommendations more than branded messages, so leverage this powerful form of social proof.
Strategically unveil new details about speakers, activities, or special features throughout your timeline to maintain interest. Think of it as a slow, tantalizing reveal that keeps people coming back for more! Develop a unique event hashtag and use it consistently across all promotions, encouraging your audience to use it as well.
Read the Room and Pivot When You Need To
Monitor engagement metrics throughout your promotional period and be prepared to adjust your approach based on what resonates with your audience. Pay attention to which posts generate the most likes, comments, shares, and click-throughs.
If certain content types or messages perform exceptionally well, create more similar content. Conversely, if some approaches fall flat, don't be afraid to pivot. This flexible approach ensures that your promotional efforts remain effective, rather than adhering to a rigid plan that isn't working.
Utilize Facebook's Event Insights to track response rates and attendance commitments. These metrics provide valuable insights into your audience's interests and behaviors, enabling you to refine your messaging for maximum impact.
Tips To Help You Stop Begging for Likes and Start Earning Loyalty
Authentic engagement isn't about tricks, giveaways, or manipulating the algorithm; it's about creating content so genuinely valuable that people can't help but interact with it. When you focus on delivering real value instead of chasing vanity metrics, something powerful happens: your audience stops treating you like just another brand and starts seeing you as a trusted resource they actually want to hear from. The strategies that work best don't feel like strategies at all, they feel like natural conversations between people who share genuine interests and goals.
1. Create Content Worth Sharing Without Asking
Focus on genuine value over explicit sharing requests. Solve real problems, create visually appealing content, offer exclusive behind-the-scenes insights, use compelling storytelling from past attendees, and provide practical resources. When content truly helps your audience, natural sharing follows.
2. Foster Real Connections That Go Beyond the Event Page
Build community through live Q&As, candid behind-the-scenes content, interactive polls for decision-making, user-generated content opportunities, and personalized responses. Make followers feel like insiders and stakeholders by showing the real people behind your event and actively engaging with comments.
3. Keep the Energy Alive Long After the Last Guest Leaves
Maintain post-event momentum with highlight reels, surveys, discussion threads, and personalized thank-you messages. Create recap content showcasing attendee participation while teasing future events. This converts non-attendees for next time and strengthens relationships for ongoing collaboration.
Turn Your Next Facebook Event Into the One Everyone's Talking About
Creating impactful Facebook events requires a strategic blend of compelling content, thoughtful design, and active engagement. The most successful events seamlessly blend professional presentation with authentic connection, creating experiences that begin the moment someone discovers your event online and continue long after they leave.
When you approach event creation as both a writing and design challenge, everything shifts. You're not just announcing details, you're creating complete experiences that begin the moment someone sees your event in their feed and continue long after the last attendee heads home. Your next event could become a defining moment for your brand, creating buzz, engagement, and lasting connections.
Don't let boring visuals convince people your event isn't worth their time, NoBoring Design creates scroll-stopping Facebook event graphics and social media assets that turn casual browsers into committed attendees. Partner with us today!
Key Takeaways
- Successful Facebook events combine compelling copy with strategic design elements to create a complete experience. Together, they guide people from curiosity to commitment.
- Timing your promotional content correctly helps build momentum and maintain interest. Get the timing wrong, and even great events can struggle to fill seats.
- Authentic engagement strategies drive organic sharing and community building. Real value creates natural advocates who share because they want to, not because you asked.
- Visual consistency across all event materials strengthens recognition and trust. Cohesive branding passes the crucial first-impression test that determines whether people take you seriously.

Your nonprofit's website is often the first touchpoint potential supporters have with your organization. Creating a web presence that converts goes beyond aesthetics—it's about crafting digital experiences that inspire meaningful action. This guide to non-profits web design that converts will help you transform your website into a powerful tool for engagement.
One in three donors thoroughly researches an organization before deciding to support it. This reality highlights why developing a compelling, informative website is crucial for nonprofits looking to expand their reach and impact.
A well-designed nonprofit website serves multiple essential purposes:
- Establishes global visibility for your mission
- Builds credibility and trust with potential supporters
- Serves as an information hub for your cause
- Streamlines volunteer recruitment
- Opens doors to international collaborations
- Simplifies event promotion and management
The most effective nonprofit websites combine powerful visual storytelling with clear calls to action. Rather than simply listing services, showcase your organization's impact through personal stories, compelling case studies, and quantifiable results. Take inspiration from organizations like Twloha, which effectively features statistics and impactful stories on their homepage, or Invisible Children, whose intuitive design and strategic use of imagery communicate their mission in a way that evokes empathy without overwhelming visitors.
In brief:
- Effective nonprofit websites balance emotional storytelling with factual data to build trust and inspire action
- Mobile responsiveness is critical with 25% of donors completing donations via smartphones
- Simple donation processes with minimal fields and clear CTAs significantly increase conversion rates
- Accessibility features like semantic HTML and alt text ensure your mission reaches everyone
Fundamental Principles of Non-Profits Web Design That Converts
Storytelling and Branding
Nonprofits face the challenge of standing out among approximately 10,000 brand messages that consumers encounter daily. Storytelling has emerged as a powerful tool for cutting through this noise and forging meaningful connections with your audience, helping you create a unique online presence. This guide to non-profits web design that converts emphasizes the importance of effective storytelling.
Effective storytelling in nonprofit web design does more than just inform visitors about your organization—it creates emotional resonance that transforms passive browsers into active supporters. When incorporating storytelling elements into nonprofit websites, focus on:
- Human-centric messaging that showcases real voices from both beneficiaries and team members
- Emotional engagement that helps visitors relate to your mission on a personal level
- Building authentic connections that bridge the gap between your organization and potential supporters
Teach for America exemplifies this approach beautifully. Their website leads with compelling narrative elements that articulate their mission while featuring imagery of students and teachers, creating an immediate emotional connection with visitors.
User Experience and Conversion Optimization
The power of storytelling must be paired with thoughtful user experience design to effectively convert emotional connections into meaningful actions. When you structure your nonprofit's website as a narrative journey, you naturally guide visitors toward engagement opportunities.
This strategic approach allows you to:
- Present information in a digestible, flowing manner that maintains interest
- Improve retention of key messages by leveraging the brain's natural affinity for narrative formats
- Differentiate your organization in a crowded nonprofit landscape
- Create a seamless path from emotional connection to concrete action
For nonprofits, storytelling isn't just about creating appealing content—it's about structuring your entire web presence to support the journey from awareness to advocacy. By thoughtfully incorporating narrative elements throughout your website, you create an experience that resonates with visitors and inspires them to become part of your story.
To explore more detailed strategies for weaving storytelling into your nonprofit web design that converts, visit Key Medium's guide on nonprofit storytelling.
Best Practices for Accessibility and Responsiveness
Accessibility Guidelines
Making your nonprofit website accessible isn't just about compliance—it's about ensuring your mission reaches everyone. Implementing ADA (Americans with Disabilities Act) standards helps you create an inclusive digital environment where all users can engage with your content.
Here are key accessibility practices you should implement:
- Use semantic HTML markup: Structure your content meaningfully to enhance navigation for assistive technologies. This helps screen readers interpret your content correctly and improves the overall user experience.
- Add descriptive alt text to images: Every image should include alternative text that clearly describes what's shown. This is essential for visitors using screen readers to understand visual content.
- Ensure screen reader compatibility: Make sure all your visual content can be adequately described by screen readers. This includes not only images but also charts, graphs, and other visual elements that convey information.
- Implement keyboard navigation: Your website should be fully navigable using only a keyboard for users with mobility challenges. Ensure all interactive elements have proper focus states and tabbing order.
- Write descriptive web links: Instead of generic "click here" text, use descriptive link text that indicates where the link leads when read out of context.
- Include captions for videos: All video content should have captions to make it accessible to deaf or hard-of-hearing users.
For inspiration, the Cram Foundation website effectively implements accessibility principles with high-contrast colors and larger font sizes for improved readability.
Mobile Responsiveness
The importance of mobile access can't be overstated in expanding your nonprofit's reach. In 2023, there are approximately 6.8 billion smartphone users globally, representing a 4.2% annual increase. For nonprofits specifically, there has been a 50% rise in transactions completed on donation pages via mobile devices, with 25% of donors finalizing their donations on smartphones.
To effectively reach this mobile audience:
- Implement responsive design: Your website should automatically adjust its layout based on the device being used. This ensures a seamless experience across varying screen sizes without requiring separate mobile and desktop versions.
- Optimize for touch interaction: Use larger fonts and buttons to facilitate easy clicking on mobile devices. Touch targets should be at least 44×44 pixels to accommodate fingertip tapping.
- Ensure content accessibility: All content should be easily accessible on mobile without horizontal scrolling. Consider how your navigation menus transform on smaller screens.
- Conduct cross-device testing: Continuously test your website on various devices and browsers to ensure compatibility and identify any issues with your responsive implementation.
- Pay attention to navigation: Your header and navigation menus should adapt appropriately on mobile and tablet devices. Consider using a hamburger menu or other mobile-friendly navigation patterns.
The World Wildlife Fund's website exemplifies excellent mobile-first design, prioritizing the mobile user experience while maintaining visual appeal. Similarly, Aging Ahead's website demonstrates excellent responsive design with easy navigation regardless of device.
Creating Effective Donation Pages That Convert
When it comes to nonprofit websites, your donation page is arguably your most valuable digital asset. Creating a streamlined, user-friendly donation process can significantly impact your fundraising success. Here's how to design conversion-driven donation pages that encourage visitors to complete their giving journey.
Make Donation Pages Easily Accessible
Your donation page should be impossible to miss. Place donation buttons prominently in your website's navigation and on the homepage. As part of this guide to non-profits web design that converts, we recommend:
- Including a high-contrast "Donate" button in your main navigation
- Adding donation CTAs on your homepage (ideally "above the fold")
- Limiting competing CTAs to avoid overwhelming visitors
Shofco's website exemplifies this approach by maintaining a visible donate button in both their secondary navigation and footer, ensuring it remains accessible throughout a visitor's journey.
Simplify Your Donation Form
The complexity of your donation form directly affects completion rates. Only ask for information that's absolutely necessary to process a donation. Consider these form design best practices:
- Use buttons instead of drop-down menus when possible
- Arrange form fields in a single column for easier visual flow
- Avoid placeholder or filler text that might confuse users
- Provide clear error notifications that specify exactly what needs correction
For inspiration, look at Charity:Water's donate page, which exemplifies a streamlined donation process by requesting only essential information.
Keep Donors on Your Site
Maintain trust by keeping the entire donation process on your website. When donors get redirected to third-party platforms, you risk losing them in the transition. If you must use external payment processors, ensure they're seamlessly integrated into your site's design.
Implement Robust Security
Security isn't just a technical consideration—it's a trust factor that directly influences donation completion. Prioritize:
- HTTPS encryption to protect data transmission
- Secure integration of payment gateways
- Compliance with Payment Card Industry Data Security Standards (PCI DSS)
These security measures not only protect your donors but also build confidence in your organization's digital presence, as noted in this guide for nonprofits.
Use Clear, Compelling Calls-to-Action
Your donation page should feature descriptive action prompts that motivate giving. Use action-oriented language that conveys impact rather than generic "Donate Now" buttons. For example, "Provide Clean Water" carries more emotional weight than "Submit Donation."
Effective donation pages are a crucial component of your marketing and outreach efforts. By creating effective marketing collateral, you can guide visitors toward becoming donors.
Exemplary Nonprofit Websites
What transforms a nonprofit website from simply informative to truly effective at converting visitors into supporters? Impactful designs that communicate a mission effectively make all the difference. The best nonprofit websites share several key characteristics that engage visitors and inspire action.
Compelling Visual Storytelling
Organizations like Make-A-Wish demonstrate the power of visual storytelling through effective imagery. Their website features soft colors and photography focused on children, creating an emotional connection that resonates with visitors. Similarly, the Little Fox Foundation uses a vibrant color palette of mint, navy, and orange with an engaging fox logo that immediately captures attention.
High-quality design solutions can elevate a nonprofit's digital presence, inspiring visitors and driving engagement.
Streamlined Navigation
Despite their complex missions, successful nonprofit websites prioritize simplified navigation. Make-A-Wish consolidates its global presence into just four key navigation items, preventing visitor overwhelm. The Little Fox Foundation, despite having seven main links, utilizes visually digestible mega menus that enhance user experience rather than complicating it.
Captivating Copy
The Gates Foundation exemplifies effective copywriting with powerful phrases like "we are impatient optimists working to reduce inequity." Their approach makes engaging with content feel like experiencing an inspiring TED Talk. The best nonprofit websites write specifically for their audience, simplify language, avoid jargon, and break text into scannable sections.
Strategic Calls-to-Action
Effective nonprofit websites feature persistent donation calls-to-action that remain accessible throughout the browsing experience. The Little Fox Foundation incorporates a floating donation button on every page, while Make-A-Wish implements interactive donation prompts that appear while users browse, gently encouraging contributions.
Multi-Channel Connectivity
Human Rights Watch demonstrates excellence in connecting visitors to their broader digital ecosystem. They showcase links to various social media platforms in their website footer, encouraging deeper engagement beyond the website itself. The most effective nonprofit websites create dedicated "Get Involved" pages and integrate social media prompts throughout their content.
Authentic Narrative
What truly distinguishes exceptional nonprofit websites is their ability to weave authentic narratives throughout the user experience. By incorporating real stories from beneficiaries and volunteers, they humanize their organization and create urgency that motivates support. These narratives transform passive visitors into active advocates who feel personally connected to the cause.
Integration Strategies and Tools for Non-Profits Web Design That Converts
Incorporating the right integration strategies and tools into your website design can transform both user experience and organizational efficiency. Comprehensive design solutions ensure that systems work together seamlessly, creating a cohesive experience that engages visitors and streamlines operations behind the scenes.
Interactive Elements for Enhanced Engagement
Adding interactive elements to your website gives visitors a sense of agency and creates a more dynamic experience. For example, animations that trigger upon scrolling make your site feel alive and responsive to user actions. Organizations like Teach for America effectively implement this strategy through blog posts that animate into view as users scroll and interactive map points that appear contextually when needed.
Interactive features transform passive viewers into active participants, fostering a deeper connection with your brand or cause. However, it's important to follow best practices for animation to ensure these elements enhance rather than detract from usability.
Video Content Integration
The principle of "show, don't tell" applies perfectly to website design, where complex ideas can often be communicated more effectively through visual media. According to research by Wistia, visitors spend an average of 2.6 times longer on pages featuring video content compared to those without.
Integrating video storytelling creates emotional connections with your audience while simplifying complex concepts. This approach is particularly valuable when explaining organizational missions or demonstrating impact, as seen in Teach for America's "How Change Happens" video that effectively conveys their mission through compelling storytelling.
Responsive Support Systems
Integrated support systems ensure visitors can connect with you when needed. Effective integration strategies include:
- User-friendly contact forms for straightforward communication
- Live chat functionality for real-time interaction
- Email integration for more detailed inquiries
- Chatbots and AI tools that provide instant responses to common questions
These tools not only improve visitor experience but also free up your team's time by handling routine queries automatically. For flexible design support options, consider an on-demand design subscription. The right combination of support systems creates an environment where users feel valued and supported throughout their journey on your site.
When choosing integration tools, remember that expensive isn't always better. Many free or affordable solutions can meet your needs effectively, especially if you're just starting out. The key is selecting tools that work together cohesively to enhance both user experience and your organizational efficiency.
Cost Considerations and Budgeting for Non-Profits Web Design That Converts
When developing a website for your nonprofit organization, maximizing impact within budget constraints is crucial. Fortunately, there are several strategies you can implement to create an effective digital presence without breaking the bank, such as utilizing a flat fee design solution.
Prioritize Features Based on Donor Behavior
Remember that one in three donors extensively research an organization before supporting it. This means your website's basic functionality and information accessibility should be your top priority investments. Focus your budget on creating clear pathways to information about your mission, impact, and ways to donate or volunteer.
Optimize for Performance First
Performance optimization offers significant returns on minimal investment. According to a study by Google, the probability of users bouncing increases by 32% as page load time goes from 1 to 3 seconds. Implement these cost-effective optimizations:
- Compress images and videos to reduce file sizes
- Minimize HTTP requests by streamlining page elements
- Enable browser caching to store frequently accessed data
- Consider a content delivery network (CDN) for faster load times
Choose Scalable Support Options
Customer support features can be implemented based on your current capacity:
- Start with simple contact forms before investing in live chat
- Consider implementing chatbots for common queries as your organization grows
- Ensure email communication functionality is robust before adding more channels
To address ongoing design needs, consider a monthly design subscription that scales with your organization.
Leverage Accessible Storytelling Tools
You don't need professional equipment to create compelling digital stories. A smartphone is often sufficient for capturing impactful narratives. Additionally, there are numerous free software options that can be as effective as premium alternatives for video editing and production across different platforms.
Implement Incremental Accessibility
While comprehensive accessibility is the goal, you can approach it incrementally:
- Begin with semantic HTML markup and proper heading structure
- Add alt text to images as a baseline requirement
- Implement keyboard navigation
- Expand to more complex accessibility features as budget allows
By strategically allocating your resources to these high-impact areas, you can create an effective nonprofit website that serves your mission while respecting financial limitations. Remember that regular maintenance and incremental improvements often yield better results than investing everything in a perfect initial launch.
SEO and Performance Optimization in Non-Profits Web Design That Converts
To maximize your nonprofit website's impact, you need strategic SEO and performance optimization. With 75% of users never scrolling past the first page of search results, visibility is crucial for reaching your audience.
Technical SEO Fundamentals
Start by ensuring your site's structure is technically optimized for search engines:
- Semantic HTML: Structure your content with proper HTML tags that make your site more accessible to both users and search engines.
- Clean URL Structure: Create readable URLs that are short, descriptive, and relevant. Use hyphens to separate words and avoid special characters or unnecessary information.
- Schema Markup: Implement structured data to help search engines better understand your content.
- Proper Indexing: Use a robots.txt file to guide search crawlers and create a comprehensive sitemap that includes all important pages.
Content Optimization Strategies
Quality content remains the cornerstone of effective SEO:
- Create valuable, accurate information relevant to your audience
- Update your website regularly through blogs or event calendars, sharing insights on topics like branding costs and strategies
- Conduct keyword research and naturally incorporate relevant terms
- Develop FAQ sections that align with voice search patterns as this technology continues to gain popularity
Performance Optimization
According to a study by Google, the probability of users bouncing increases by 32% when page load time goes from 1 to 3 seconds. Improve speed by:
- Compressing images and videos to reduce file sizes
- Minimizing HTTP requests by reducing page elements
- Using a content delivery network (CDN)
- Enabling browser caching
Mobile Optimization
With 6.8 billion smartphone users globally and a 50% increase in mobile donations, mobile optimization is essential. According to Double the Donation, 25% of donors complete donations via mobile devices. Prioritize:
- Responsive design that adapts to different screen sizes
- Content that's fully accessible without horizontal scrolling
- Large, easily clickable buttons and readable fonts
Conversion Optimization
Guide visitors toward engagement with clear calls-to-action:
- Position prominent CTAs at the top of webpages
- Use descriptive, compelling language that encourages action
- Limit CTAs to one or two per page to avoid overwhelming visitors
For inspiration, look at Shofco's website, which features accessible donate buttons in both navigation and footer areas.
Implement strategic internal linking like God's Love We Deliver does by connecting related content throughout your site, using descriptive link text and button styles to improve both user experience and SEO performance.
Emerging Trends in Non-Profits Web Design That Converts
As a nonprofit organization, staying ahead with cutting-edge design techniques is essential to maximize your mission's impact and donor engagement. The digital landscape is constantly evolving, and your website needs to keep pace with these changes to remain effective.
Mobile-First Design
One of the most significant trends is the shift toward mobile-first design. Your website must prioritize responsive design to guarantee a seamless user experience across all devices. This approach is no longer optional—it's a necessity for broader accessibility and engagement.
The World Wildlife Fund's website (www.worldwildlife.org) exemplifies this approach by ensuring easy navigation and readability on smaller screens while maintaining visual appeal. Their design prioritizes the mobile user experience without compromising on functionality or aesthetic quality.
Interactive Engagement Features
Modern nonprofit websites are moving beyond static pages to create more interactive experiences. Consider implementing:
- Social media sharing buttons that make it easy to spread your message
- Comment sections that foster community dialogue
- Interactive forms that simplify user input and increase completion rates
- Engagement tools that encourage visitors to connect with your cause
These features not only enhance user experience but also help build a community around your mission.
Trust-Building Design Elements
In 2023, establishing credibility through design is paramount. Incorporate elements that build trust:
- Testimonials from beneficiaries and supporters
- Success stories that showcase your impact
- Certifications and recognitions prominently displayed
- Impact metrics visualized through infographics and statistics
These elements help visitors feel confident in your organization's work and more likely to support your cause.
Simplified Form Design
To maximize conversions—whether for donations, email signups, or event registrations—form design has become increasingly important. The trend is moving toward:
- Button-based selections instead of dropdown menus
- Single-column layouts for more logical progression
- Clear error notifications that guide users to fix issues
- Minimal fields requesting only essential information
When considering updating your website, be mindful of essential website redesign considerations to ensure you implement the latest trends effectively.
For inspiration, check out the Macau Design Biennial website, which features straightforward, user-friendly forms that encourage completion.
Conclusion and Actionable Takeaways
Throughout this guide to non-profits web design that converts, we've explored the essential elements that make nonprofit websites effective and impactful. The digital landscape continues to evolve, but the core principles of clear communication, user-friendly design, and strategic engagement remain paramount for nonprofit success.
To maximize your nonprofit's digital presence, consider implementing these key takeaways:
- Prioritize storytelling across multiple channels, adapting your narrative to fit each platform while maintaining consistent branding. Remember that authentic stories that highlight both emotional impact and data-driven results are most effective at connecting with your audience.
- Design with purpose by ensuring your website features clear navigation, mobile responsiveness, and accessibility for all users. Your site should reflect your mission through compelling visuals and concise, persuasive copy.
- Integrate multiple connection points by prominently featuring social media links, email sign-up forms, and other engagement opportunities. Organizations like Human Rights Watch demonstrate how effective social media integration can extend your reach.
- Always include clear calls to action that channel the emotional response from your storytelling into tangible outcomes. Whether it's donating, volunteering, or advocacy, give your audience specific ways to contribute to your cause.
- Measure your impact by tracking key metrics like website traffic, engagement rates, and conversion statistics. Use these insights to continuously refine your digital strategy and storytelling approach.
When you need expert guidance on creating a nonprofit website that truly converts, consider flexible design subscriptions that specialize in crafting digital experiences that blend powerful storytelling with strategic conversion optimization to help your organization maximize its impact.
Authoritative Tone in Non-Profits Web Design That Converts
Creating an authoritative tone for your nonprofit website is essential to build trust and credibility with potential donors, volunteers, and supporters. Research shows that one in three donors extensively research an organization before deciding to support it, making your website's authority a crucial factor in their decision-making process.
Balancing Emotion and Facts
While storytelling in the nonprofit sector often relies on emotional appeal to create empathy, maintaining a balance between emotions and factual information is critical. Your website must evoke empathy while ensuring that your stories remain grounded in truth and supported by accurate data. This combination of emotional resonance and factual evidence significantly enhances your credibility and the effectiveness of your messaging.
When writing content for your nonprofit website, we recommend using emotionally resonant language that inspires feelings of empathy, compassion, and urgency. This approach helps your audience experience the human side of statistics and issues your organization addresses. However, always back these emotional appeals with concrete data and transparent information about your impact to maintain an authoritative stance.
For more insights on striking this balance, the article on The Power of Nonprofit Storytelling offers excellent guidance on creating stories that resonate while maintaining credibility.
Establishing Visual Authority
Your website's visual elements play a significant role in conveying authority. Consider implementing these strategies:
- Create and follow a style guide: Develop comprehensive guidelines that outline your colors, fonts, image types, and usage of icons and graphics.
- Define a consistent voice and tone: Decide whether your organization's voice should be friendly, professional, urgent, or a combination, and maintain this voice consistently across all content.
- Organize content hierarchically: Establish a clear structure for presenting text and visuals, using headings, lists, and concise paragraphs to highlight the most critical information.
Understanding your mission to enhance aesthetics helps align your website's visuals with your overall goals.
Acumen's website exemplifies effective authoritative branding with its consistent use of colors and design elements that reflect their logo throughout the site. Their clear information hierarchy and professional yet approachable tone instill confidence in visitors about their expertise and impact.
Technical Elements That Reinforce Authority
Beyond content and visuals, certain technical aspects of your website can strengthen its authoritative tone:
- Use semantic HTML markup: Structure your content meaningfully to improve accessibility and demonstrate attention to detail.
- Implement clear navigation: Design an intuitive structure that helps users quickly find what they're looking for.
- Include credibility elements: Incorporate testimonials, success stories, certifications, and transparent impact reporting to build confidence in your work.
- Enable responsive support options: Integrate contact forms, email functionalities, or even live chat features to demonstrate your organization's accessibility and responsiveness.
Visual storytelling is another powerful tool for establishing authority. By harmonizing narrative elements with engaging visuals, you can create emotional connections while presenting your organization as knowledgeable and impactful in your field.
When your nonprofit website successfully balances emotional appeal with factual information, maintains consistent branding, and implements thoughtful technical elements, it creates an authoritative presence that inspires trust—turning visitors into supporters and advocates for your cause.

In the tech landscape, branding goes beyond logos and color schemes—it's your company's identity and a business success driver. As tech companies multiply across sectors, strong branding captures attention, builds trust, and creates lasting impressions in a crowded marketplace.
Successful tech companies know that branding isn't a one-time effort but a strategic investment paying dividends at every growth stage. Research shows that companies focusing on both first impressions for new customers and exceptional experiences for existing ones achieve 1.6 times more business impact. This dual focus creates a comprehensive growth strategy satisfying both short-term goals and long-term vision.
The value of effective branding becomes clearer when examining conversion metrics. On average, a prospect needs approximately 8 brand interactions before becoming a client. Each touchpoint—from your website and social media to customer service and product experience—must consistently reinforce your unique value proposition.
For companies with global ambitions, effective branding matters even more. Around 45% of medium-sized businesses report that more than half their revenue comes from international markets. A cohesive, recognizable brand transcends geographical boundaries and cultural differences.
Beyond immediate recognition, investing in branding delivers tangible financial results. Companies with strong branding can enhance revenue by up to 23% while enjoying benefits like stronger customer loyalty, strategic product positioning, and establishment as an industry authority. Your branding serves as the foundation that communicates your values, highlights your unique selling propositions, and positions you as a leader through modern marketing techniques.
Whether you're a startup finding your voice or an established tech company reinventing your image, the investment in distinctive branding remains one of the most consequential decisions for your business's future. In an industry defined by constant change, your brand becomes the constant that customers recognize and trust.
In brief:
- Strong branding creates recognition and trust, with studies showing prospects need about 8 brand interactions before conversion
- Companies focusing on both new and existing customer experiences achieve 1.6x more business impact than those with a narrow focus
- International success depends on cohesive branding, with 45% of medium-sized businesses generating over half their revenue from global markets
- Effective branding delivers concrete results, including potential revenue increases of up to 23%, enhanced customer loyalty, and industry authority
Understanding the Importance of Branding for Tech Companies
Branding isn't just about having a nice logo—it's a strategic asset that evolves with your company and drives measurable business outcomes at every stage of growth. When done right, a cohesive visual identity creates a foundation for sustainable growth and market differentiation.
Branding Across Growth Stages
Your branding needs change significantly as your tech company develops:
In the early stages, focus on attraction and awareness. An impactful visual identity paired with compelling messaging catches attention in a crowded marketplace. Whether you're in SaaS, Fintech, AI, or Cleantech, distinctive branded elements drive potential users to your website and create that first impression.
During growth phases, branding plays a critical role in onboarding. Explainer videos and tech illustrations help showcase your product's functionality and user benefits, making it easier for new customers to understand what to expect. The clarity provided through these branding elements simplifies adoption and reduces friction.
For mature tech companies, branding shifts toward building long-term loyalty. When you've established market presence, your focus expands to nurturing relationships with existing customers. A thoughtful rebrand must consider the preferences of current users while still attracting new ones—a balanced approach supporting sustained growth.
Measurable Business Outcomes
The impact of strategic branding extends beyond aesthetics and delivers concrete business results:
First, effective branding drives conversion through consistency. Research shows it takes an average of 8 brand interactions to convert a prospect into a client. By aligning your brand identity across all touchpoints, you build the trust necessary to move prospects through your funnel.
Second, comprehensive branding strategies yield greater business impact. Companies that focus on both attracting new customers and enhancing the brand experience for existing ones achieve up to 1.6x more business impact compared to those with a narrower focus.
Third, strong branding creates competitive differentiation. In markets where technological capabilities might be similar, your brand identity communicates unique value propositions that resonate with your target audience and help you stand out.
Finally, well-executed branding increases your company's market value. Organizations with powerful brand identities often command premium pricing, attract strategic partners, and represent more stable investment opportunities—all factors that contribute directly to valuation.
Core Elements of Branding for Tech Companies
Creating a strong tech brand requires careful attention to several fundamental elements that form your company's identity in the marketplace. These components work together to distinguish your brand from competitors and build meaningful connections with your audience.
Brand Personality, Visual Identity, and Voice
Your brand personality defines how your tech company expresses itself and connects with users. It should reflect your company's core values and resonate with your target audience. To develop an effective brand personality:
- Define your core values: Articulate what your brand stands for and ensure this message appears consistently across all business aspects. These values will guide your branding decisions and help in aligning brand values with customer expectations.
- Craft a unique value proposition: Clearly communicate what differentiates your tech company from competitors. Your unique value proposition should highlight what sets your services apart and why users should choose you over others.
The visual identity of your tech brand comprises several critical elements:
- Logo: Create a distinctive symbol that represents your brand and aids recognition.
- Color Palette: Select specific colors that consistently convey your brand personality. Colors evoke emotions and play a significant role in how users perceive your brand.
- Typography: Choose fonts that align with your brand aesthetics. Typography affects readability and influences how audiences interpret your messaging.
- Design Style: Develop a cohesive overall look and feel that effectively communicates your brand's message.
Bose's recent rebrand demonstrates effective visual identity implementation, featuring bright colors, animated elements, and bold typeface to reinforce their position as an audio innovation leader while creating a dynamic, motion-oriented identity that stands out in the digital landscape, according to Envato. Another branding case study illustrates how strategic design can support brand values.
Your brand voice defines how you communicate with your audience through written and spoken content. Consistency in tone, language, and style helps build recognition and trust with your audience. Whether your brand voice is professional, conversational, technical, or playful, it should reflect your brand personality and resonate with your target market. Utilizing storytelling in branding can help create emotional connections with your audience.
Brand Architecture and Consistency
Brand architecture refers to how you organize and structure your offerings under your brand umbrella. For tech companies with multiple products or services, establishing a clear brand architecture is useful for:
- Defining relationships between different products
- Clarifying how sub-brands relate to the parent brand
- Managing brand equity across your portfolio
- Guiding future brand extensions
Research indicates that it takes an average of 8 brand interactions to convert a prospect into a client, making consistency across all touchpoints key. A unified brand image creates a cohesive experience that reinforces professionalism and reliability, according to Kaltura.
To maintain brand consistency:
- Create comprehensive brand guidelines documenting your visual identity, voice, messaging, and application rules
- Regularly audit your brand presence across all channels (website, social media, marketing materials, product interfaces)
- Develop templates for common marketing materials to ensure consistent application
- Train your team on proper brand usage and the importance of consistency
By simultaneously engaging both new and existing customers through consistent branding, companies can achieve 1.6 times more business impact, according to The Branx. This approach results in a more comprehensive growth strategy that addresses both short-term acquisition goals and long-term loyalty objectives.
In today's competitive tech landscape, strong brand elements and consistent implementation can help you overcome common challenges like differentiation, maintaining relevance, and driving innovation—giving your company the foundation needed to build lasting customer relationships.
Overcoming Branding Challenges for Tech Companies
The tech industry presents unique branding challenges due to its fast-paced nature and increasingly crowded marketplace. Developing a distinctive brand identity requires strategic thinking and standout strategies to cut through the noise.
Rapid Innovation Cycles and Complexity
Tech companies face constant pressure to stay relevant in an industry characterized by accelerated change. This creates several distinct branding challenges:
- Keeping pace with technological evolution: As innovations emerge quickly, your brand messaging can become outdated. What was cutting-edge yesterday may be standard tomorrow.
- Explaining complex offerings: Technical solutions often involve complex concepts that are difficult to communicate clearly to potential customers. Simplifying without diluting your unique value proposition requires careful balance.
- Maintaining brand relevance: The need for ongoing adaptation to evolving industry trends without losing your core brand identity creates tension between consistency and flexibility.
To address these challenges, focus on building a brand foundation that emphasizes your core values rather than specific technologies. This approach allows your messaging to evolve while maintaining a consistent brand identity. For example, rebranding efforts that focus on core values can effectively navigate rapid innovation cycles. Creating educational content that simplifies complex concepts helps bridge the gap between technical innovations and customer understanding.
Differentiation Techniques
Standing out in saturated tech markets requires strategic positioning. Here are effective differentiation techniques to consider:
- Craft a compelling unique value proposition: Rather than competing solely on features, articulate what truly sets your company apart. According to research, a clear value proposition should highlight what differentiates your tech company from competitors and why users should choose you over alternatives.
- Leverage consistency across platforms: With research showing it takes 8 brand interactions on average to convert a prospect into a client, maintaining branding consistency becomes crucial. Align your brand identity across all touchpoints to foster trust and recognition.
- Expand your focus beyond new customers: By focusing on both new and existing customers, businesses can achieve 1.6 times more impact. Your branding initiatives should target both audiences to create a comprehensive growth strategy.
- Harness AI for competitive advantage: For smaller tech companies competing against industry giants, leveraging artificial intelligence can level the playing field. AI enables more personalized marketing, accelerated development cycles, and enhanced online presence—creating opportunities to outmaneuver larger competitors with deeper pockets.
- Build community around shared values: Create a sense of belonging by fostering engagement through forums, social media groups, or exclusive events. This community-building approach transforms customers into advocates who amplify your brand message.
Strategic storytelling is particularly effective in tech company branding. Rather than focusing exclusively on technical specifications, share narratives about how your solutions solve real problems. This human-centered approach makes complex offerings more relatable while differentiating your brand in ways that technical features alone cannot.
Strategic and Tactical Branding Practices for Tech Companies
Building an effective brand in the tech industry requires both strategic vision and tactical implementation, including professional marketing design services. As the technology landscape evolves, different sectors demand specialized approaches to establish meaningful connections with their audiences. Understanding user needs is essential to establish meaningful connections with your audience. Let's explore how branding solutions can be tailored to specific tech niches and what design professionals are seeing on the horizon.
Solutions for Specific Tech Sectors
Each technology sector has unique branding requirements that reflect both their product offerings and audience expectations:
SaaS Companies
For software-as-a-service companies, branding must communicate reliability and ongoing value. Research shows that prospects typically require 8 brand interactions before converting into clients, making consistency across touchpoints key. SaaS brands benefit from branded illustrations and animations that effectively explain complex solutions in accessible ways.
Hardware Manufacturers
Hardware brands need to balance innovation with dependability. Their branding should emphasize physical quality and tangible benefits while creating emotional connections. The unboxing experience becomes a critical brand touchpoint where tactile elements reinforce brand values.
Consumer Tech
Consumer tech companies face the most competitive branding landscape, with the top global brands led by Apple valued at $1 trillion. For these companies, authenticity is paramount—88% of consumers cite authenticity as crucial for brand preference and loyalty. Creating a cohesive experience across physical products, software interfaces, and marketing materials helps build this authentic connection.
Implementing these sector-specific approaches creates measurable results. Companies that focus branding efforts on both new and existing customers achieve 1.6x more business impact than those focusing on only one audience segment.
Insights from Design Professionals
Design experts working across the tech industry are witnessing significant shifts in visual trends and branding strategies:
Embracing AI-Enhanced Branding
The adoption of generative AI shows a stark contrast between industries. While 84% of executives in non-tech sectors consider generative AI a top-five priority, only 37% of consumer packaged goods executives share this view. Forward-thinking tech companies are leveraging AI not just in their products but in their branding processes—creating dynamic brand systems that adapt to user preferences while maintaining core identity elements.
Motion Design as a Differentiator
Design professionals emphasize that staying ahead of motion design trends has become valuable for communicating key differentiators and startup values. These elements enhance onboarding experiences by clearly showcasing product functionalities and user benefits, making complex offerings more accessible and engaging.
Defining Core Values
Experienced brand strategists stress that before visual elements are considered, tech companies must define their brand's core values. These values guide all branding decisions and help align company mission with customer expectations. This foundation becomes particularly significant in the Business Technology and Services Platforms category, which has seen remarkable growth with a 45% increase in total value, largely fueled by advancements in AI technology.
Measuring Branding Success
Effective branding goes beyond creating a visually appealing identity—it requires systematic measurement to evaluate impact and justify investments. Let's explore the key performance indicators (KPIs) that can help you gauge your tech branding's effectiveness.
KPIs for Branding for Tech Companies
When evaluating your tech brand's performance, these metrics will provide valuable insights:
Net Promoter Score (NPS) measures brand loyalty by asking customers how likely they are to recommend your brand on a scale of 0-10. Responses categorize users as detractors (0-6), passives (7-8), or promoters (9-10). Calculate your NPS by subtracting the percentage of detractors from the percentage of promoters. A higher score indicates stronger customer loyalty and positive brand perception. This metric is particularly valuable after rebranding initiatives to measure changes in customer sentiment.
Customer Lifetime Value (CLV) quantifies the total revenue expected from a customer throughout their relationship with your brand. A strong brand identity enhances customer loyalty, extending their lifespan and increasing CLV. To calculate:
- Customer Value = Average Purchase Value × Average Purchase Frequency Rate
- Average Customer Lifespan = Sum of customer lifespans / Number of customers
- CLV = Customer Value × Average Customer Lifespan
Website Visits and Search Engine Rankings reflect your brand's digital visibility and awareness. Higher rankings on search engines drive organic traffic, a critical component of brand awareness in the tech sector.
Social Media Engagement metrics including interactions, likes, mentions, and follower growth provide insights into how well your brand resonates with target audiences. Regular tracking of these metrics on platforms like LinkedIn, Twitter, and other relevant channels can help gauge brand reputation and sentiment.
Conversion Rates and Lead Generation numbers demonstrate how effectively your branding translates to business outcomes. Strong branding typically leads to increased lead generation and improved conversion rates.
Social Reach and Impressions indicate how effectively your brand is gaining visibility across platforms. Growing these metrics without heavy reliance on paid advertising highlights the organic strength of your brand presence.
Persuasion can be measured through consumer surveys that gauge purchase intent after exposure to branding campaigns. Another approach is cohort analysis—comparing conversion rates between groups exposed to brand-building content versus those who weren't. The formula is simple: Persuasion = Number of increased conversions after branding effort.
By consistently monitoring these KPIs, you can make data-driven decisions to refine your tech branding strategy and demonstrate clear ROI from your branding investments. The most comprehensive assessment combines both short-term metrics (like website traffic and social engagement) with long-term indicators (such as NPS and CLV).
For companies seeking to create distinctive, memorable tech branding that resonates with audiences, NoBoringDesign offers specialized on-demand design services that transform complex tech concepts into engaging visual experiences that drive measurable business results.
Additional Resources
To help you evaluate your tech company's current brand positioning, I've created this comprehensive branding assessment checklist. Use this tool to identify strengths and opportunities in your branding strategy:
Tech Brand Assessment Checklist
Brand Awareness & Recognition
- Can target audience recall your brand unprompted?
- Is your visual identity distinctive within your tech niche?
- Do people recognize your brand without seeing your logo (branding linkage)?
- Are you tracking brand awareness metrics consistently?
Brand Favorability & Perception
- Have you measured how positively consumers feel about your brand?
- Do you know which emotions your brand evokes in your audience?
- Are you conducting creative testing surveys to evaluate marketing assets?
- Have you implemented A/B testing to optimize brand messaging?
Brand Consistency
- Is your messaging cohesive across all platforms?
- Do your marketing assets maintain brand identity without explicit identifiers?
- Are your onboarding materials aligned with your brand promise?
- Does your team understand and embody your brand values?
ROI Measurement
- Have you established tangible ROI metrics for your branding efforts?
- Are you avoiding vanity metrics in favor of actionable insights?
- Do you conduct cohort analysis to measure the impact of branding on conversions?
- Are you tracking increased conversions after specific branding initiatives?
For deeper insights into measuring brand effectiveness, explore Attest's comprehensive guide to essential branding metrics or review how top companies have leveraged brand tracking for success. If you're struggling to justify branding investments, their article on applying ROI to branding efforts provides valuable frameworks.

Micro-interactions are small, single-task interactions within a product that play a crucial role in enhancing the overall user experience. In web design, these seemingly minor details—like a button that changes color when hovered over or a subtle animation when you like a post—can transform ordinary functionality into moments of delight for your users. In this article, we'll explore 15 amazing examples of micro-interactions in web design that demonstrate how these small elements can significantly enhance user engagement.
As Dan Saffer, author of Microinteractions: Designing with Details, eloquently puts it:
"Microinteractions are an exercise in restraint, in doing as much as possible with as little as possible. Embrace the constraints and focus your attention on doing one thing well. Mies van der Rohe's mantra of 'less is more' should be the microinteraction designer's mantra as well."
These tiny interactions are everywhere across digital interfaces—from the progress bar that fills as a file uploads to the typing indicator in your messaging apps. While often overlooked, they're vital for creating intuitive experiences that guide users seamlessly through their tasks.
In brief:
- Micro-interactions follow a four-part framework: triggers, rules, feedback, and loops/modes that create intuitive and responsive interfaces
- Well-designed micro-interactions reduce cognitive load and transform mechanical interactions into experiences that feel human and responsive
- The most effective micro-interactions are subtle, simple, and consistent—complementing your design without overwhelming it
- Testing with real users is the only reliable way to determine if your micro-interactions enhance or detract from the user experience
Understanding Micro-Interactions in Web Design
Micro-interactions are small, focused interactions that allow users to accomplish a single task within a digital product. In web design, they can be as simple as a button changing color when hovered over, a progress bar filling as a file uploads, or a subtle vibration when toggling a switch on your smartphone. Though often overlooked, these tiny moments play a crucial role in guiding users through a product and creating a seamless experience.
As Dan Saffer puts it: "Microinteractions are an exercise in restraint, in doing as much as possible with as little as possible. Embrace the constraints and focus your attention on doing one thing well."
Micro-interactions follow a four-part framework:
- Triggers - These initiate the micro-interaction and can be either:
- User-initiated: Actions like clicking a button, using a touch gesture, or giving a voice command.
- System-initiated: Occurring when specific conditions are met by the system, such as receiving a notification.
- Rules - These determine what happens once the micro-interaction is triggered and how it functions.
- Feedback - This is the targeted response to the trigger, usually communicated through subtle visual changes in the user interface, often displayed near the point of interaction for clear visibility and context.
- Loops and Modes - These determine how long the micro-interaction lasts and if it changes over time or with repeated use.
Not all interface elements qualify as micro-interactions. Static elements that remain consistently visible without a specific trigger don't count. Similarly, complex flows requiring multiple user actions fall outside the definition of micro-interactions, which are characterized by their simplicity and focus on a single task.
Micro-interactions significantly enhance user experience in several ways:
- Showcasing System Status: They effectively communicate what's happening in the system. For example, a progress bar during a file download gives users feedback and a sense of control over the process.
- Preventing Errors: By providing real-time feedback, micro-interactions help users avoid mistakes. Visual checkmarks next to password requirements inform users of their progress in meeting criteria as they type, streamlining the process.
- Facilitating Intuitive Navigation: These subtle interactions guide users through tasks with intuitive cues. Hover effects on menu items signal to users where they can click, making navigation straightforward.
- Reducing Cognitive Load: Well-designed micro-interactions reduce the mental effort required to navigate a digital product, enabling users to engage more effortlessly with important features.
- Making Digital Experiences Feel Human: Micro-interactions add a layer of interactivity and polish that transforms mechanical interactions into more human-feeling experiences. This attention to detail enhances the perceived performance of a product.
- Building Emotional Connections: The positive feedback offered by micro-interactions not only encourages continued user engagement but also fosters emotional connections between users and products.
While micro-interactions may seem insignificant individually, collectively they transform mundane tasks into memorable experiences, making products more intuitive, engaging, and efficient. They represent the difference between interfaces that feel cold and mechanical versus those that feel responsive and human.
15 Amazing Examples of Micro-Interactions in Web Design
Micro-interactions are the subtle magic that transforms ordinary interfaces into delightful experiences. These small, task-based interactions provide visual feedback and guide users with intuitive cues, making web design more engaging and efficient. Let's explore 15 amazing examples of micro-interactions in web design that demonstrate how these tiny details can make a significant impact on user experience.
Example 1: Facebook's Interactive Emojis
Facebook's reaction system adds emotional depth to digital communication. Hover over the like button, and a small animation reveals the full range of emoji reactions. Each selected emoji plays a unique animation—hearts float upward, laughing faces bounce, angry faces pulse with intensity. This turns a simple "like" into an expressive action that users enjoy performing.
Example 2: Asana's Celebratory Creatures
Asana uses micro-interactions to celebrate task completion. Finish a task, and colorful creatures—unicorns, narwhals, and phoenixes—briefly zoom across your screen. This surprising element creates a moment of celebration and positive reinforcement, making the mundane action of checking off tasks more rewarding. It's a perfect example of how micro-interactions can infuse emotional value into the user experience.
Example 3: Porsche's Car Configuration Tool
Porsche's online car configurator creates an immersive shopping experience through carefully crafted micro-interactions. As you select different features, real-time visual feedback shows exactly how your choices affect the vehicle's appearance. Colors transition smoothly; wheel options spin into place. These responsive elements make users feel connected to the product before they've even test-driven the actual car.
Example 4: Dropbox's File Upload Progress Bar
Dropbox reduces user anxiety during file uploads through thoughtful micro-interactions. Their progress bar doesn't just fill from left to right—it provides visual feedback through color changes and animated checkmarks when complete. This transforms an otherwise stressful waiting period into a transparent, informative experience that increases confidence in the system and reduces perceived waiting time.
Example 5: Google Assistant's Floating Dots
Google Assistant's pulsing, colorful dots serve as a helpful status indicator when processing queries. These animated dots provide immediate feedback that the assistant is "thinking," creating a conversation-like interaction that feels natural and responsive. The animation's rhythm suggests activity without distraction, giving users confidence that their request is being handled.
Example 6: Mailchimp's High-Five Animation
When you schedule or send an email campaign in Mailchimp, a small animated character appears with a high-five gesture. This micro-interaction serves as both confirmation and celebration, reducing anxiety about whether the action was completed. The animation reinforces the brand's playful personality while confirming a successful operation.
Example 7: Medium's Clap Animation
Medium's "clap" feature shows how micro-interactions can enhance engagement. Click the clap button, and a satisfying ripple effect emanates from your cursor as the counter increments with each click. The subtle animation provides immediate feedback while encouraging multiple claps through its tactile, almost addictive quality. This transforms appreciation into an engaging, dynamic action.
Example 8: Duolingo's Streak Flames
Duolingo uses micro-interactions to motivate consistent learning. As you maintain a daily practice streak, the flame icon grows more intense and animated. These subtle visual changes provide progress feedback and create a sense of achievement, tapping into gamification principles to encourage habit formation. The micro-interaction transforms abstract progress into a visible, motivating element.
Example 9: Pinterest's Save Button Animation
When saving items on Pinterest, the save button transitions with a subtle bounce effect and color change. This micro-interaction provides immediate confirmation that the item has been saved while adding a small moment of satisfaction to the action. The animation is quick enough not to disrupt browsing flow but distinctive enough to register as positive feedback.
Example 10: Tinder's Swipe Animation
Tinder's iconic swipe interaction transforms decision-making into a fluid, intuitive gesture. As you swipe right or left, cards animate accordingly with rotation and movement that follows your finger's direction and speed. When matches occur, a celebratory animation creates a moment of excitement. These micro-interactions make the matching process feel natural and rewarding.
Example 11: Slack's Typing Indicator
Slack's typing indicator shows animated bubbles when someone is composing a message. This creates awareness of ongoing communication activity, reducing the anxiety of waiting for responses and creating a more conversational feel in digital communication. The subtle animation provides just enough information without becoming distracting.
Example 12: Apple's Face ID Animation
Apple's Face ID uses a subtle outline animation that wraps around your face during recognition. This provides clear feedback about the system's status—when it's looking for your face, when recognition is successful, and when it fails. The animation transforms a complex security process into an intuitive, confident interaction.
Example 13: Uber's Ride Tracking
Uber's map interface uses micro-interactions to enhance the ride experience. The car icon moves realistically along streets, the pick-up pin drops with a subtle bounce, and the arrival countdown pulses as it updates. These small details provide continuous feedback about your ride status, reducing uncertainty and creating a sense of control during the waiting period.
Example 14: Instagram's Stories Navigation
Instagram Stories features subtle micro-interactions in its navigation. Tapping left or right produces a smooth transition effect, while holding pauses the story with a visual indicator. These small interactions create an intuitive browsing experience that feels responsive and natural, enhancing content consumption without calling attention to the interface itself.
Example 15: Netflix's Rating System
Netflix's thumbs-up/thumbs-down rating system includes a satisfying animation when selected. The icon briefly enlarges and changes color, providing clear feedback that your rating was registered. This micro-interaction turns passive viewing into active engagement, encouraging users to provide feedback while keeping the interaction quick and frictionless.
Each of these amazing examples of micro-interactions in web design demonstrates how thoughtfully designed interactions can transform standard user interfaces into experiences that feel more intuitive, responsive, and emotionally satisfying. As research from the Interaction Design Foundation points out, these small details leverage psychological principles like feedback and confirmation to enhance user confidence and create emotional connections with digital products. When designing interfaces, remember that these seemingly minor details often make the most significant difference in how users perceive and engage with your product.
Practical Implementation Tips for Web Designers
When it comes to implementing micro-interactions in your web designs, the execution is just as important as the concept. Here are some practical tips to help you effectively bring these important UX elements to life.
Choose the Right Tools
The tools you use to implement micro-interactions can significantly impact their effectiveness and efficiency. Utilizing resources like a Webflow style guide can help maintain consistency across your designs. For web-based micro-interactions, consider these options:
- CSS animations and transitions for simple interactions
- JavaScript libraries like GSAP or Anime.js for more complex animations
- Framer Motion for React-based applications
- Lottie for implementing complex animations created in After Effects
When selecting your tools, consider the complexity of the interaction, performance implications, and browser compatibility.
Timing and Performance Considerations
Micro-interactions should be quick and responsive to maintain user engagement. As a general rule:
- Keep micro-interactions between 300-400 milliseconds with smooth velocity curves
- Ensure transitions feel responsive and don't delay the user's journey
- Test your animations on various devices to ensure consistent performance
Longer animations can frustrate users and disrupt their flow. Remember that micro-interactions should enhance, not obstruct, the user experience.
Common Pitfalls to Avoid
1. Overuse and Distraction
The most common mistake is overusing micro-interactions. When implementing these elements:
- Practice restraint in your designs
- Avoid unnecessary animations that don't serve a clear purpose
- Remove elements that muddy the user experience, even if they seem impressive
As noted in the 5 Mistakes to Avoid When Designing Micro-interactions, allowing personal ego to dictate design choices can lead to unnecessary complexity and confusion.
2. Lack of Context-Sensitivity
Micro-interactions should be contextually appropriate:
- Consider the user's current task and emotional state
- Ensure the interaction matches the importance of the action
- Adapt interactions based on the platform and device
3. Inconsistency Across the Experience
Maintain consistency in your micro-interactions to reduce cognitive load:
- Use similar animation styles throughout your application
- Keep timing and easing consistent for similar actions
- Ensure interactions follow established patterns when possible
Testing and Refinement
Before finalizing your micro-interactions, rigorous testing is essential:
- Conduct usability testing to observe how users interact with your designs, helping you understand your audience's needs
- Collect feedback and identify areas for improvement
- Test across multiple devices and browsers to ensure consistent performance
- Be prepared to simplify, accelerate, or eliminate interactions based on user feedback
Through iterative testing and refinement, you can ensure your micro-interactions enhance rather than detract from the user experience.
Remember that the ultimate goal of micro-interactions is to provide immediate feedback, maintain simplicity, and humanize the digital experience. When implemented thoughtfully, these small details can significantly improve your overall user experience.
Best Practices for Designing Micro-Interactions in Web Design
Designing effective micro-interactions requires a thoughtful approach that balances aesthetics with functionality. When creating micro-interactions in web design, focus on several key principles that ensure they enhance rather than detract from the user experience.
Embrace Subtlety
Micro-interactions should complement your design without overwhelming it. The most effective micro-interactions are those that users barely notice consciously but intuitively understand. As noted in the Ultimate Guide to Micro-Interactions, "The key is to focus on subtle, elegant motions that enhance the experience without drawing too much attention away from the content or functionality of the website." Think of a simple hover effect that guides users to clickable elements—it provides guidance without disruption.
Prioritize Simplicity
While it might be tempting to create elaborate animations or complex feedback mechanisms, simplicity often leads to better usability. Overly complicated interactions can confuse users or slow down their progress—precisely the opposite of what micro-interactions should achieve. Keep your design elements clean and your animations straightforward to ensure users can easily understand and anticipate how elements will behave.
Maintain Consistency
Your micro-interactions should feel like a natural extension of your overall design aesthetic. Using consistent style, timing, and behavior across all micro-interactions creates a cohesive experience that helps users navigate your interface more intuitively. For example, if you use a fade-in effect for buttons, applying the same effect to other interactive elements will create a predictable pattern that users can learn and follow.
Consider Context and User Journey
According to Ribotek Solutions, effective micro-interactions should be "purposeful and contextual." This means ensuring they serve a clear purpose and provide value to users at the right moment in their journey. Each interaction should align with your overall goals and fit seamlessly into the user flow. By considering when and where users encounter these interactions, you can design them to provide maximum support at critical moments.
By applying these principles consistently, your micro-interactions will enhance user confidence and create more intuitive, engaging experiences that users appreciate—even if they don't consciously notice all the thoughtful details you've incorporated.
Measuring Micro-Interaction Effectiveness in Web Design
Despite their small size, micro-interactions have a substantial impact on the overall user experience. To ensure they enhance rather than detract from your web design, it's essential to implement proper measurement and testing methodologies.
Quantitative and Qualitative Metrics
When evaluating micro-interactions, rely on both hard data and user feedback. Research shows that 69% of users find micro-interactions engaging and feel they enhance their overall experience. Additionally, approximately 70% of users agree that these small interactions improve clarity and platform usability.
These statistics provide a strong foundation, but they don't tell the complete story. You need to conduct your own testing to understand how your specific audience responds to your micro-interactions.
Usability Testing Methodologies
Usability testing is crucial for gathering insights about how users engage with micro-interactions in real-world scenarios, helping you understand your audience's needs. What works well in theory or controlled environments often differs significantly from actual user experiences.
During testing sessions, pay attention to:
- Time to completion of tasks involving micro-interactions
- Error rates associated with specific interactions
- User facial expressions and verbal feedback
- Points of confusion or hesitation
Iterative Refinement Process
The data collected from testing should feed directly into an improvement cycle. Through this process, you might discover that some interactions need simplification, acceleration, or complete replacement to better serve users.
Testing each micro-interaction and gaining user feedback is essential to avoid implementing elements that drive disengagement. Research your audience's feelings about these components and focus on the details. This approach will be key to delivering an enjoyable experience that keeps users returning to your website or application.
For more comprehensive insights on implementing effective testing methodologies, refer to the Ultimate Guide to Micro-Interactions in Web Design 2024.
Advanced Innovation: Non-Digital and Emerging Technologies in Micro-Interactions
As the digital landscape evolves, micro-interactions are expanding beyond traditional interfaces into both non-digital realms and emerging technologies, creating new possibilities for user engagement.
Emerging Technologies
The integration of micro-interactions with emerging technologies is creating exciting new frontiers for user experience design.
In augmented reality (AR) and virtual reality (VR) environments, micro-interactions are taking on entirely new dimensions, enhancing storytelling with animation and creating immersive experiences. Instead of simple 2D animations, we're seeing immersive 3D animations that guide users through spatial experiences. These might include subtle visual cues that direct attention to interactive elements in a virtual space or haptic feedback that confirms when a virtual object has been successfully manipulated.
Voice-activated feedback represents another innovation in AR/VR micro-interactions, providing real-time assistance that feels natural within immersive contexts. This feedback can help users navigate virtual environments without breaking immersion by having to consult external help systems.
AI-driven micro-interactions represent another significant advance. These adaptive interactions learn from user behavior and evolve over time, offering increasingly personalized responses. For example, AI-powered chatbots can use subtle micro-interactions to guide conversations naturally, with response timing and suggestions that adapt to individual user preferences and past interactions.
Non-Digital Micro-Interactions
While we often associate micro-interactions with digital interfaces, the principles apply equally to physical products and environments. Non-digital micro-interactions provide tactile feedback that confirms user actions and enhances the overall experience.
Consider the satisfying click of a premium car door closing, the gentle resistance of a well-designed knob turning, or the weight and balance of a quality writing instrument. These physical micro-interactions communicate quality and attention to detail without requiring a screen.
The principles that make digital micro-interactions effective—immediate feedback, contextual relevance, and purposeful design—apply equally in the physical world, creating moments of delight and confirmation that enhance our daily experiences.
Dos and Don'ts for Creating Micro-Interactions in Web Design
Creating effective micro-interactions can significantly enhance your website's user experience, but there's a fine line between helpful and hindering. Here are the key dos and don'ts to ensure your micro-interactions delight rather than distract your users.
Do: Design with Purpose
- Do ensure each micro-interaction serves a clear function and provides value to users.
- Do align micro-interactions with overall website goals and user flow.
- Do focus on making interactions that tell a story or convey a clear message.
- Do use micro-interactions to provide feedback on user actions.
Don't: Overdesign
- Don't overcomplicate your micro-interactions with excessive animation.
- Don't create slow transitions (keep them to 300-400 milliseconds ideally).
- Don't rely solely on animation to solve design problems.
- Don't add interactions that are purely decorative with no functional purpose.
Do: Prioritize Usability
- Do maintain consistency across micro-interactions throughout your site.
- Do design interactions that are intuitive and predictable for users.
- Do pay attention to the finer details as opportunities to enhance user experience.
- Do keep interactions subtle and unobtrusive.
Don't: Sacrifice Performance
- Don't implement micro-interactions that slow down your website.
- Don't ignore how interactions perform on slower devices or connections.
- Don't create animations that arrive at different times, creating false narratives.
- Don't add cognitive load with complex or confusing interactions.
Do: Consider Ethical Implications
- Do be transparent about how micro-interactions influence user behavior.
- Do respect user autonomy when designing persuasive interactions.
- Do create interactions that contribute to a positive digital experience.
- Do balance creativity with what works best for the user.
Remember, as Dan Saffer emphasizes: "Microinteractions are an exercise in restraint, in doing as much as possible with as little as possible." When in doubt, simplify and focus on doing one thing exceptionally well.
Conclusion
Micro-interactions represent the subtle yet powerful details that transform ordinary digital experiences into delightful, engaging journeys. These small moments—a heart animation when liking a post, a progress bar during file uploads, or celebratory creatures appearing after task completion—collectively create an emotional connection between users and products that goes far beyond mere functionality.
As we've explored throughout this article, micro-interactions serve multiple critical purposes: they showcase system status, encourage deeper engagement, facilitate intuitive navigation, prevent errors, communicate brand personality, and strengthen brand recognition. When thoughtfully designed, these tiny interactions bridge the gap between human behavior and digital response, making interfaces feel more alive and responsive, ultimately contributing to more engaging websites.
The psychology behind micro-interactions is equally important—they provide immediate feedback that builds user confidence, creates familiarity through recognition, and delivers emotional value that keeps users coming back. As Dan Saffer wisely notes, effective micro-interactions are "an exercise in restraint, in doing as much as possible with as little as possible."
For web designers looking to create truly exceptional user experiences, micro-interactions deserve the same attention as major design elements. NoBoringDesign specializes in creating these subtle yet powerful interface elements that can transform your user experience from functional to delightful, helping your product stand out in today's competitive marketplace. Learn more about the NoBoringDesign approach.

When building a brand, consistency isn't just nice—it's essential for recognition and trust. Studying effective branding guidelines templates can help you understand how brand guidelines serve as the rulebook defining how your brand appears across all touchpoints and brand messaging formats, from websites to social media, advertising, and physical materials.
A well-crafted brand guide includes several core components working together to maintain a cohesive identity:
- Brand strategy and narrative: Your story, mission, vision, and values providing context for all communications
- Logo usage guidelines: Specifications for proper logo application
- Color palette: Primary and secondary colors with specific codes (HEX, RGB, CMYK)
- Typography: Font families, sizes, and hierarchy rules
- Imagery and visual elements: Photography style, illustration guidelines, and iconography
- Tone of voice: Guidelines for written communications
According to MasterClass, "Brand consistency is vital for your company to build instant brand recognition and enhance brand loyalty—a dedicated consumer base that will advocate for your brand." This consistency directly impacts your bottom line by building customer trust.
The most effective brand guidelines balance technical precision with creative expression. While they provide specific rules, they also leave room for creativity. Chobani's brand guidelines provide explicit color codes but organize them intuitively by enlarging main colors and minimizing accents.
Some companies take different approaches. Starbucks' brand guidelines include case studies showing how seasonality affects their brand look while maintaining a consistent framework. Dropbox differentiates between product and marketing visuals using illustrations within their product interface and photography for marketing materials.
As Growth Story Brands notes, "A brand guide is much more than just logo or color guidelines; it captures the heart and soul of your brand. It shows how your business presents itself to the world, making sure all your communications align with your vision and values."
In brief:
- Brand guidelines serve as the foundation for consistent brand representation across all touchpoints
- Effective guidelines balance technical precision with room for creative expression
- The best brand guides include both visual standards and voice guidelines
- Well-crafted guidelines capture your brand's personality, not just its visual elements
The 6 Essential Components of an Effective Brand Guide
Creating a comprehensive brand guide is a cornerstone of maintaining consistency across all your brand touchpoints. By examining brand guide examples, understanding the core components, and avoiding common branding mistakes, you'll be able to create a branding kit that serves your team effectively.
1. Brand Strategy and Narrative
Begin with your brand's foundational elements:
- Brand story
- Mission statement and vision
- Core values
- Brand personality
This strategic context helps users understand not just the "what" but the "why" behind your brand guidelines. By understanding these elements, you'll be better equipped to create a brand style guide that accurately reflects your brand's essence.
For example, the Eames Institute brand redesign emphasizes playfulness and creativity, reflecting the organization's core values.
2. Logo Usage Guidelines
Provide clear instructions for how your logo should (and shouldn't) be used, following logo design practices:
- Full logo specifications
- Secondary logo variations
- Clear space requirements
- Minimum size requirements
- Acceptable and unacceptable treatments
YouTube's brand guidelines emphasize the importance of negative space around their logo to create more impact, while Salesforce provides detailed use cases across various platforms.
3. Color Palette
Document your brand colors with precision:
- Primary brand colors
- Secondary colors
- Color codes (HEX, RGB, CMYK, Pantone)
- Usage guidelines and proportions
Chobani's brand guidelines effectively showcase their color system by enlarging the main colors and minimizing the accents, along with providing all necessary color codes.
4. Typography
Define your brand's typographic standards:
- Primary and secondary typefaces
- Font sizes and weights
- Typographic hierarchy
- Spacing and alignment rules
Mailchimp's brand guide is known for providing intricate details on typography usage, ensuring consistency across all communications.
5. Voice and Tone
Document how your brand communicates:
- Brand voice characteristics
- Tone variations for different contexts
- Key messaging and taglines
- Writing style guidelines
Buffer's brand guide goes beyond conventional guidelines by highlighting client testimonials and company metrics to reinforce their brand voice.
6. Digital vs. Print Considerations
The medium of your brand guide significantly impacts its structure, accessibility, and implementation:
Digital Brand Guides
Digital brand guides offer several advantages:
- Interactive Navigation: Users can easily search and jump to specific sections
- Multimedia Integration: Include videos, animations, and interactive elements to demonstrate brand usage
- Real-Time Updates: Make changes instantly without redistributing physical copies
- Global Accessibility: Provide immediate access to team members worldwide
- Asset Integration: Allow users to download the latest brand assets directly from the guide
Frontify, a brand management platform, enables organizations to create interactive digital guidelines with real-time collaboration features and integrated asset management.
Print Brand Guides
While less common today, print guides still offer certain benefits:
- Tangible Presence: Physical guides can make a stronger impression during client presentations
- Offline Access: No internet connection required for reference
- Linear Structure: Some users prefer the sequential flow of a printed document
- Fixed Format: Print guides provide a consistent viewing experience
The key limitation is that print guides can't be easily updated, requiring reprinting when brand elements change.
4 Ways to Balance Structure with Flexibility in Brand Guidelines
Creating an effective brand guide requires balancing comprehensive rules with creative flexibility, as demonstrated by various brand guide examples:
1. Define Core Elements vs. Flexible Guidelines
Clearly distinguish between:
- Non-negotiable brand elements that must remain consistent
- Areas where creative interpretation is encouraged
For instance, Dropbox's brand guidelines differentiate between product and marketing visuals, using illustrations within the product interface but allowing more flexibility with photography for marketing materials.
2. Show Examples of Creative Applications
Include examples showing how your brand can be expressed in various contexts while maintaining its core identity. Starbucks' brand guidelines include case studies demonstrating how seasonality affects the look and feel of their brand without compromising recognition.
3. Provide Clear Do's and Don'ts
Visual examples of correct and incorrect usage help users understand the boundaries. This approach is particularly effective for logo usage, typography, and color applications.
4. Use a Modular Approach
Organize your guide into discrete, easily updatable sections. This structure allows for flexibility in how different teams apply the guidelines to their specific needs while maintaining overall consistency.
By thoughtfully balancing structure with flexibility, your brand guide will serve as both a technical reference and a source of creative inspiration, ensuring your brand remains consistent yet adaptable as it evolves.
4 Innovative Technology Sector Brand Guide Examples
Technology companies face unique challenges when developing comprehensive brand guidelines. They must balance technical precision with creative flexibility while creating systems that scale across vast product ecosystems. Crafting innovative visual identities is key to standing out in a competitive market. Incorporating effective marketing design strategies and staying abreast of marketing design trends help in achieving this balance. Let's examine some innovative technology brand guide examples that have successfully navigated this balance.
1. IBM Design Language
IBM's Design Language stands as one of the most comprehensive and sophisticated brand guides in the technology sector. What makes it truly innovative is its modular approach to design systems.
The IBM brand guide functions as a living system rather than a static document. It divides design elements into modular components that can be assembled in various configurations while maintaining a consistent identity. This approach is particularly valuable for a company with hundreds of products and services spanning enterprise software, cloud computing, and artificial intelligence.
Notable features include:
- A systematic grid-based framework that ensures consistency across all digital products
- Detailed specifications for accessibility that are built into the core design system
- Precise typography guidelines that maintain readability across various interfaces
- Comprehensive color palette with detailed accessibility ratings for each combination
The key takeaway from IBM's approach is that effective tech brand guides should function as flexible systems rather than rigid rulebooks. This allows diverse product teams to maintain brand consistency while addressing specific technical requirements.
2. Uber's Brand Evolution
Uber's brand guide exemplifies how technology companies can evolve their visual identity while maintaining core brand recognition. What makes Uber's approach innovative is its responsive logo and identity system that adapts to various contexts.
When Uber rebranded, they moved away from a static logo to a responsive identity system that changes based on the market, product, and application. This flexibility is crucial for a global technology platform operating across diverse markets.
Notable features include:
- A responsive logo system that adapts to different cultural contexts and applications
- Market-specific color palettes that respect local cultural associations
- Customizable design elements that maintain brand recognition across products
- Clear guidelines for maintaining brand integrity in partner integrations
The key takeaway from Uber's brand guide is the importance of building flexibility into your brand system from the ground up, allowing it to adapt to different markets and use cases while remaining instantly recognizable.
3. Spotify's Interactive Guidelines
Spotify has revolutionized how technology companies approach brand guidelines by creating a fully interactive experience. What makes their approach innovative is how their guidelines themselves embody the interactive nature of their product.
Spotify's brand guide is delivered as an interactive web-based experience, allowing users to explore and interact with various brand elements. This format is particularly effective for a digital audio platform that values user experience and engagement, showcasing the importance of designing effective websites.
Notable features include:
- Interactive color palette with copyable HEX codes for developers
- Animated logo usage examples demonstrating proper motion principles
- Embedded audio samples showcasing brand sound design
- Downloadable design assets and icon libraries
The key takeaway from Spotify's guidelines is that the format of your brand guide should reflect your company's values and product experience. By making their guidelines interactive, Spotify demonstrates their commitment to engaging user experiences.
4. OpenAI's Minimalist Approach
OpenAI represents a different approach to technology branding, embracing minimalism and sophistication. What makes their brand guide innovative is how it balances cutting-edge AI technology with accessible, human-centered design.
OpenAI's 2025 rebranding introduced a custom typeface called 'OpenAI Sans' to enhance brand recognition across all touchpoints. According to DesignRush, this bespoke typography was designed specifically for clarity and consistency across platforms.
Notable features include:
- The custom 'OpenAI Sans' typeface designed for enhanced readability and brand consistency
- A refined 'blossom' logo that symbolizes growth and innovation
- A minimalist color palette of grays and blues projecting professionalism and trust
- Specific guidelines for representing complex AI concepts visually
The key takeaway from OpenAI's approach is that technology companies dealing with complex concepts can benefit from minimalist brand guidelines that emphasize clarity and accessibility.
Each of these technology companies has created brand guidelines that do more than maintain visual consistency—they create systems that scale with growing product ecosystems, adapt to changing market conditions, and balance technical precision with creative expression. By studying these brand guide examples and exploring innovative visual identities, you can develop brand guidelines that support your technology company's growth while maintaining a cohesive identity across all touchpoints.

Webflow isn't just another website builder—it's a revolution in how we breathe life into digital spaces. This Webflow Website Development Guide will show you how this visual development platform shatters the traditional wall between design and code, putting creative power right where it belongs: in your hands.
Picture this: a powerful WYSIWYG editor showing you exactly how your creation will look and function as you build it. No more mind-numbing toggling between code editor and browser preview. Just pure, unfiltered creativity flowing from your imagination to the screen. With Webflow, you can bring your ideas to life effortlessly.
With Webflow's intuitive drag-and-drop functionality, you'll position elements precisely where you want them, style with confidence, craft responsive designs for every device, and watch your interactions and animations unfold before your eyes—all in real-time.
The benefits? They're game-changing. When HR software company Lattice switched to Webflow, they saw a staggering 98% increase in speed to market for new pages. That's not just an efficiency boost—it's a complete transformation in how design teams operate, iterate, and respond to feedback.
Whether you're a designer tired of template limitations or a team leader desperate to demolish those design-development bottlenecks, Webflow hands creative control back to you while delivering professional results that make clients swoon, unlocking the creative potential in the Arts & Culture sector.
In brief:
- Webflow combines the power of custom coding with an intuitive visual interface, eliminating the traditional design-to-development bottleneck
- Companies like Discord, Lattice, and Rakuten have achieved 3-5x faster page creation after switching to Webflow
- The platform includes a comprehensive ecosystem with Designer, CMS, Hosting, and E-commerce components
- Webflow's visual approach to responsive design and interactions requires no coding knowledge yet delivers professional results
Understanding the 4 Key Webflow Website Development Advantages
When comparing Webflow to traditional development approaches, the differences become immediately apparent. Traditional web development typically involves a lengthy process of coding, testing, and debugging, with multiple handoffs between designers and developers. Webflow's visual interface flips this paradigm on its head, offering significant time and cost savings while maintaining professional quality. This paradigm shift is particularly beneficial for fast-paced industries like media & entertainment initiatives and construction & architecture potential, where time-to-market is crucial.
Why Choose Webflow for Website Development
The most compelling reason to choose Webflow is the dramatic reduction in development time. Companies that have switched to Webflow consistently report faster production cycles. For example, Discord's blog team experienced 5x faster speed to market after moving to Webflow. Similarly, Rakuten SL achieved 3x faster page builds after implementing Webflow for their web projects.
This efficiency comes from Webflow's ability to bridge the gap between design and development. Instead of creating static mockups that developers must then interpret and code, designers can build fully functional websites directly in Webflow. This eliminates the traditional back-and-forth between teams and reduces the potential for miscommunication or design compromise.
The visual interface is particularly powerful because it allows designers to bring their ideas to life without coding barriers. You can create complex designs, responsive layouts, and interactive elements—all without writing a single line of code. This doesn't mean you're limited in your design options—Webflow maintains a high degree of design flexibility and customization potential that rivals custom-coded sites.
Client collaboration also becomes more streamlined with Webflow. You can easily share work in progress, collect feedback directly on the site, and implement changes quickly. This creates more efficient feedback loops and leads to better client satisfaction since they can see their ideas taking shape in real time rather than trying to visualize the final product from static mockups.
The Webflow Ecosystem
Webflow isn't just a design tool—it's a comprehensive platform with four main components that work seamlessly together:
- Designer: The visual interface where you build your website, with precise control over layout, styling, and interactions without coding.
- CMS: A powerful content management system that allows you to create dynamic content and give clients the ability to update their site easily.
- Hosting: Built-in hosting with enterprise-grade security, global CDN, and automatic backups to ensure your site performs well and stays secure.
- E-commerce: Integrated e-commerce functionality for creating online stores with customizable product pages, shopping carts, and checkout experiences.
What makes Webflow particularly valuable is how these components integrate with each other and with third-party tools. This makes Webflow an ideal platform for marketing & advertising solutions, as it seamlessly integrates design, content, and marketing tools. You can connect Webflow to CRMs, marketing automation platforms, payment processors, and more through native integrations or API connections, creating a flexible system that fits into your broader tech stack.
By combining design freedom with development efficiency, Webflow provides a compelling alternative to traditional web development approaches. You get the professional quality and customization of custom code with the speed and cost-efficiency of a visual builder, making it an increasingly popular choice for industries like construction & architecture.
Setting Up for Success: 8 Steps for Webflow Website Development
Before diving into Webflow development, taking time to prepare properly will save you countless hours and help you create a more maintainable website. The initial setup phase helps streamline your workflow and ensures a smooth development process.
4 Design Strategy Preparation Steps
A well-planned design strategy is the foundation of any successful Webflow project. Here's how to set yourself up for success:
- Create a comprehensive design system: This serves as a single source of truth for your project's visual elements, including typography, colors, spacing, and UI components.
- Develop a style guide: Document your design decisions and standards to maintain consistency throughout development. Your style guide should include:
- Color palette with hex codes
- Typography hierarchy and font specifications
- Component variations and usage guidelines
- Spacing and grid systems
- Plan your site structure: Map out your pages, sections, and content organization before building. This is especially important for complex projects like real estate web solutions, where clear navigation and structure are critical. This helps you anticipate potential challenges and create a more coherent user experience.
- Prepare your assets: Optimize images, icons, and other visual elements before importing them into Webflow to ensure optimal performance, contributing to effective landing page optimization.
Having these elements prepared in advance will help you work more efficiently in Webflow and make your projects more scalable as they grow.
4 Account and Project Setup Steps
Proper configuration of your Webflow account and workspace sets the stage for efficient collaboration and development:
- Choose the right Webflow plan: Select a plan that accommodates your project needs, considering factors like the number of projects, CMS requirements, and team size.
- Set up your workspace: Organize your dashboard by creating project folders to categorize different client projects or internal initiatives.
- Configure team collaboration settings:
- Invite team members with appropriate permission levels (Admin, Editor, or Collaborator)
- Establish clear roles for who can edit the design, manage content, or publish changes
- Set up comment threads to facilitate feedback and discussions
- Configure client access:
- Determine which aspects of the site clients will need to manage
- Set up Editor access for clients who only need to update content
- Prepare educational resources to help clients navigate the Editor interface
For agencies or teams working on multiple projects, developing reusable templates with your standard components and settings to maintain consistency and speed up future development can be a game-changer. Taking time to properly configure your Webflow environment before starting development creates a more organized workflow, facilitates better team collaboration, and sets you up to build more maintainable websites.
Mastering 3 Core Features in Webflow Website Development
The magic of Webflow lies in how quickly you can turn design concepts into functional websites without writing a line of code. Getting comfortable with its core features will dramatically boost your workflow and capabilities.
Visual Design Fundamentals in Webflow
Webflow's visual development interface feels like a breath of fresh air compared to traditional coding platforms. You can place elements exactly where you want them while seeing real-time previews of your changes.
The Box Model is your key to understanding how elements arrange in Webflow. Instead of writing CSS to control margins, padding, and borders, Webflow shows you a visual representation of these properties. This makes it much easier to manipulate spacing and see how elements interact with each other.
Color management becomes a breeze through global swatches, letting you maintain consistent branding across your entire site. Update a global swatch once, and the change appears throughout your project—no more manual updates, helping you adhere to logo design best practices.
Typography settings work the same way. Create typography styles combining font family, size, weight, line height, and other properties. Apply these styles throughout your site for consistency while making site-wide changes with a few clicks.
Building Responsive Layouts
Responsive design is where Webflow truly shines, offering two powerful layout methods: Flexbox and Grid.
Flexbox makes creating flexible, responsive layouts intuitive. Elements automatically adjust based on screen size. It's perfect for navigation menus, card layouts, and flexible content areas where elements need to redistribute space proportionally.
For more complex layouts, Grid gives you precise control. Create multi-dimensional layouts that would be painful to code manually. Grid areas and responsive settings let your designs transform gracefully across different screen sizes.
Webflow's breakpoint system defines how layouts adapt across devices. Create custom breakpoints beyond the standard desktop, tablet, and mobile for fine-grained control over how your site responds to various screen sizes.
You can even hide or show specific elements based on screen size, creating completely different experiences for mobile and desktop users without duplicating content.
Advanced Interactions and Animations
Once your layout is in place, you can add dynamic interactions that enhance user engagement. Webflow's interaction capabilities go far beyond basic hover effects.
The four main interaction types in Webflow are:
- Hover interactions that respond when users move their cursor over elements
- Click interactions that trigger animations when elements are clicked
- Scroll interactions that animate elements as users scroll down the page
- Time-based interactions that play automatically based on timing you define
The animation toolkit is equally impressive, offering capabilities like:
- Fade effects for smooth transitions
- Slide animations to move elements in from different directions
- Grow/shrink animations to emphasize important content
- Emphasis animations like pop, jiggle, pulse, and bounce that draw attention to specific elements
Webflow's capabilities even extend to incorporating modern trends like AI-enhanced illustration, providing cutting-edge visual experiences.
What's particularly valuable is how Webflow handles the timing and easing of animations. You can fine-tune the duration and choose from various easing functions to make your animations feel natural and professional.
Just remember to consider performance when implementing interactions. To maintain smooth performance while using animations:
- Optimize images using next-gen formats and proper compression
- Minimize HTTP requests by consolidating files
- Implement lazy loading for images and media not immediately visible
- Prioritize animations for above-the-fold content
By thoughtfully implementing these core Webflow features, you can build professional, responsive, and engaging websites without writing code. Whether you're designing a simple portfolio or a complex interactive experience, these fundamentals give you the foundation to bring your digital visions to life and can be complemented by our ad design tips.
Developing with Webflow CMS: 4 Essential Strategies for Your Website
When building websites with dynamic content, Webflow's Content Management System (CMS) offers powerful capabilities that allow you to create flexible, scalable sites. An effective CMS implementation serves both your current needs and sets you up for future growth. Let's explore how to structure your content and create an intuitive management system that both you and your clients will love.
2 Strategies for Structuring Dynamic Content
The foundation of any successful Webflow CMS implementation begins with thoughtful planning of your content structure. Here's how to approach it:
Define Clear Content Types
Start by creating distinct Collections for different content types. For example, you might need separate Collections for blog posts, team members, case studies, and products. Each Collection should have a specific purpose and contain only the fields relevant to that content type.
When designing your Collections, consider these best practices:
- Use consistent field naming conventions across Collections (always use "title" for main titles, "description" for summaries, etc.)
- Include only the fields you need, but plan for future expansion
- Group related fields together for better organization
Establish Content Relationships
One of Webflow's most powerful CMS features is the ability to create relationships between different content types using reference fields. This allows you to:
- Link blog posts to author profiles
- Connect products to categories
- Associate case studies with relevant services
- Create related content recommendations
These relationships help you avoid duplicating content and create a more interconnected site structure. For example, by connecting team members to blog posts, you can automatically display author information on each post without manual updates. This approach was successfully implemented in our Jasper AI case study, demonstrating the effectiveness of well-structured content relationships.
Design for Scalability
When planning your CMS structure, think beyond your immediate needs. The most common mistake is creating a structure that works for today but fails as content grows.
Consider these strategies for scalable content design:
- Create modular content blocks that can be mixed and matched
- Implement robust categorization systems using tags, categories, or custom fields
- Use Collection Lists with filtering to display content in different contexts
- Design templates that accommodate varying content lengths and formats
A well-designed CMS structure allows you to add hundreds or even thousands of content items without redesigning your site architecture. This future-proofing saves significant time and resources as your site grows.
2 Strategies for Creating Editor-Friendly CMS
Building a powerful CMS is only half the battle. To ensure successful content management, especially when clients will be updating content, you need to create an intuitive editing experience.
Design Intuitive Editing Interfaces
The editing interface is what content managers interact with daily, so make it as user-friendly as possible:
- Use clear, descriptive field labels that explain what each field is for
- Provide help text for fields that might need additional explanation
- Set appropriate character limits for fields like titles and excerpts
- Create custom editing panels that group related fields together
Clients are more likely to maintain their websites when the content updating process feels intuitive and straightforward, an important consideration for social impact initiatives where resources may be limited.
Implement Style Guide Fields
Help maintain design consistency by creating style guide fields in your Collections. These can include:
- Dropdown fields for selecting pre-defined text styles
- Color selection fields that limit choices to brand colors
- Image proportion fields that guide users to select appropriately sized images
- Toggle fields for enabling/disabling optional content sections
These guardrails help non-designers create content that aligns with your design system while still giving them flexibility.
Create Reusable Components
Leverage Webflow's CMS to create reusable content components that clients can easily implement:
- Design call-to-action blocks that can be inserted anywhere
- Create standardized image galleries with consistent styling
- Build flexible quote blocks for testimonials
- Develop reusable feature comparison tables
By providing these pre-designed components, you empower content creators to build complex layouts without design expertise.
Establish Content Management Processes
Beyond the technical setup, help your clients implement effective content workflows:
- Create a content calendar for planning and scheduling updates
- Establish review processes for new content before publication
- Schedule regular content audits to identify outdated material
- Set up automated notifications for content that needs review
Well-defined processes ensure that content stays fresh and accurate, even as team members change over time.
By following these best practices for Webflow CMS development, you'll create a content management system that's both powerful and accessible. The result is a website that can grow and evolve with your clients' needs, without requiring constant developer intervention.
Optimizing Team Workflow: 4 Key Approaches for Webflow Development
When working with Webflow as a team, establishing clear processes and roles is essential for maintaining efficiency and preventing workflow bottlenecks. Here are strategies for collaborative development and design systems implementation that will help your team work more effectively.
2 Collaborative Development Strategies
Effective collaboration starts with establishing clear team roles and permissions. Webflow's role-based access control allows you to assign appropriate access levels to different team members based on their responsibilities.
For developers and designers who need full access, you can grant Designer permissions, while content editors may only need Editor access for updating site content without changing design elements. This permission system, when properly implemented, creates clear boundaries that prevent accidental changes while enabling team members to work efficiently within their domains.
Since Webflow doesn't include built-in version control, you'll need to establish workarounds to track changes and maintain project integrity. Here are some effective strategies:
- Leverage automatic backups: Webflow creates automatic backups that can be restored with a single click when something goes wrong.
- Implement third-party version control: Tools like Webflow Git allow you to export Webflow sites to GitHub, enabling proper version tracking and the ability to view file and code changes over time.
- Utilize page branching: Webflow's branching feature enables multiple designers to work on different pages simultaneously, reducing bottlenecks in the development process.
- Document changes: Maintain a detailed changelog to track major updates and iterations, making it easier to understand what changes were made and why.
For smooth handoff procedures between team members, consider implementing these practices:
- Create comprehensive documentation for common tasks and workflows
- Record walkthroughs of complex processes for future reference
- Schedule regular sync meetings to discuss progress and challenges
- Use collaborative platforms like Slack integrated with your Webflow workflow
By implementing these collaborative workflows, your team can work more efficiently in Webflow while maintaining design consistency and quality across projects, as demonstrated in our performance marketing case study and complex projects like social media ad design.
2 Design System Implementation Approaches
Creating a cohesive design system is crucial for maintaining consistency across your Webflow projects. Start by implementing a component-based approach:
- Build reusable components: Leverage Webflow's Symbols (now called Components) feature to create global elements that can be reused throughout your site. When you update a Component, the changes apply everywhere it's used.
- Establish naming conventions: Develop a consistent naming system for classes and styles. This might follow patterns like BEM (Block Element Modifier) or another methodology that makes sense for your team. Clear naming prevents confusion and makes it easier for team members to understand each other's work, crucial in projects like social media ad design.
- Create a centralized style guide: Dedicate a page in your Webflow project to document color palettes, typography, UI patterns, and component usage guidelines. This serves as a reference point for the entire team.
- Document component usage: For each component in your design system, provide clear documentation on:
- Its intended purpose
- How to implement it correctly
- Any variations or states
- When to use (and when not to use) the component
To maintain and evolve your design system over time:
- Schedule regular reviews to evaluate the effectiveness of existing components
- Create a process for proposing and implementing new components
- Document deprecated components and their replacements
- Ensure new team members are properly onboarded to your design system
By implementing these collaborative workflows and design system practices, your team can work more efficiently in Webflow while maintaining design consistency and quality across projects.
7 Quality Assurance Techniques for Webflow Website Development
Quality assurance is critical to ensuring your Webflow site performs well and delivers a consistent experience across all devices and browsers. Implementing a thorough testing process will help you catch issues before launch and provide a smooth user experience.
7-Point Pre-Launch Checklist
Before launching your Webflow site, work through this comprehensive checklist to ensure everything is functioning properly:
- Cross-browser compatibility testing
- Test on Chrome, Firefox, Safari, and Edge at minimum
- Check for layout inconsistencies, broken interactions, or functionality issues
- Use browser developer tools to simulate different browser versions
- Device testing
- Test on various device types (desktop, tablet, mobile)
- Verify responsive breakpoints are working correctly
- Check touch interactions on mobile devices
- Test in both portrait and landscape orientations
- Performance optimization
- Run performance audits using Lighthouse or PageSpeed Insights
- Optimize image sizes and formats
- Implement lazy loading for below-the-fold content
- Review animation performance on lower-end devices
- Functionality testing
- Test all forms and form submissions
- Verify CMS functionality and dynamic content
- Check all links, buttons, and navigation elements
- Confirm interactive elements work as expected
- Accessibility compliance
- Test with screen readers
- Verify proper heading structure and semantic HTML
- Check color contrast ratios
- Ensure keyboard navigation works properly
- Content review
- Proofread all text content
- Check for consistent formatting
- Verify image alt text is present and descriptive
- Ensure CMS content displays correctly
- SEO verification
- Check meta titles and descriptions
- Verify canonical URLs are set correctly
- Review structured data implementation
- Confirm site is indexable (if intended)
5 Common Issues and Troubleshooting Techniques
When working with Webflow, you might encounter these common issues. Here's how to diagnose and fix them:
Layout Problems
- Issue: Elements shifting or displaying incorrectly at certain breakpoints
- Solution: Review your responsive settings and use the element panel to check for conflicting styles at different breakpoints. Make sure elements are properly contained within their parent containers.
CMS Issues
- Issue: Dynamic content not displaying as expected
- Solution: Check your Collection List settings and template pages. Verify that your Collection fields are properly mapped to your design elements. Clear the site cache if changes aren't showing up.
Interaction Debugging
- Issue: Animations or interactions not triggering properly
- Solution: Use the Interactions panel to review trigger settings and timing. Test on different devices to ensure compatibility. Simplify complex animations that might be causing performance issues.
Performance Concerns
- Issue: Slow page loading times
- Solution: Optimize images, reduce the number of animations, and implement lazy loading. Consider using Webflow's built-in optimizations like responsive images and CDN delivery.
Form Functionality
- Issue: Forms not submitting or processing correctly
- Solution: Check form settings in the Webflow dashboard, verify field requirements, and test submission functionality. Ensure proper integration with third-party services if applicable.
By implementing a rigorous QA process and knowing how to address common Webflow issues, you'll create more stable, accessible, and high-performing websites for your clients. Remember that testing isn't a one-time activity but should be integrated throughout your development process to catch and fix issues early.
Launching Your Webflow Website: 4 Key Areas to Master
After completing the development of your Webflow website, proper deployment and client handover are crucial steps to ensure a successful project conclusion. These final stages can significantly impact how well the site performs and how effectively your client can manage their new digital asset.
2 Deployment Best Practices
When you're ready to launch your Webflow website, follow these best practices to ensure a smooth deployment:
- Domain setup and SSL configuration: Properly configure the client's domain name and set up SSL certificates for secure HTTPS connections. This increases site security and helps with SEO rankings. If transferring from another platform, ensure DNS records are properly updated to avoid downtime.
- Staged launching approach: For complex sites, consider a phased deployment strategy. Launch critical pages first, then gradually roll out additional sections. This approach allows you to identify and fix issues before the full site goes live.
- Pre-launch checklist: Before going live, run through a comprehensive checklist that includes:
- Cross-browser and device testing
- Form functionality verification
- Link checking (internal and external)
- Image optimization confirmation
- Page load speed testing
- 404 page configuration
- SEO final checks: Ensure all meta titles, descriptions, and image alt text are properly configured. Verify that your site has a sitemap.xml file and proper schema markup where appropriate.
- Analytics integration: Set up Google Analytics, Google Search Console, and any other tracking tools to monitor site performance from day one.
2 Client Handover and Training Strategies
A thoughtful client handover process is essential for ensuring your client can effectively manage their new website:
- Prepare comprehensive documentation: Create a detailed guide covering basic website management tasks. This should include how to update content, add new pages, and manage the CMS. Documentation should be clear and accessible, with screenshots and step-by-step instructions.
- Conduct training sessions: Schedule dedicated training sessions to walk clients through the Webflow Editor interface. Focus on the specific tasks they'll need to perform regularly, such as updating text, swapping images, and publishing blog posts.
- Record training for future reference: Record your training sessions so clients can revisit the information later or train new team members without requiring additional support from you.
- Transfer ownership properly: When the project is complete, duplicate the site for backup before transferring the original to the client's Webflow account. Guide them through the necessary steps to accept the transfer and manage billing.
- Set up appropriate access levels: Use Webflow's role-based permissions to give clients only the access they need. For most clients, Editor access is sufficient for content management without risking accidental design changes.
- Establish maintenance procedures: Define clear processes for ongoing maintenance, including who is responsible for updates, security, and backups. Consider offering a maintenance package for continued support beyond the initial handover.
Taking the time to deploy your site properly and thoroughly train your clients pays dividends in the long run. It reduces support requests, ensures the website maintains its performance and security, and helps build lasting client relationships that can lead to future work and referrals.
2 Advanced Development Techniques for Webflow Website Development
When you've mastered the basics of Webflow, it's time to explore more advanced techniques that can take your projects to the next level. Let's dive into custom code integration and performance optimization strategies that will help you build more sophisticated and high-performing websites.
Custom Code Integration
While Webflow's visual editor is powerful, there will be times when you need functionality beyond its built-in capabilities. This is where custom code integration becomes invaluable:
- JavaScript Implementation: You can add custom JavaScript to create advanced interactions that aren't possible with Webflow's native interaction tools. This might include complex animations, custom calculators, or dynamic content manipulation.
- API Integrations: Connect your Webflow site to third-party services by implementing API calls through custom code. This allows you to integrate with services like CRMs, payment processors, or custom databases.
- Custom Animations: While Webflow has impressive animation capabilities, custom code lets you implement advanced animation libraries like GSAP for more complex motion effects.
To add custom code in Webflow, you can use:
- The page settings panel for page-specific code
- The site-wide settings for global code
- Custom code embeds for specific sections
Here's a simple example of how you might implement a custom scroll-triggered animation:
window.addEventListener('scroll', function() {
  const element = document.querySelector('.my-element');
  const position = element.getBoundingClientRect().top;
  const screenPosition = window.innerHeight / 1.3;

  if(position < screenPosition) {
    element.classList.add('animate');
  }
});
When implementing custom code, always test thoroughly across different browsers and devices to ensure compatibility.
Optimization for Performance
After enhancing your Webflow site with custom code and interactions, it's crucial to ensure these additions don't negatively impact performance. Here are key optimization strategies:
- Image Optimization:
- Use next-gen formats like WebP when possible
- Compress images without sacrificing quality
- Implement responsive images that serve different sizes based on device
- Consider converting decorative animations to lightweight SVGs
- Minimize HTTP Requests:
- Consolidate files where possible
- Eliminate redundant code
- Remove unnecessary script comments
- Combine multiple small scripts into a single file
- Implement Lazy Loading:
- Only load images and videos when they're about to enter the viewport
- Prioritize above-the-fold content for immediate loading
- Defer loading of non-critical elements
- Reduce Mobile Interactions:
- Simplify or remove complex animations on mobile devices
- Consider using media queries in your custom code to disable heavy animations on smaller screens
- Test performance on a variety of devices, not just your high-end development machine
- Leverage Browser Caching:
- Set appropriate cache durations for static assets
- Use Webflow's caching settings to balance speed and content freshness
Remember that even the most impressive interactions and animations will frustrate users if they cause performance issues. Always test your site's performance using tools like Google PageSpeed Insights after implementing advanced techniques.
By thoughtfully incorporating custom code while maintaining a focus on performance optimization, you can create Webflow sites that are both feature-rich and lightning-fast.
Conclusion of the Webflow Website Development Guide
Throughout this Webflow Website Development Guide, we've explored how Webflow transforms the web development process with its powerful visual interface and robust feature set. The benefits of adopting Webflow are clear and compelling, as demonstrated by real-world success stories:
- Discord's blog achieved 5x faster speed to market for new content after switching to Webflow.
- Lattice experienced a remarkable 98% increase in speed to market for new pages.
- Rakuten SL reported 3x faster page builds, allowing their marketing team greater creative freedom.
As Marcus Jones, COO, aptly put it: "Webflow has the power of custom coded web development but the accessibility of a visual interface. It's intuitive in a way that other platforms simply are not."
The value of Webflow lies in bridging the gap between design and development, enabling teams to create sophisticated websites without the traditional constraints of coding. Cat Origitano, VP of Product & Portfolio Marketing at Lattice, confirms this: "With Webflow Enterprise, we're able to move with trust and confidence that things will get done quickly without compromising our brand or draining resources."
We encourage you to implement the strategies outlined in this guide and experience the efficiency of Webflow's visual development environment firsthand. Start small with a component or page, then scale your approach as you grow more comfortable with the platform.
For continuing education, take advantage of Webflow University's comprehensive tutorials and join the active Webflow Community Forum for support and inspiration from fellow designers and developers.
At NoBoringDesign, we specialize in creating stunning, functional websites that defy expectations while delivering exceptional results. Our team of Webflow experts can help you unlock the full potential of this revolutionary platform, whether you're building your first Webflow site or looking to elevate your existing web presence.
By embracing Webflow's innovative approach to web development, you're not just learning a new tool—you're adopting a more efficient, collaborative, and creative way to bring your digital visions to life.

What is the best font size for eBooks? This seemingly simple question holds significant importance, as font size is one of the most critical yet often overlooked elements that significantly affects how readers engage with your eBook, especially considering the media influence on reader expectations. Selecting the appropriate font size is essential for creating an optimal reading experience that balances readability, accessibility, and user engagement across various devices and reader demographics.
Research shows that choosing the right font size directly correlates with reader engagement and satisfaction. Font sizes typically ranging from 11pt to 14pt provide the best reading experience for most adults, with 12pt being widely accepted as the standard for body text.
What makes determining the best font size for your eBook particularly challenging is the diversity of devices used for eBook consumption. E-ink readers like Kindle, tablets, smartphones, and desktop computers all present different screen sizes and technologies that affect how text appears. A font size that works perfectly on a Kindle's paper-like E-ink display might look too small or too large on a smartphone's LCD screen.
Reader demographics also play a crucial role in selecting the best font size for your eBook. Older adults generally prefer larger font sizes—studies indicate that readers aged 50+ often find 14pt-18pt more comfortable for extended reading sessions. Meanwhile, younger readers might be comfortable with smaller sizes, though research suggests 12pt remains optimal for most age groups.
The technology behind the screen matters too. E-Ink displays are designed to mimic paper and reduce eye strain during extended reading, potentially allowing for smaller font sizes compared to LCD screens that emit light and may require larger text to compensate for increased eye fatigue.
Throughout this article, we'll guide you through selecting the ideal font size for your eBook by considering various factors—including device compatibility, reader demographics, genre expectations, and best practices recommended by typography experts. By understanding these elements, you'll be able to determine what is the best font size for your eBook and create an enjoyable, accessible reading experience for your entire audience.
In brief:
- The optimal font size for most adult readers is 11-14pt, with 12pt being the standard
- Different devices (e-readers, tablets, smartphones) require different font size considerations
- Reader demographics significantly impact font size needs, with older adults preferring 14-18pt
- E-Ink displays allow for somewhat smaller font sizes compared to LCD screens
Understanding What is the Best Font Size for Your eBook: 3 Font Size Fundamentals
When designing an eBook, understanding typography fundamentals is essential for creating a readable, professional product. Digital text behaves differently than print, and knowing these differences will help you make better choices for your readers.
How Screens Render Text Differently Than Print
Unlike printed books, digital screens render text using pixels rather than ink on paper. This fundamental difference affects how readers perceive your content. E-Ink displays, like those used in Kindle devices, mimic the appearance of real paper, providing sharp text with high contrast. According to a Harvard study, E-Ink displays can be used up to three times longer than LCD screens before causing the same level of eye strain.
LCD screens, common in tablets and smartphones, use backlighting which can cause more eye fatigue during extended reading sessions. They also have different optimal font sizes compared to E-Ink displays, often requiring larger text for comfortable reading.
Relative vs. Absolute Font Measurements
When working with eBooks, you'll encounter two primary types of font measurements:
- Absolute measurements: These include points (pt) and pixels (px), which specify exact sizes. For example, printed books typically use 10-12pt font for body text.
- Relative measurements: These include ems, rems, and percentages, which scale based on the parent element or device settings.
For eBooks, relative measurements are generally preferable because they allow text to adapt to different screen sizes and reader preferences. When you use ems or percentages, your text can scale appropriately whether someone is reading on a large tablet or a small smartphone.
Amazon's Kindle formatting guidelines actually require a minimum font size of 7 points, but most experts recommend 11-12pt for optimal readability on digital devices.
Key Typography Terms for eBook Designers
To make informed decisions about your eBook typography, familiarize yourself with these essential terms:
- Leading: The vertical space between lines of text (also called line height). For eBooks, a leading of 1.2 to 1.5 times the font size generally works well.
- Kerning: The spacing between individual letter pairs. Good kerning improves readability by ensuring characters are appropriately spaced.
- Line length: The number of characters per line. For optimal readability, aim for 45-75 characters per line.
- Font weight: The thickness of the characters. E-Ink displays often benefit from slightly heavier font weights to improve contrast and readability.
- Tracking: The uniform spacing between characters in a block of text (as opposed to kerning, which adjusts specific letter pairs).
Understanding these fundamentals, along with cultural design elements, will help you make informed decisions about typography in your eBook, guiding you toward determining what is the best font size for your eBook and creating a more comfortable and engaging reading experience for your audience across different devices and screen technologies.
4 Critical Factors in Determining the Best Font Size for Your eBook
When designing an eBook, choosing the right font size isn't just about aesthetics—it directly impacts readability and user experience. Innovative design solutions can help address these challenges. Let's explore the key factors that influence determining the best font size for your eBook.
Device Considerations in Choosing the Best Font Size for Your eBook
Different reading devices have varying screen sizes and resolutions, requiring careful font size adjustments:
- E-readers (Kindle, Nook): These typically work best with body text in the 11-12pt range, with chapter titles at 14-16pt. Amazon's Kindle formatting guidelines require a minimum font size of 7 points, though most experts recommend 11-12pt for optimal readability.
- Tablets: For iPad and other tablets, body text generally needs to be larger (16-18px) with chapter titles in the 22-26px range to ensure comfortable reading on these mid-sized screens.
- Smartphones: The smallest screens require body text of 14-16px and chapter titles of 18-22px to maintain legibility on limited screen real estate.
- Desktops/Web: When reading on computer screens, 16-18px for body text and 24-30px for chapter titles typically works best.
Screen technology also plays a role. E-Ink displays can often use slightly smaller font sizes while maintaining readability because they mimic the appearance of paper. A Harvard study found that E-Ink displays are up to three times less stressful on readers' eyes than LCD screens.
How Target Audience Demographics Influence the Best Font Size for Your eBook
Your audience's characteristics significantly influence font size requirements:
- Age: Older readers generally prefer larger fonts. Research by Hou et al. found that adults aged 59-79 preferred font sizes of 10.5-15pt for optimal readability and comfort on mobile devices. The Project Tomorrow Study demonstrated that larger print improved reading comprehension and reduced anxiety for many students.
- Vision capabilities: Readers with vision impairments benefit from larger text sizes, with some requiring 14-18pt for comfortable reading.
- Reading habits: Frequent readers may have established preferences, while casual readers might need more generous sizing to maintain engagement during longer sessions.
The Adobe Research team discovered that "different readers read fastest in different fonts," highlighting the importance of allowing user customization of font sizes.
How Content Type and Genre Affect the Best Font Size for Your eBook
The nature of your content should inform font size decisions:
- Fiction vs. Non-fiction: Fiction often works well with standard 11-12pt sizes, while non-fiction might benefit from 12-13pt to improve comprehension of complex information.
- Technical content: Academic or reference materials often require larger fonts (14-16pt) to accommodate complex information and improve comprehension. For example, incorporating data visualization requires careful consideration of font size to ensure readability.
- Children's books: These typically use larger font sizes (14-18pt) with playful, rounded letterforms for improved readability and engagement.
- Magazines and news: These formats sometimes use slightly smaller fonts (10-12pt) to accommodate more content per page.
Reading Environment and Context
The circumstances under which your eBook will be read matter significantly:
- Lighting conditions: Low-light environments often necessitate larger font sizes for improved visibility. E-Ink displays perform better in bright environments, while backlit LCD screens can be more versatile in varying light conditions.
- Reading duration: For content designed for extended reading sessions, slightly larger fonts reduce eye strain over time.
- Screen brightness: Brighter screens can sometimes compensate for smaller font sizes, though this increases battery consumption and potential eye strain.
- Ambient factors: Reading in motion (commuting, traveling) typically requires larger text for stability and focus.
Font size selection isn't a one-size-fits-all decision. The best approach is to consider these factors collectively while providing readers with customization options. Testing your eBook across multiple devices and with diverse reader groups will help ensure you've struck the right balance for your specific audience and content.
Industry Standards and Research-Backed Recommendations on the Best Font Size for Your eBook
When designing your eBook, it's helpful to understand what font sizes industry experts recommend for optimal reading experiences. While there's flexibility in digital publishing, following established guidelines and effective marketing strategies can help ensure your content remains accessible and comfortable to read across different devices.
Major eBook Publishers' Font Size Standards
Amazon's Kindle formatting guidelines require a minimum font size of 7 points for eBooks. However, this minimum is well below what most typography experts actually recommend for comfortable reading.
Steven Spatz, President of BookBaby, suggests "12 point font size for body text and 14-18 point for chapter titles." This recommendation aligns with what many professional publishers use for their digital releases.
For most standard eBooks, industry consensus suggests:
- Body text: 11-12pt
- Chapter headings: 14-18pt
- Book title: 22-24pt
Research on Readability and Eye Strain
Screen technology has a significant impact on optimal font sizes. A Harvard study commissioned by E Ink Corporation found that E Ink displays (like those used in Kindle e-readers) can be used up to three times longer than LCD screens before causing the same level of eye strain.
This difference in screen technology may influence your font size decisions:
- For E-ink readers: 11-12pt is typically sufficient for body text
- For LCD screens (tablets, phones): 12-14pt may be more comfortable for extended reading
Research consistently shows that higher contrast ratios between text and background also improve readability, regardless of the screen technology used, emphasizing the importance of measuring effectiveness in typography choices.
Accessibility Guidelines and Considerations
Accessibility should be a primary concern when selecting font sizes. The Web Content Accessibility Guidelines (WCAG) don't specify exact font sizes but recommend that text should be resizable up to 200% without loss of content or functionality.
For users with visual impairments or older readers, larger font sizes are often necessary. A study by Lege et al. found that middle-aged adults preferred 18pt font size for comfortable reading.
When designing your eBook, remember that most reading apps and devices allow users to adjust font sizes according to their preferences. Your role is to set a comfortable default size while ensuring your formatting remains consistent when readers adjust the text.
The key takeaway is that while 11-12pt is the general industry standard for body text in eBooks, factors like screen technology, reader demographics, and content type should influence your specific font size decisions. Testing your content across multiple devices and with readers of different age groups can help you determine the optimal size for your specific eBook.
4 Recommended Font Sizes by Device Type
When it comes to font sizes for eBooks, one size definitely doesn't fit all. Different devices have different screen technologies, resolutions, and sizes that significantly impact readability. Let's walk through the optimal font size recommendations for various device types to ensure your readers have the best possible experience.
E-Ink Readers (Kindle, Kobo, Nook)
E-Ink displays are designed to mimic the appearance of ink on paper, offering excellent readability even in direct sunlight with minimal eye strain. For these devices, we recommend:
- Body text: 11-12pt
- Chapter titles: 14-16pt
This recommendation is backed by Amazon's Kindle formatting guidelines, though experts generally suggest staying at the higher end of this range for better readability. The paper-like appearance of E-Ink allows for comfortable reading even at slightly smaller sizes compared to backlit screens.
As noted by eBook experts: "For Kindle eBooks, Amazon provides a flexible reading experience where users can adjust the font size to their preference. However, setting an appropriate default font size is still important. The best font size for a Kindle eBook typically falls within the 11pt-12pt range."
Tablets (iPad, Android Tablets)
Tablets use LCD or OLED screens that emit light rather than reflect it, which changes how text appears to readers. For these devices, we recommend slightly larger font sizes:
- Body text: 16-18px
- Chapter titles: 22-26px
The backlit nature of tablet screens can cause more eye fatigue during extended reading sessions, so the larger font sizes help compensate for this. Additionally, tablets are typically held at a greater distance from the eyes than e-readers or smartphones, which also influences optimal font size.
Interestingly, even within the tablet category, different models may require different approaches. For instance, reading on an iPad Pro versus an iPad Mini could necessitate adjustments due to their significant size difference.
Smartphones
Smartphones present unique challenges due to their smaller screen size. To maintain readability without requiring excessive scrolling, we recommend:
- Body text: 14-16px
- Chapter titles: 18-22px
Despite their smaller screens, smartphones shouldn't use proportionally smaller fonts—in fact, quite the opposite. Larger relative font sizes are necessary to ensure comfortable reading on these compact devices.
It's worth noting that phone screen sizes vary considerably, from compact models under 5 inches to "phablets" exceeding 6.5 inches. The smaller the screen, the more critical adequate font sizing becomes for readability.
Desktop/Laptop Reading Applications
For reading on computer screens, whether through browser-based readers or dedicated applications, we recommend:
- Body text: 16-20px
- Chapter titles: 24-30px
Desktop reading typically occurs at a greater distance from the screen compared to mobile devices, justifying the larger font sizes. Additionally, computer screens often have higher resolution and brightness levels that affect perceived text size.
Browser-based readers and dedicated applications may handle font rendering differently, so testing your content in both environments is advisable. Desktop applications tend to offer more precise control over font rendering, which can enhance readability at slightly smaller sizes compared to browsers.
Remember that while these recommendations provide a solid starting point, the best practice is to ensure your eBook's formatting allows readers to adjust font sizes according to their individual preferences and needs.
Determining the Best Font Size for Your eBook: 5 Content-Type Considerations
Selecting the right font size for your eBook isn't just about what looks good—it's about matching the text size to both your content type and your readers' needs. Let's walk through some specific recommendations based on content type to help you make informed decisions for your next eBook project.
Body Text for Different Genres
Different genres have distinct font size requirements that align with reader expectations and reading contexts:
- Fiction: Fiction works typically use serif fonts at sizes between 11-14pt. Literary fiction, historical novels, and romance often benefit from classic serif fonts like Garamond or Bookerly that mimic the traditional print reading experience.
- Non-fiction: Self-help, business, and technology books tend to favor sans-serif fonts at slightly larger sizes (12-14pt) than fiction. The clean lines of sans-serif fonts like Lato or Open Sans enhance readability for factual content.
Research shows that no single font size works best for all readers. In fact, the Adobe Research Study found that individuals read up to 35% faster with their preferred font compared to their least preferred option.
Headings, Subheadings, and Navigation Elements
Creating a clear hierarchy with your font sizes helps readers navigate your eBook effortlessly:
- Chapter titles: 14-18pt is generally recommended
- Main headings (H1): 22-24pt
- Subheadings (H2): 18-20pt
- Minor headings (H3): 16-18pt
This graduated approach creates visual separation between sections while maintaining proportion. Remember that headings should be 1.3-1.96 times larger than your body text to create effective visual hierarchy.
Children's eBooks and Young Adult Content
Children's books require special font size consideration:
- Picture books (ages 0-8): 14-18pt with rounded, playful letterforms
- Middle grade (ages 8-12): 14-16pt
- Young adult (ages 12-18): 12-14pt
The Project Tomorrow Study found compelling evidence for using larger print with young readers. When students read books with larger print, 43% reported reduced anxiety, 60% found it easier to focus and not lose their place, and 75% of teachers noted improved reading comprehension for students reading below grade level.
Technical, Academic, and Reference Material
Complex or technical content presents unique challenges that often require larger font sizes:
- Technical manuals: 14-16pt
- Academic papers: 12-14pt
- Reference materials: 12-14pt with larger fonts (16-18pt) for important formulas, equations, or code snippets
For code samples, maintain consistent monospaced fonts at 14-16pt to ensure readability of syntax and special characters. Additionally, consider using slightly increased line spacing (1.4-1.5) for technical content to improve readability of complex information.
Special Content Considerations
Beyond standard text, special content elements require thoughtful font sizing:
- Pull quotes: 1-2pt larger than body text to create emphasis
- Captions: Slightly smaller (10-12pt) than body text but still easily readable
- Footnotes/endnotes: 10-11pt is standard but ensure they remain readable
- Tables and charts: Labels at 10-12pt with headers at 12-14pt to create hierarchy
When creating eBooks with technical content, remember that font size isn't just about visibility—it affects comprehension. Academic materials often require readers to jump between sections, making clear size differentiation between headers and body text particularly important.
Choosing the Best Font Size for Your eBook: 3 Font Family Considerations
When designing your eBook, it's important to understand that different font families require different size settings to achieve optimal readability. The font you choose significantly impacts how your text appears to readers, even when using the same point size.
Serif Fonts and Their Ideal Sizing
Serif fonts, with their decorative strokes at the ends of characters, are traditional choices for printed books and many eBooks. However, each serif font has its own unique characteristics that affect optimal sizing:
- Times New Roman: As one of the most common serif fonts, it typically requires a slightly larger size (11-12pt) for comfortable reading in digital formats.
- Georgia: Designed specifically for screen readability, Georgia can work well at 11pt due to its larger x-height.
- Palatino: With its elegant appearance, Palatino often needs to be set at 12pt for optimal eBook readability.
What's interesting is that each of these fonts, despite potentially sharing the same technical point size, can appear dramatically different in terms of perceived size to readers.
Sans-serif Fonts and Optimal Presentation
Sans-serif fonts (those without decorative strokes) have their own sizing considerations:
- Verdana: This font appears significantly larger at the same point size compared to fonts like Times New Roman, so you can often use it effectively at 10-11pt.
- Helvetica/Arial: These standard sans-serif options typically work well at 11-12pt for body text in eBooks.
- Calibri: Microsoft's default font often requires at least 12pt for comfortable reading on digital devices.
If you're looking to maximize content per page while maintaining readability, the choice between a space-efficient serif font versus a more open sans-serif can make a significant difference.
How Font Weight and Style Affect Perceived Size
Beyond the font family itself, weight and style dramatically affect how readers perceive font size:
- Bold text appears larger and requires less point size to achieve the same visibility.
- Italic text often appears slightly smaller and may need size compensation.
- Light-weight versions of fonts generally need to be sized larger for equivalent readability.
Research from the FontMART Study found that heavier font weights particularly benefit older adults, as the increased stroke thickness makes text easier to read for those with declining eyesight.
Implementing dynamic typography can enhance readability by adjusting font characteristics according to context. When pairing different fonts in your eBook, you'll need to adjust sizes accordingly to maintain consistency in perceived size rather than technical point size. We recommend testing your font combinations across different devices to ensure that your size choices maintain proper visual hierarchy and readability regardless of screen type or reader settings.
Remember that the goal is to create a comfortable reading experience where font size feels natural and doesn't call attention to itself. The right combination of font family and size should enhance your content without readers even noticing the typography choices you've made.
3 Approaches to Optimizing for Reader Demographics
When it comes to choosing the ideal font size for your eBook, understanding your target audience's demographics is crucial. Different age groups and readers with varying visual abilities have distinct font size preferences that can significantly impact their reading experience.
Tailoring Font Size for Different Age Groups
Age is one of the most significant factors affecting font size preferences. Research consistently shows clear patterns across different age brackets:
- Older Adults (59-79 years): Studies by Hou et al. found that older adults preferred larger font sizes ranging from 10.5-15pt for optimal readability, usability, and visual comfort on digital devices. This preference helps compensate for age-related vision changes.
- Middle-aged Adults: Research by Lege et al. showed that middle-aged adults found 18pt font size significantly more comfortable to read compared to smaller sizes.
- Younger Adults: This demographic can typically read smaller fonts more comfortably. However, even younger readers benefit from appropriately sized text. A study by Chatrangsan and Petrie found that 18pt font size was significantly faster to read than 14pt or 16pt for both younger and older participants.
As demonstrated in the performance marketing case study, optimizing for reader demographics improves engagement.
Addressing Visual Impairments and Reading Disabilities
Beyond age considerations, it's vital to accommodate readers with visual impairments or reading disabilities:
- For readers with mild to moderate visual impairments, offering font size adjustment options is essential. Following WCAG guidelines, text should be resizable up to 200% without loss of content or functionality.
- For readers with dyslexia or other reading disabilities, larger font sizes (typically 14-16pt) can improve comprehension and reduce reading fatigue.
- A Project Tomorrow study found that large print improved reading comprehension and engagement, with 43% of students reporting reduced feelings of anxiety when reading books in large print.
Cultural and Educational Factors
Beyond age and visual abilities, cultural and educational backgrounds can influence font size preferences:
- Readers who are less familiar with the language of your eBook may benefit from slightly larger font sizes to aid comprehension.
- Educational level can affect reading fluency and comfort with different font sizes. Technical or academic content often benefits from slightly larger fonts to accommodate complex information.
- Reading habits also play a role—frequent digital readers may be more comfortable with standard digital font sizes, while those transitioning from print may prefer larger text initially.
Inclusive typography choices, coupled with inclusive imagery, ensure your eBook appeals to a broad audience. When designing your eBook, we recommend offering customizable font size options rather than enforcing a single size. This approach ensures that readers of all demographics can enjoy your content with maximum comfort and engagement.
3 Testing and Optimization Techniques
Creating an eBook with optimal font sizes requires thorough testing across different devices and collecting reader feedback. Here are practical methods to ensure your eBook's typography delivers the best possible reading experience.
Methods for Testing Font Readability Across Devices
When testing your eBook's font readability, it's essential to view it on multiple devices to understand how your typography choices appear across different screen technologies:
- Use dedicated previewing tools: Kindle Previewer, Adobe Digital Editions, and Apple Books offer ways to test how your eBook will look on various devices without needing to own each one.
- Test on actual devices when possible: Physical testing provides the most accurate understanding of how your font appears. Try to test on at least one e-ink device, one tablet, and one smartphone.
- Check different lighting conditions: Especially for e-ink displays versus LCD/OLED screens, font readability can vary significantly based on ambient lighting.
- Validate accessibility features: Ensure that font resizing controls work properly and that your fonts render clearly at larger sizes for readers who need them.
A/B Testing Approaches for Font Size Optimization
A/B testing involves creating multiple versions of your eBook with different font configurations to determine which performs best:
- Create two or three versions: Develop versions with slightly different font sizes (e.g., 11pt, 12pt, and 13pt) while keeping other formatting elements consistent.
- Distribute to test readers: Send each version to different segments of your beta reader group without telling them which version they're receiving.
- Use consistent questions: Ask all testers the same questions about readability, comfort during extended reading sessions, and overall experience.
- Measure objective metrics: Beyond subjective feedback, track metrics like reading time, completion rates, and where readers stop reading.
Reader Feedback Collection and Analytics
Gathering quality feedback is crucial for optimizing your eBook's typography:
- Survey readers about their experience: Create targeted questions about font sizes and readability to gather specific feedback.
- Diversify your test readers: Include people of different age groups, especially older adults who may prefer larger font sizes.
- Ask comparative questions: "Was the text too small, too large, or just right?" often provides more actionable feedback than open-ended questions.
- Follow up on negative feedback: If readers report difficulty reading, ask clarifying questions to identify whether the issue is with font size, font choice, line spacing, or another factor.
- Track font size adjustments: If you have access to reading analytics platforms, monitor how often readers change the default font size while reading your eBook.
- Analyze reading speed: Significant slowdowns in certain sections might indicate readability issues.
- Compare across devices: Look for patterns in reading behavior differences between smartphone, tablet, and e-reader users.
Gathering reader feedback is crucial for optimizing your eBook's typography. Similar to digital engagement strategies, understanding your audience's interaction with your content allows for better optimization.
By implementing these testing and optimization techniques, you'll gain valuable insights into how readers interact with your eBook's typography and be able to make informed decisions that enhance the reading experience across all devices.
4 Common Font Size Mistakes to Avoid
When formatting your eBook, choosing the right font size is critical for reader experience. However, there are several common mistakes publishers make repeatedly. Being aware of these pitfalls can help you create a more readable and professional eBook.
Size Extremes: Too Small for Comfort or Too Large for Context
One of the most frequent errors is choosing font sizes at the extremes. Text that's too small (below 10pt) strains the eyes and discourages reading, while overly large text can appear unprofessional and reduce the amount of content visible on each screen.
Many publishers make the mistake of using very small fonts to fit more content per page, not realizing this dramatically impacts readability. As a general rule, body text should typically fall between 10-12pt, with chapter titles between 14-18pt.
Ignoring Device-Specific Considerations
A critical mistake is choosing a font size based solely on how it appears on one device. What looks perfect on your large tablet may be virtually unreadable on a smartphone.
The variety of devices used for eBook reading means you need to test your font sizes across multiple screen types and sizes. Using relative font sizes (em or %) rather than absolute sizes (pt or px) can help your eBook adjust better to different devices.
Neglecting the Relationship Between Font Size and Line Spacing
Font size doesn't exist in isolation—it interacts with line spacing and margins to affect overall readability. Many publishers focus solely on font size without considering how it relates to other layout elements.
When your line spacing is too tight, even a reasonably sized font can feel cramped and difficult to read. A general rule is to set line spacing to about 140% of the font size to create comfortable reading conditions.
Inconsistent Sizing Throughout the Publication
Inconsistencies in font sizes across different parts of your eBook can be jarring for readers. We've seen books where the font size inexplicably changes between chapters or even between paragraphs, creating a disjointed reading experience.
This often happens when converting from other formats or when multiple people work on formatting the same book. Create a style guide for your eBook that defines consistent font sizes for body text, headings, captions, and other elements to avoid this problem.
Utilizing a design assessment checklist can help you avoid these common mistakes. Another common mistake is assuming one font size works for all readers. While you should set an appropriate default size, it's essential to ensure your eBook allows readers to adjust font sizes easily according to their personal preferences and needs.
4 Future-Proofing Strategies for Your eBook Typography
As eBook technology continues to evolve, staying ahead of emerging typographic trends can help ensure your content remains readable and accessible for years to come. Let's explore some of the most promising developments that will shape the future of eBook typography.
Adaptive Typography Technologies
The next generation of eBook typography is moving toward responsive design that automatically adjusts based on the reader's device and preferences. Unlike static typography, adaptive systems can:
- Automatically adjust font sizes based on screen size and orientation
- Modify line length and spacing to maintain optimal readability
- Adapt to different reading environments (e.g., bright outdoors vs. dim bedrooms)
AI-driven design is playing a significant role in developing these adaptive typography technologies, enabling more personalized reading experiences.
Variable Fonts and Their Potential
Variable fonts represent one of the most exciting typographic innovations for eBooks. These single font files contain multiple variations of a typeface, allowing for:
- Dynamic adjustment of weight, width, and slant
- Smoother transitions between font sizes
- Reduced file size compared to loading multiple font files
- More precise typography that can adapt to different screens
As support for variable fonts grows across eBook platforms, they'll offer unprecedented flexibility while maintaining your design vision.
Designing for Emerging Device Trends
Future-proof typography means anticipating how reading devices will evolve. Some trends to consider:
- Foldable displays that create different reading experiences in various configurations
- Ultra-high resolution screens that render finer typographic details
- E-Ink color technology that opens new possibilities for visual hierarchy
- Wearable devices that require extreme adaptability in typography
By considering the immersive design impact, you can create typography that enhances reader engagement. When designing your eBook typography today, consider how it might appear on tomorrow's devices by favoring flexible typographic systems over rigid specifications.
Balancing Author Control with Reader Customization
AI-driven personalization is becoming increasingly sophisticated, using machine learning to determine optimal font sizes based on individual reading habits. These systems analyze:
- How long users read at certain font sizes
- When they manually adjust typography settings
- Environmental factors like ambient light
- Each reader's history and preferences
The key to future-proofing your typography is finding the right balance between maintaining your design vision and allowing these personalization technologies to optimize the reading experience. Consider defining typographic ranges (minimum and maximum sizes, line heights, etc.) rather than absolute values to work harmoniously with these emerging technologies.
By embracing these forward-looking approaches to typography, you'll ensure your eBooks remain readable and accessible as technology continues to evolve.
6-Step Practical Implementation Guide
When it comes to implementing font sizes in your eBook, theoretical knowledge must be translated into practical action. Let's walk through the entire process—from initial evaluation to final testing—to ensure your eBook typography delivers an optimal reading experience.
Step-by-Step Font Size Selection Process
- Evaluate your content and audience:
- Consider your target readers' age and reading habits.
- Analyze your content type (fiction, non-fiction, technical, children's).
- Determine if your book will be read primarily on e-readers, tablets, or smartphones.
- Select your baseline font size:
- For most adult readers: 11-12pt for body text.
- For older audiences or children: 12-14pt for body text.
- For chapter titles: 14-18pt is generally recommended.
- For section headings: Use a consistent hierarchy, typically 2-4pt larger than body text.
- Consider font pairing:
- Some fonts appear larger at the same point size than others.
- Test how your chosen font looks at different sizes before finalizing.
- Determine line spacing:
- Set line spacing to approximately 1.2-1.5 times your font size.
- Adjust based on your specific font choice and content type.
- Establish a consistent hierarchy:
- Create a style guide for your eBook with specific sizes for each element.
- Maintain consistent ratios between heading levels and body text.
- Prioritize flexibility:
- Use relative units where possible to accommodate reader adjustments.
- Test how your layout responds to font size changes.
Technical Specifications for Major eBook Formats
Different eBook formats handle font sizing in unique ways, requiring format-specific approaches:
EPUB Format:
- Uses HTML and CSS for formatting.
- Supports relative and absolute units.
- Allows readers to adjust font size in most readers.
- Minimum recommended body text size: 12pt equivalent.
MOBI/KF8 Format (Amazon Kindle):
- Amazon requires a minimum font size of 7 points for legibility.
- Recommended body text size: 11-12pt.
- Supports limited CSS styling.
- Uses em-based sizing for better compatibility.
KFX Format (Enhanced Kindle Format):
- Supports enhanced typography features.
- Maintains font size relationships across devices.
- Allows for more precise control over font appearance.
- Still requires adherence to Amazon's minimum font size guidelines.
CSS Techniques for Typography Control
For optimal typography control, your CSS implementation is crucial:
- Use relative units instead of absolute units:
/* Avoid this approach */
body { font-size: 12pt; }
h1 { font-size: 24pt; }

/* Use this approach instead */
body { font-size: 1em; }
h1 { font-size: 2em; }- Create a consistent hierarchy:
body { font-size: 1em; }
h1 { font-size: 2em; }
h2 { font-size: 1.5em; }
h3 { font-size: 1.25em; }- Control line height for better readability:
body {
  font-size: 1em;
  line-height: 1.5;
}- Consider different screen sizes:
@media (max-width: 600px) {
  body { font-size: 0.95em; }
}
Remember that relative units like em and percentage work better than absolute units (pt or px) because they scale proportionally across different devices and when users change their preferred text size.
Quality Assurance Checklist for Typography
Before publishing your eBook, run through this comprehensive quality assurance checklist:
- Device testing:
- Test on at least one e-ink device (e.g., Kindle Paperwhite).
- Test on a tablet (e.g., iPad).
- Test on a smartphone.
- Check desktop reading experience.
- Font size verification:
- Ensure body text is readable without zooming.
- Verify heading hierarchy is visually clear.
- Check caption and footnote legibility.
- Adaptability testing:
- Test font size adjustments in e-readers.
- Verify text reflows properly when size changes.
- Check line breaks and paragraph formatting at different sizes.
- Accessibility checks:
- Ensure contrast ratio meets accessibility standards.
- Verify the book remains readable at 200% zoom.
- Test with screen readers if possible.
- Cross-format consistency:
- Compare appearance across EPUB, MOBI, and PDF formats.
- Check that font size relationships remain consistent.
- Reader feedback:
- If possible, get feedback from beta readers on different devices.
- Ask specifically about typography and readability.
By following this implementation guide, you'll be able to create eBooks with typography that enhances readability across devices while maintaining the flexibility that digital reading demands. Remember that the goal isn't perfect uniformity across all devices but rather an optimal reading experience regardless of how your readers choose to consume your content.
Determining What is the Best Font Size for Your eBook to Create the Optimal Reading Experience
Selecting the right font size for your eBook isn't just about aesthetics—it's about crafting an experience that resonates with your readers and keeps them engaged. Throughout this article, we've explored the multifaceted considerations that go into making this crucial decision.
The research clearly shows that there's no perfect "one-size-fits-all" solution. Different age groups have distinct preferences, with older adults generally benefiting from larger sizes of 14-18pt, while younger readers might be comfortable with 11-14pt text. Remember that reader comfort should always take precedence over design preferences.
Testing across multiple devices is absolutely essential. What looks perfect on your desktop might be unreadable on a smartphone or e-reader. As research from Adobe found, individuals read 35% faster with their fastest font compared to their slowest font—a dramatic difference that highlights the importance of thoughtful font selection.
When creating your eBook, consider these key takeaways:
- Start with a comfortable baseline: 12pt is widely accepted as standard.
- Ensure customization: Make sure readers can adjust sizes to their preference.
- Test extensively: Check your content across multiple devices and with diverse reader groups.
- Balance design and function: Aesthetic design should not compromise readability.
- Know your audience: Consider your target audience's age and reading habits.
The goal is to create a reading experience that disappears into the background, allowing your content to take center stage. As Project Tomorrow's research demonstrated, appropriate font sizes can significantly improve reading comprehension and reduce anxiety—especially for younger readers.
By implementing the recommendations we've discussed, you'll create an eBook that's not just beautiful but accessible and enjoyable for everyone. If you need help striking the perfect balance between aesthetics and readability in your next eBook project, NoBoringDesign can help transform your manuscript into a typographically stunning digital reading experience that puts your readers first.
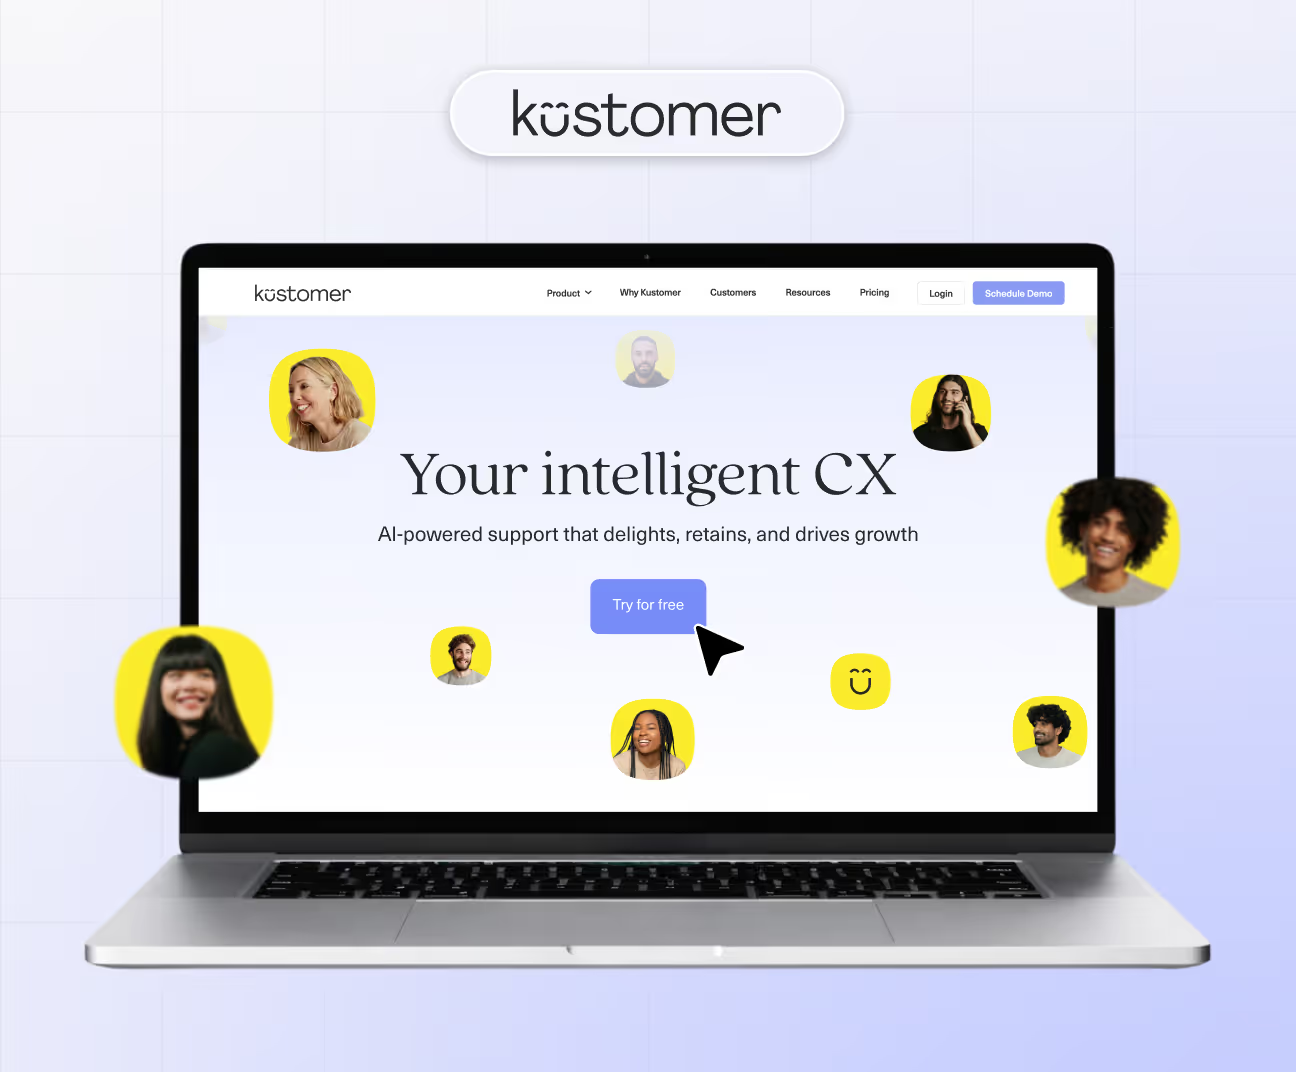


.avif)

.avif)
.avif)
.avif)

