
.svg)

The Complete Guide to Creating A Memorable Facebook Event

A Facebook Event is a built-in marketing tool that lives right where your audience already scrolls, chats, and clicks. It lets you turn a date on the calendar into a full-blown experience, with space for visuals, updates, reminders, and community interaction. Whether you're hosting in-person or online, it's one of the easiest and most effective ways to rally interest and attendance.
Why does it matter? Because visibility equals engagement. A well-created Facebook Event boosts discoverability, keeps your event top-of-mind with automated reminders, and makes it easy for attendees to share the news with others.
In this article, we’ll walk you through how to create Facebook Events that are memorable and perform well. From setting the tone with the right visuals to optimizing for engagement and reach, consider this to be your step-by-step playbook for making an impact that lasts well beyond the RSVP.
The 5 Must-Haves To Create A Facebook Event People Actually Want to Attend
Most Facebook events get ignored because they’re rushed, vague, or forgettable. If you want people to actually show up, you need to treat your event like a product launch: clear, polished, and built for engagement. To achieve this, certain essential elements must be in play. These elements are the baseline for earning attention, building credibility, and making it easy for someone to say yes.
When creating a Facebook event that converts, certain fundamental elements serve as the foundation for all your promotional efforts. Getting these basics right signals professionalism and reliability to potential attendees.
1. Write a Clear and Clickable Title
Your title needs to be attention-grabbing, descriptive, and searchable. Aim for a title that balances SEO-friendly keywords with human appeal. For example, instead of "Annual Company Gathering," try "TechCo's 2025 Innovation Summit: Shaping the Future of AI."
Your event title is your first impression. It needs to captivate and compel action while striking a balance between clarity and intrigue. Try the action word + unique value + event type formula: "Master Data Science: Interactive Workshop with Industry Leaders." Or use the exclusive descriptor + topic + format approach: "Insider's Guide to Crypto: Live Q&A with Industry Experts."
Employing brand positioning strategies helps your event stand out from the crowd. Test your titles by asking, “Would I stop scrolling for this?” Ensure your title sets the right expectations, and that your event meets them. Nothing damages trust more than a spectacular headline followed by a forgettable experience.
2. Cover the When and Where (Without Making People Hunt)
Include the day of the week, date, start time, and end time. For multi-day events, clearly state the whole duration. Nothing frustrates potential attendees more than having to hunt for basic timing information.
For physical events, include the venue name, address, and any relevant parking or transportation details. For virtual events, specify the platform and how attendees will access it. Vague location information makes even the most exciting event seem disorganized.
3. Write a Description That Sells the Experience
Your event description should include a brief overview of what attendees can expect, key speakers or highlights, the value proposition, any special features, and ticket information. This is where you sell the experience, not just the logistics.
Open with a compelling statement or question that communicates the value of attending. Make them feel what they’ll miss out on if they don’t join. Highlight standout features, world-class speakers, interactive sessions, and exclusive takeaways, and use formatting to keep the content scannable, especially for mobile users.
Let your brand’s personality come through. If you’re quirky, lean into it. If you’re buttoned-up and sleek, reflect that. Create urgency without being pushy: “Early bird tickets available until Friday” is far more effective than all-caps hype. End with a clear next step, so your audience knows what to do and why they shouldn’t wait.
4. Choose the Right Privacy Settings
Determine whether your event should be public, private, or invite-only, taking into account your goals and target audience. Each option creates a distinct perception and attracts a different type of attendee.
The technical aspects of your Facebook event significantly affect its discoverability and reach. Public events are discoverable by anyone on Facebook and can be shared widely. Private events are only visible to guests, creating a sense of exclusivity. Select options based on your event's goals and target audience.
5. Optimize Setup for Discoverability and Conversion
Select the most specific categories that fit your event to improve discoverability. Facebook's algorithm uses categories to suggest relevant events to users. Update categories if your event evolves during the planning process.
Use Facebook's recognized venue locations when possible to improve discoverability in location-based searches. This also provides attendees with directions and additional venue information, eliminating the need for extra effort on your part.
Partner with complementary brands or influencers as co-hosts to expand your event's reach and audience. This can significantly increase visibility to new audiences and add credibility to your event through association. Avoiding common branding mistakes is crucial during your event setup to maintain professionalism and trust.
If selling tickets, integrate with Facebook's ticketing partners for a seamless purchase experience. This reduces friction in the conversion process, making it easier for people to commit to attending.
Why Smart Design Makes or Breaks Your Facebook Event
To be honest, poor design doesn't just make your event look unprofessional, it actively convinces people your event isn't worth their time before they even read your description. Every visual choice, from your cover photo to promotional graphics, either builds credibility and excitement or undermines it, and there's no middle ground on a platform where people make split-second decisions. When your design elements work seamlessly with your messaging, they create an experience that transforms casual scrollers into committed attendees.
Make Your Cover Photo Do the Work
Your event's cover photo is often the first visual element people see. To maximize its impact, use the optimal size of 1920 x 1005 pixels with a 16:9 aspect ratio to ensure your image appears crisp on all devices.
Select eye-catching imagery that reflects the tone and purpose of your event rather than generic stock photos. To make your visuals as impactful as possible, consider principles from strategic poster ad design.
Boring visuals = boring event (at least that's what people will assume). Keep the text on the cover image minimal, focusing on essential information such as the event title, date, and location.
Use contrasting colors for text overlays to ensure legibility, especially on mobile devices where most Facebook browsing happens. Consistently integrate your brand's logo, color palette, and fonts to reinforce brand identity and build trust. Utilizing elements like patterns can transform your brand identity. Your visual identity should be as recognizable as your best friend's laugh!
Create Graphic Graphics That Tell Your Story And Build Trust
Beyond the cover photo, develop a suite of visual content that supports your promotional strategy throughout the event timeline. Design graphics that work across different promotional contexts, from Facebook feeds to email campaigns and other social platforms.
Maintain visual consistency with your written voice, whether it's playful, professional, or edgy. Utilizing tools and techniques can help you elevate your brand visually. If your copy is fun and irreverent but your graphics look corporate and stuffy, you're sending mixed signals that confuse potential attendees.
Use graphics to amplify key messages without overwhelming your written content. Consider the power of typography in conveying your brand message. Create visuals that highlight speaker quotes, showcase event highlights, or present key statistics related to your event's theme.
Integrate elements of brand iconography to enhance recognition and appeal. Consider adopting creative approaches to your event design to make a lasting impression and stand out from the crowd.
Consider creating a series of countdown graphics to build anticipation as the event date approaches. Nothing builds excitement quite like seeing "Only 3 days left!" paired with an enticing image of what awaits attendees.
Partner With Design Professionals Who Actually Get Events
Contrary to what you might think, you don't have to figure it out your design solo. Professional designers who understand event marketing know exactly how to translate your vision into visuals that stop the scroll and start conversations, plus they handle all the technical requirements like file sizes and platform-specific dimensions that can make or break how your visuals appear.
The right design partner doesn't just make pretty pictures; they create strategic visual experiences that guide people from curiosity to commitment while you focus on what you do best. Whether you need a complete visual identity for your event or just want to elevate specific pieces, partnering with designers who specialize in event marketing can transform your promotional materials from forgettable to unforgettable.
How To Make Your Facebook Event Buzz Before, During, and After
Most Facebook events die a quiet death with zero engagement and empty seats, while others generate the kind of buzz that makes people genuinely excited to attend. The difference isn't budget or connections, it's treating your event page like the strategic marketing tool it actually is, not just a digital flyer. Your Facebook event becomes your first impression, ongoing conversation starter, and relationship-building platform that transforms casual browsers into committed attendees.
Know What To Say and When To Say It
A well-planned promotional timeline can make the difference between a packed venue and empty seats. Start 3-6 months before the event by creating your Facebook event page with preliminary information. Begin sharing teaser content to build awareness and launch "Save the Date" campaigns to generate early interest.
Two to three months before, increase posting frequency with more detailed event information. Implement early-bird ticket promotions and start engaging with your community through Q&A sessions or polls to gauge interest and gather feedback.
One month before, intensify your messaging with a sense of urgency. Share the finalized agenda and highlight key attractions. Launch retargeting campaigns for users who've shown interest but haven't registered yet.
Two weeks before, focus on last-minute registrations with countdown posts. Share practical information about the event like parking, what to bring, and other logistics. Leverage testimonials from past attendees to build trust and excitement.
During the event, post real-time updates and highlights. Encourage attendees to share their experiences using a specific hashtag. Use Facebook Live to broadcast key moments for those who couldn't attend.
After the event, share highlights and thank attendees. Collect feedback through polls or surveys and begin nurturing the community for future events. This post-event engagement helps maintain momentum and build a loyal following.
Build Recognition That Sticks Through Smart Messaging
Maintaining visual and verbal consistency throughout your promotional period is crucial for building recognition and trust. Develop a visual theme with a cohesive identity that can be adapted across all promotional materials, including a specific color palette, font choices, and graphic elements. Understanding the impact of strategic branding changes can help you maintain consistency.
Establish main themes or messages about your event. Rotate through these themes to maintain consistency while avoiding repetition that could bore your audience. Mix up your content types to keep things interesting—alternate between text posts, images, videos, and interactive content.
Encourage attendees from previous events or early registrants to share their experiences, adding authenticity to your promotion. People trust peer recommendations more than branded messages, so leverage this powerful form of social proof.
Strategically unveil new details about speakers, activities, or special features throughout your timeline to maintain interest. Think of it as a slow, tantalizing reveal that keeps people coming back for more! Develop a unique event hashtag and use it consistently across all promotions, encouraging your audience to use it as well.
Read the Room and Pivot When You Need To
Monitor engagement metrics throughout your promotional period and be prepared to adjust your approach based on what resonates with your audience. Pay attention to which posts generate the most likes, comments, shares, and click-throughs.
If certain content types or messages perform exceptionally well, create more similar content. Conversely, if some approaches fall flat, don't be afraid to pivot. This flexible approach ensures that your promotional efforts remain effective, rather than adhering to a rigid plan that isn't working.
Utilize Facebook's Event Insights to track response rates and attendance commitments. These metrics provide valuable insights into your audience's interests and behaviors, enabling you to refine your messaging for maximum impact.
Tips To Help You Stop Begging for Likes and Start Earning Loyalty
Authentic engagement isn't about tricks, giveaways, or manipulating the algorithm; it's about creating content so genuinely valuable that people can't help but interact with it. When you focus on delivering real value instead of chasing vanity metrics, something powerful happens: your audience stops treating you like just another brand and starts seeing you as a trusted resource they actually want to hear from. The strategies that work best don't feel like strategies at all, they feel like natural conversations between people who share genuine interests and goals.
1. Create Content Worth Sharing Without Asking
Focus on genuine value over explicit sharing requests. Solve real problems, create visually appealing content, offer exclusive behind-the-scenes insights, use compelling storytelling from past attendees, and provide practical resources. When content truly helps your audience, natural sharing follows.
2. Foster Real Connections That Go Beyond the Event Page
Build community through live Q&As, candid behind-the-scenes content, interactive polls for decision-making, user-generated content opportunities, and personalized responses. Make followers feel like insiders and stakeholders by showing the real people behind your event and actively engaging with comments.
3. Keep the Energy Alive Long After the Last Guest Leaves
Maintain post-event momentum with highlight reels, surveys, discussion threads, and personalized thank-you messages. Create recap content showcasing attendee participation while teasing future events. This converts non-attendees for next time and strengthens relationships for ongoing collaboration.
Turn Your Next Facebook Event Into the One Everyone's Talking About
Creating impactful Facebook events requires a strategic blend of compelling content, thoughtful design, and active engagement. The most successful events seamlessly blend professional presentation with authentic connection, creating experiences that begin the moment someone discovers your event online and continue long after they leave.
When you approach event creation as both a writing and design challenge, everything shifts. You're not just announcing details, you're creating complete experiences that begin the moment someone sees your event in their feed and continue long after the last attendee heads home. Your next event could become a defining moment for your brand, creating buzz, engagement, and lasting connections.
Don't let boring visuals convince people your event isn't worth their time, NoBoring Design creates scroll-stopping Facebook event graphics and social media assets that turn casual browsers into committed attendees. Partner with us today!
Key Takeaways
- Successful Facebook events combine compelling copy with strategic design elements to create a complete experience. Together, they guide people from curiosity to commitment.
- Timing your promotional content correctly helps build momentum and maintain interest. Get the timing wrong, and even great events can struggle to fill seats.
- Authentic engagement strategies drive organic sharing and community building. Real value creates natural advocates who share because they want to, not because you asked.
- Visual consistency across all event materials strengthens recognition and trust. Cohesive branding passes the crucial first-impression test that determines whether people take you seriously.

Platforms like Canva and Kittl have made it easier than ever to create stunning visuals, eliminating the need for complex software like Adobe Creative Suite. Visual content is now the core of marketing, branding, and communication. Whether you're running a small shop or handling design for a large corporation, choosing between Kittl and Canva can significantly impact your brand's visual identity.
Each tool offers unique strengths. Canva stands out with its user-friendly interface and vast library of templates, ideal for quick designs. Kittl excels in typography and illustrations, attracting professionals who want to create visually striking, custom content.
Do you find yourself reaching for simplicity or seeking creative depth? Our article will help you discover the strengths of both platforms and help you decide which one best suits your creative needs.
Kittl vs Canva: 2 Different Approaches to Design
Canva Overview
Canva has transformed how businesses create visual content, offering drag-and-drop simplicity that works for both complete novices and marketing wizards alike. The platform boasts an impressive library of design templates covering everything from scroll-stopping Instagram posts to presentation decks that keep people awake.
But what is it that makes Canva truly shine? Its mind-boggling collection of over 100 million stock photos, videos, and design elements gives creative minds endless possibilities. The platform doesn't stop there; it packs robust photo and video editing capabilities, with clever AI tools that banish backgrounds and transform content with digital magic.
For businesses serious about their image, the Brand Kit feature keeps your visual identity consistent and polished across all materials. Teams can collaborate in real-time, making it a dream for remote creative partnerships.
Kittl Overview
Kittl has carved out its unique space by mastering advanced typography and illustration tools. This platform attracts designers hungry to create distinctive, often vintage-inspired visuals that stand out from the crowd.
What sets Kittl apart? Its advanced text customization capabilities offer a playground of effects for crafting eye-catching logos, signage, and merchandise designs that demand attention. For inspiration on the best tech logos, Kittl can enhance your creations.
The platform delivers unique, hand-drawn style illustrations that help small businesses develop brand identities with genuine character and soul. For tech companies looking to strengthen their branding and marketing contexts, Kittl offers the tools to create visuals that resonate.
Kittl doesn't mess around with blend mode options either, giving creative minds fine-tuned control over image compositing and effects. This makes it a powerhouse for creating product packaging, posters, and branding materials with sophisticated visual punch. Designers seeking a unique visual approach will find Kittl's illustration capabilities especially appealing.
These platforms have different superpowers. Canva gives you an all-purpose, friendly solution for a wide range of design challenges. Kittl focuses on specialized tools for typography and illustration-heavy designs that make people stop and stare. Your perfect match depends on what you're creating and how much you want to customize your visual voice.
Kittle vs Canva Compared: 5 Key Differences
1. User Experience and Interface
Canva proudly wears its user-friendly crown. Beginners and pros alike can dive in without drowning, thanks to intuitive drag-and-drop functionality that just makes sense. Canva's simplicity gives you a serious edge when you need to conjure designs quickly without endless training sessions.
Kittl also aims for accessibility but brings a steeper learning curve to the table. Its modern, eye-catching interface takes more time to tame. This extra complexity is the trade-off for Kittl's advanced typography and design magic, a worthwhile investment for creative minds craving more control over their visual voice.
2. Design Capabilities and Toolsets
Canva offers a treasure chest of templates and design elements. With more than 100 million stock images, videos, and graphics at your fingertips, it's like having a design department on demand. Its AI features, including Magic Design and background removal, help you craft polished designs without the usual creative headaches.
Kittl shines in specialized creative areas, particularly typography and illustration. Kittl delivers far more advanced text effects compared to Canva, with extensive options to transform text into distinctive visual statements. This makes Kittl the go-to choice for projects demanding unique branding or artistic flair that refuses to blend in.
3. Pricing and Value Proposition
Canva uses a freemium model, with paid plans starting at $12.99 per month for Pro and $100 per user per year for Teams. The pricing grows with your business ambitions, accommodating everyone from solo creators to sprawling organizations. Its value comes from uniting design, collaboration, and publishing tools in one seamless ecosystem.
Kittl keeps its pricing competitive, with plans starting around $10 per month for Pro users. While it offers fewer features overall than Canva, Kittl's actual value lies in its specialized tools, particularly for creative minds focusing on standout typography and illustrations for merchandise or branding that demands attention.
4. Integration with Other Business Tools
Canva excels here with over 500 app integrations. This extensive connectivity creates smooth workflows with popular platforms like Google Drive, Dropbox, Slack, and social media channels. Users can automate tasks and develop custom workflows through Zapier, making Canva a versatile player in virtually any business setting.
Kittl, being newer to the party, has more limited integration capabilities. This might not matter for users focused primarily on creating stunning designs, but it affects those who need to integrate their work into broader marketing or collaborative workflows.
5. Collaboration and Team Features
Canva offers stellar collaborative features, including real-time editing, commenting, and version history that preserves your creative journey. Its Brand Kit helps organizations maintain visual consistency, crucial for teams or agencies juggling multiple client identities. Canva's team management capabilities make it ideal for businesses needing coordinated design efforts.
Kittl provides more basic collaboration tools. While it allows sharing and some teamwork, it lacks the robust team management and workflow controls that Canva offers. This makes Kittl better suited for individual creative spirits or smaller teams with simpler collaboration needs.
Your perfect match depends on your creative mission. Canva offers a comprehensive and friendly platform with extensive integration and collaboration features, making it ideal for diverse teams and general design needs. Kittl, though more focused in scope, offers advanced typography and illustration tools for creators seeking unique, high-quality designs that won't be forgotten.
How to Choose Between Kittl and Canva: Business Use Cases
Small Business Applications
Small businesses often need versatile design solutions that don't require extensive training. Canva shines here with its intuitive interface and a wide range of templates that cover everything from social media posts to business cards. The platform's ease of use means even the busiest entrepreneur can create professional-looking materials without hiring a designer.
Canva's Brand Kit feature helps businesses create a branding kit to maintain consistent visuals across all touchpoints, a must for businesses building recognition. The extensive template library covers virtually every small business need, from menu designs to promotional materials for seasonal sales.
For small businesses focusing on merchandise or distinctive branding, Kittl offers specialized advantages. Its advanced typography tools create memorable logos and packaging designs that stand out in crowded marketplaces. Businesses selling custom products through platforms like Etsy or print-on-demand services will appreciate Kittl's ability to create unique, illustration-rich designs that catch customer attention.
Kittl's vector export capabilities ensure designs maintain quality across different applications, particularly valuable for businesses needing both digital assets and high-quality print materials. The platform's vintage-inspired effects add character to branding, helping small businesses develop distinctive visual identities.
Marketing Team Requirements
Marketing teams juggle numerous projects with tight deadlines, making Canva's streamlined workflow and collaboration features particularly valuable. Teams can work simultaneously on campaigns, with changes reflected in real-time, eliminating version control headaches. The platform's social media scheduling capabilities streamline content distribution, saving precious time in busy marketing departments.
Canva's extensive integration options connect smoothly with other marketing tools, creating efficient workflows from design to deployment. The content planner helps teams coordinate visual strategies across platforms, maintaining consistent messaging while adapting designs for different channels.
Marketing teams focusing on distinctive brand development might prefer Kittl's specialized capabilities. The platform's advanced effects and typography tools create scroll-stopping visuals that break through digital noise. Teams crafting distinctive visual identities will appreciate Kittl's ability to create custom illustrations and unique text treatments that competitors can't easily replicate.
Kittl's detailed control over design elements allows marketing professionals to craft visuals with precision and creative flair. The platform's blend modes and advanced layering create sophisticated effects that elevate marketing materials beyond template-based designs.
Creative Professional Considerations
Professional designers and creative agencies often need tools that strike a balance between efficiency and creative control. Canva offers time-saving templates that allow customization while maintaining creative standards. The platform's collaboration features facilitate client feedback and approval processes, streamlining project workflows.
Canva's extensive asset library provides quick solutions when timelines get tight. The ability to save brand elements, color palettes, and custom templates helps professionals maintain consistency across client projects while working efficiently.
Creative professionals seeking distinctive capabilities often gravitate toward Kittl's specialized toolset. The platform's advanced typography effects create striking custom lettering without requiring manual vector work. Illustrators and logo designers appreciate Kittl's ability to create unique, vintage-inspired graphics that stand apart from generic design trends. The focus on custom illustrations allows businesses to deliver distinctive work that showcases their unique artistic voice.
Kittl's professional export options, including vector formats and transparent backgrounds, ensure designs maintain quality across applications. The platform's detailed control over textures and effects helps creative professionals deliver distinctive work that showcases their unique artistic voice.
Kittle Vs Canva: Essential Factors to Consider When Choosing Your Design Platform
Your Team Size and Collaboration Needs
The size of your design team has a significant impact on platform selection. Larger teams with multiple contributors benefit from Canva's robust collaboration features, including real-time editing, commenting, and role-based permissions. Teams spanning different departments appreciate Canva's intuitive interface, which allows non-designers to contribute without extensive training.
Smaller teams or solo designers might find Kittl's more specialized tools better suited to their focused needs. While offering fewer collaboration features, Kittl provides deep creative capabilities that individual designers or boutique agencies can leverage to create distinctive work.
Your Design Output Requirements
Consider the types of designs you create most frequently. Teams producing high volumes of social media content, presentations, and marketing materials benefit from Canva's extensive template library and content scheduling features. The platform's variety of pre-sized templates for different platforms saves valuable time during content creation.
Projects requiring distinctive typography, custom illustrations, or vintage-inspired aesthetics often shine when created with Kittl. The platform's specialized effects add a unique character to logos, packaging, and branding projects where standing out matters more than speed.
Your Team’s Technical Skill Level
Assess your team's technical abilities honestly. Canva's intuitive drag-and-drop interface requires minimal training, making it accessible to everyone from executive assistants to marketing managers. The platform's guided templates provide design guardrails that help non-designers create content that looks professional.
Kittl's more specialized tools offer creative rewards but demand greater investment in learning the platform. Teams with design experience or a willingness to develop new skills will appreciate Kittl's advanced capabilities that create distinctive visual results worth the learning curve.
Integration Requirements
Examine how your design tool needs to connect with other business systems. Canva's extensive integration options with tools like Slack, Dropbox, social media platforms, and email marketing services create seamless workflows. The ability to automate design processes through Zapier connections extends Canva's utility in complex business environments.
Teams working primarily within their design department with fewer integration needs might find Kittl's more focused approach sufficient. Consider whether your workflows require extensive connections with other business tools or if your design process exists somewhat independently.
Budget Constraints
Financial considerations naturally influence platform selection. Canva's free tier offers substantial functionality for teams with limited budgets, with paid plans scaling as needs grow. The platform's all-in-one approach potentially replaces multiple design tools, creating cost efficiencies for organizations.
Kittl's competitive pricing makes its specialized capabilities accessible to businesses investing in distinctive visual identities. Consider whether your design needs justify premium features or if free versions might suffice for your current requirements.
Kittl or Canva? Choosing the Right Platform for Your Creative Vision
Choosing between Kittl and Canva isn't about finding a clear winner; it's about finding the platform that best fits your creative needs. Canva excels with its user-friendly design tools, templates, and collaboration features, making it ideal for fast, accessible design.
Kittl shines with its advanced typography and unique illustration styles, perfect for creating standout, personalized visuals. Test both platforms to see which one aligns with your goals and workflow.
Ready to transform your design process and create visuals that captivate your audience? At NoBoringDesign, we create brand experiences that captivate and resonate, building emotional connections that encourage repeat engagement. Reach out today to learn more!
Key Takeaways
- Canva excels in user-friendly design with robust templates and collaboration features.
- Kittl specializes in advanced typography and illustration tools for distinctive branding.
- Your ideal platform depends on your specific creative needs, team size, and design goals.
- Both offer free versions to test drive before committing to premium features.
FAQs
Q: What makes Canva a better choice for beginners?
A: Canva’s intuitive drag-and-drop interface makes it ideal for beginners. With its vast library of templates, fonts, and design elements, users can create professional designs without prior experience. Canva’s simplicity ensures that you can quickly generate high-quality visuals for social media, presentations, and marketing materials, with a minimal learning curve. Additionally, its AI-powered features, such as Magic Design and background removal, offer a convenient way to enhance designs effortlessly, making it a top choice for those starting their design journey.
Q: How does Kittl cater to professional designers?
A: Kittl offers advanced tools for typography and illustration that appeal to professional designers. It allows fine control over text effects, creating unique designs that stand out. Kittl’s platform excels in crafting vintage-inspired visuals and custom illustrations, ideal for businesses seeking distinctive branding. Its blend mode options and detailed image compositing give designers the creative depth they need for product packaging, logos, and more, offering an unparalleled level of customization for those focused on high-end, artistic designs.
Q: Which platform is more suitable for team collaboration: Canva or Kittl?
A: Canva is the clear winner for team collaboration. Its real-time editing, commenting, and version control features enable seamless teamwork, allowing multiple users to work on the same project simultaneously. Canva’s Brand Kit ensures consistency across all designs, while integration with tools like Google Drive and Slack enhances its collaborative capabilities. Kittl, on the other hand, has more limited team features, making it better suited for solo designers or small teams with simpler collaboration needs.
Q: Can Kittl’s designs be used for branding?
A: Yes, Kittl is an excellent choice for branding, particularly for businesses seeking unique and memorable visuals. Its advanced typography tools allow for the creation of distinctive logos, packaging, and promotional materials that reflect a brand's personality. Kittl’s hand-drawn illustrations and vintage-style effects make it perfect for businesses wanting to create a powerful visual identity that stands out. Whether for custom products or brand storytelling, Kittl offers the creative freedom needed to build a compelling brand image.

Illustration pictures transform ordinary branding into captivating visual narratives that slice through market noise like a hot knife through butter. Unlike conventional approaches fixated on logos and typography, custom illustrations craft a distinctive visual vocabulary that speaks volumes about who you are.
These artistic allies don't just decorate your brand, they bring it to life, conveying complex values and emotions more powerfully than words can alone.
Ready to fully leverage the power of illustrations? In this article, you’ll learn how illustration images can elevate your brand, explore various styles, and learn how to incorporate them into your branding strategy for lasting impact.
Core Benefits of Illustration Pictures in Branding Success
Immediate Emotional Connection
Your brain processes images faster than text; it's simply how we're wired. Illustration images capitalize on this biological fact, sparking instant emotional connections in branding before the audience has read a single word.
This immediate emotional engagement creates a powerful first impression that text-only branding cannot achieve. The visual language you develop through custom illustrations speaks directly to the heart, bypassing logical barriers and creating authentic bonds with viewers.
Enhanced Brand Recognition
Consistent visual elements dramatically boost recognition. Illustration pictures provide unique visual cues that become firmly associated with your brand in consumers' minds. When these visuals appear consistently across touchpoints, they create a cumulative effect that strengthens brand identity with each exposure.
Complex Concept Simplification
Illustrations excel at making the complicated simple, a superpower for brands in technical industries. By translating intricate ideas into visually appealing graphics, companies make their products more accessible to broader audiences, effectively transforming marketing with design.
Abstract concepts become tangible, digestible stories that audiences can quickly grasp and remember. This visual translation removes barriers to understanding, opening doors to new customer segments that might otherwise be intimidated by complex products or services.
Authentic Personality Expression
Illustration images reveal a brand's personality in ways that color palettes and fonts simply cannot, adding depth and emotion to a visual identity. They communicate your brand's character, values, and voice without saying a word, much like a memorable logo design.
Whether playful, sophisticated, cutting-edge, or traditional, illustrations convey these qualities instantly and memorably. This authenticity resonates with audiences seeking genuine connections, creating trustworthy relationships that text alone struggles to establish.
Understanding Types of Illustration Pictures for Branding Success
Hand-Drawn Illustrations
Hand-drawn illustrations infuse your brand with warmth and humanity that digital methods struggle to replicate. The organic lines and visible brushstrokes convey craftsmanship and approachability, signaling creativity and personal attention. These "imperfections" aren't flaws; they're features that create emotional rapport with audiences.
Brands use hand-drawn styles particularly well when aiming to appear more personal or artisanal, fostering connections that feel genuine rather than corporate.
Digital Illustrations
Digital illustrations deliver clean vectors with vibrant colors and gradients, positioning brands as modern and tech-savvy. This style offers unlimited scalability and animation potential, making it perfect for digitally native audiences and interactive experiences.
The precision and flexibility allow brands to create complex, detailed visuals that adapt seamlessly across digital platforms, utilizing innovative illustration methods. Digital illustrations excel at developing contemporary, polished aesthetics while maintaining the warmth and personality that photography sometimes lacks.
Vector Graphics
Vector graphics feature mathematically precise shapes, ensuring crisp and scalable imagery across all formats. This style communicates professionalism, clarity, and strategic thinking, making it effective for brands to simplify data-heavy or technical content. The clean lines and geometric precision excel at breaking down complex ideas into digestible visual elements. Tech firms commonly use vector diagrams to explain intricate features, making products more understandable while reinforcing an innovative, user-focused image.
Each style creates distinct impressions. Hand-drawn illustrations foster emotional connections and authenticity. Digital illustrations offer a modern appeal and versatility, while vector graphics provide clarity and a professional look.
When selecting a style for your branding, consider your core values, target audience, and key messages. The right illustration style becomes a powerful branding tool, helping you stand out and create a memorable visual identity that resonates with your specific audience.
Strategic Considerations for Using Illustrations in Branding
Brand Positioning Strategy
Map your illustration style directly to your core value propositions and vision. If sustainability drives your business, your illustrations might incorporate natural elements and earth tones that reflect this commitment.
Progressive tech companies might opt for clean, futuristic styles, while heritage brands could embrace traditional techniques. This alignment ensures every visual touchpoint reinforces your market positioning and tells a consistent story about who you are and what you stand for.
Brand Alignment Framework
Develop clear guidelines ensuring all brand elements communicate the same message across platforms. This framework should define how illustrations interact with other brand components, creating a cohesive system rather than disconnected pieces.
Consider conducting brand alignment workshops to solidify your visual identity and develop guidelines that maintain consistency without stifling creativity. This foundation prevents mixed messages that confuse consumers and dilute brand impact.
Audience Insight Application
Tailor your illustration style to engage your specific target audience through demographic analysis and preference research. Social media insights provide valuable data about which visual styles generate the strongest engagement with your particular followers. Understanding these preferences helps create illustration pictures that not only capture attention but forge emotional connections. Different demographics respond to various visual cues; knowing these patterns guides the development of effective illustration strategies.
Platform Adaptation Techniques
While maintaining consistency, adapt your illustration pictures for different platforms without compromising your core identity. Develop platform-specific templates that preserve key visual elements while optimizing for each medium's unique requirements, such as creative email designs for businesses.
Create responsive illustration guidelines that account for various formats and viewing contexts. Establish clear rules for simplifying complex illustrations for smaller formats without losing essential brand markers. This ensures your brand remains recognizable whether on a billboard or a smartphone screen.
Emotional Resonance Mapping
Create a matrix that matches illustration styles to desired audience responses, guiding design choices to evoke specific emotions aligned with your brand goals. Whimsical illustrations might evoke joy and approachability, while bold, geometric designs could convey strength and reliability. Detailed, realistic illustrations might communicate expertise and precision.
By strategically choosing styles aligned with emotional goals, you create a more impactful visual identity that triggers the right feelings at the right moments in the customer journey.
Practical Steps for Integrating Illustration Pictures for Branding Success
Comprehensive Brand Audit
Begin by cataloging your existing visual assets and identifying narrative gaps where illustrations could enhance your brand story. Look critically at current visuals and assess whether they effectively communicate your values and personality. This process helps understand where illustration pictures can strengthen your brand without conflicting with established elements.
Examine competitor visuals to identify opportunities for differentiation through illustration style. This foundational step ensures your illustration strategy builds upon existing strengths rather than creating visual disconnects.
Strategic Style Selection
Create mood boards that reflect your brand's personality and evaluate them against your values and market positioning. Consider hand-drawn, digital, and vector styles, and assess which one best aligns with your brand essence. Explore color palettes that complement existing brand guidelines while allowing illustrations to shine.
Assess various levels of detail and complexity based on your typical communication needs and audience preferences. This deliberate selection process ensures your chosen style resonates with target audiences while differentiating you from competitors.
Detailed Guidelines Development
Document clear rules for your illustration system to ensure consistency regardless of who creates the artwork. Specify color palettes dedicated to illustrations, line weights, and styles that maintain visual cohesion, and character design rules if your brand features recurring figures. Establish usage guidelines for different contexts and create comprehensive dos and don'ts to maintain brand integrity.
These guidelines serve as a reference for designers, marketers, and external partners, ensuring visual consistency across all brand expressions.
Asset Library Creation
Assemble core illustration elements that form the building blocks of your visual language. Develop recurring characters or mascots that can appear across various communications, background elements, and textures that create consistent environments, and iconography styled to match your illustration approach.
Create templates for everyday use cases, such as creative brochure designs, that speed up implementation while maintaining quality. A well-organized asset library streamlines workflows, maintains consistency, and improves production efficiency when creating new illustration pictures.
Systematic Platform Implementation
Adapt the illustration assets methodically for each platform where your brand appears. Document technical specifications for web, mobile, print, and environmental applications to ensure quality across media. Create guidelines for animation if illustrations will appear in motion, and establish hierarchy rules for when multiple illustrations appear together.
Address accessibility considerations to ensure illustrations communicate effectively to all audiences. This systematic approach prevents fragmented visual experiences as customers interact with your brand across touchpoints.
Continuous Team Enablement
Equip your team to maintain consistency through workshops that train them on illustration guidelines and proper implementation. Share templates and resources that simplify adequate execution, and establish quarterly audits to assess compliance and make adjustments.
Create feedback channels that allow team members to suggest improvements while maintaining system integrity. This ongoing enablement ensures your illustration strategy remains consistent over time while adapting to new business needs and market conditions.
Common Mistakes to Avoid in Illustration for Branding
Visual Overcomplication
One frequent error is creating excessively detailed or busy illustrations that distract from your core message. Remember that brand illustrations exist primarily to communicate effectively, not showcase artistic virtuosity. Overly complex artwork can confuse audiences and dilute your message.
Keep illustration pictures focused, clear, and purpose-driven, with every element serving your communication goals. Simplicity often creates more impact than intricacy, allowing key brand messages to shine through without visual noise competing for attention.
Generic Stock Usage
While they are temptingly convenient, stock illustrations fail to capture your brand's unique essence, making you blend into the background rather than stand out. Generic visuals create generic impressions, undermining differentiation efforts. Invest in custom illustration pictures that truly reflect your specific brand personality and values.
Original visuals create proprietary brand assets that competitors can't replicate, building distinctive recognition that stock images can't achieve. The upfront investment pays dividends in the form of more substantial brand equity and a deeper connection with the audience.
Inconsistent Implementation
Misaligned visuals across different platforms can create confusion and dilute the brand's impact. When illustration styles vary between your website, social media, and marketing materials, you miss opportunities to build cumulative recognition.
Ensure your illustration style is consistent at every touchpoint, reinforcing your brand identity with each exposure. This consistency doesn't mean monotony; it means maintaining a recognizable visual language while adapting to each medium appropriately. Consistency in branding creates the repetition necessary for recognition and trust to develop.
Static Evolution Planning
Your brand's visual identity should evolve to stay relevant without losing recognition. Outdated illustration pictures can make your brand appear stagnant or disconnected from current culture. Develop a strategy for periodically refreshing your illustration style while maintaining core elements that ensure continuity.
This balance allows your brand to adapt to changing design trends and market conditions without having to start from scratch each time. Plan for evolution from the beginning, building flexibility into your illustration system rather than creating rigid structures that resist necessary changes.
Resource Underestimation
Building and maintaining a robust illustration system requires ongoing investment that many brands underestimate. Insufficient resources lead to inconsistent or poorly executed visuals that damage the brand perception rather than enhancing it. Allocate the appropriate time, budget, and talent to ensure your illustration strategy remains sustainable and effective in the long term.
Consider whether you need in-house capabilities or external partnerships to maintain quality and consistency. Realistic resource planning prevents illustration systems from deteriorating over time through neglect or expedient compromises.
Measurement Negligence
Without proper tracking and testing, you cannot accurately gauge the true impact of your illustration strategy or optimize it over time. Set up systems to measure key performance indicators related to illustration effectiveness, including engagement rates, brand recall, and conversion impacts.
Regular A/B testing helps refine your approach based on actual audience response rather than assumptions. This data-driven approach ensures your illustration investment delivers maximum returns and evolves based on performance insights rather than subjective opinions or passing trends.
The Impact of Illustration Pictures for Branding Success
Illustration images have proven themselves as powerful brand differentiators, blending storytelling, emotional connection, and measurable results into a compelling visual strategy. These custom visuals build distinctive identities, simplify complex ideas, and forge deeper connections with customers in ways that traditional branding elements simply cannot match.
The most successful illustration systems share key characteristics: authentic alignment with brand values, consistent application across channels, strategic placement in customer journeys, and data-informed evolution. When thoughtfully implemented, these visual systems become valuable brand assets that communicate and connect in increasingly crowded markets.
Ready to transform your brand through the power of custom illustrations? At NoBoringDesign, we design brand experiences that go beyond grabbing attention; we build lasting emotional bonds that keep your customers engaged. Schedule a meeting with us to discover how!
Key Takeaways
- Custom illustrations create distinctive brand identities that differentiate you from competitors.
- Visual storytelling communicates complex values and emotions more effectively than text alone.
- Illustration pictures work across all platforms, maintaining consistency at every touchpoint.
- Strategic implementation of illustrations yields measurable improvements in engagement and conversion.
FAQs
Q: What is the definition of an illustration in branding?
A: An illustration in branding is a custom-created graphic that visually represents a brand's identity, values, or story. Unlike photography, illustrations offer a unique and creative way to connect emotionally with the audience. They help create a memorable brand identity and are used across various marketing materials to ensure consistency.
Q: What are the different illustration styles for branding?
A: Illustration styles for branding range from hand-drawn to digital and vector graphics. Hand-drawn styles convey warmth and authenticity, while digital illustrations offer a modern, tech-savvy look. Vector graphics are precise and professional, perfect for simplifying complex concepts. Choosing the right style depends on your brand’s personality and target audience.
Q: What is an illustration picture maker?
A: An illustration picture maker is a tool or software used to create custom illustrations for branding. These tools allow businesses to design unique images that align with their brand’s identity. Popular options include Adobe Illustrator, Procreate, and online platforms like Canva, which provide templates and customizable features.
Q: How do illustrations enhance brand recognition?
A: Illustrations enhance brand recognition by providing unique, memorable visuals associated with your brand. When used consistently across marketing materials, they help create a distinctive visual language. This emotional connection and visual consistency increase familiarity and trust, making your brand more recognizable and memorable to your target audience.
Q: How can illustrations help tell a brand story?
A: Illustrations can tell a brand's story by visually representing its values, mission, or journey. They allow for creative expression, simplifying complex ideas and making them more relatable. Whether through character design, narrative scenes, or symbolic imagery, illustrations help communicate a brand’s essence in a way that resonates emotionally with the audience.
Q: Can illustrations be used in all types of branding materials?
A: Yes, illustrations can be used across various branding materials, including websites, advertisements, packaging, and social media. They provide flexibility and versatility, making it easy to maintain a consistent brand identity across all platforms. Illustrations help reinforce a brand's message and tone, enhancing its overall visual appeal.

In a digital universe where your thumb is one swipe away from the next distraction, some brands don’t just catch your eye, they make you pause, engage, and remember. These aren’t just companies posting content; they’re digital storytellers, culture-makers, and conversation-starters who turn fleeting attention into lasting loyalty.
What makes these social media standouts so magnetic? Spoiler: it’s not just deep pockets or massive marketing departments. It’s their uncanny ability to blend creativity, consistency, and connection into every post. With platform-specific savvy and unforgettable brand voices, they’ve cracked the code on digital relevance.
Ready to see who’s setting the standard? Let’s discover the top 15 brands turning social media into an art form and discover what makes their strategies so effective.
1. Nike: Inspirational Storytelling That Moves
Nike dominates social media through powerful storytelling that transcends product promotion. Their approach centers on emotional connections through inspirational narratives featuring both elite athletes and everyday heroes. This strategy transforms their brand from a sportswear company into a movement celebrating human potential.
The Power of "Just Do It"
The iconic "Just Do It" campaign continues to evolve across social platforms, delivering motivational content that resonates with audiences of all athletic abilities. Nike consistently features diverse athletes and real customer stories that inspire people to take action. Their content rarely focuses directly on products, instead highlighting the emotions and achievements sports can unlock.
Community Activation Through Challenges
Nike excels at creating participatory experiences that build community through shared goals. Their running and training apps connect directly to social platforms, allowing users to share accomplishments with branded hashtags. This creates an organic stream of user-generated content while fostering a sense of belonging among Nike enthusiasts.
By focusing on authentic engagement, Nike exemplifies how brands can authentically engage with audiences and build lasting relationships.
2. Starbucks: Creating a Cultural Phenomenon
Starbucks has transformed coffee drinking from a mundane activity into a cultural experience, mainly through its strategic social media presence. Their content strategy blends product highlights with behind-the-scenes glimpses that make followers feel like valued insiders.
Seasonal Campaigns That Create Buzz
Starbucks has mastered the art of seasonal promotion, particularly with its fall campaign centered around the Pumpkin Spice Latte. Their "Leaf Raker's Society" Facebook group has grown to over 38,700 members, a community bonding over shared enthusiasm for autumn offerings. This strategy transforms product launches into cultural moments that followers eagerly anticipate and share.
Barista Storytelling
The human element remains central to Starbucks' social strategy. Regular features showcasing baristas crafting drinks or explaining sourcing practices humanize the brand while educating consumers. This approach highlights their commitment to quality while creating emotional connections that transcend transactional relationships.
3. Wendy's: Revolutionizing Brand Voice
Wendy's transformed its social media presence, and the entire fast food category, through an unexpectedly sharp and witty voice that breaks corporate communication norms. Their strategy shows that authenticity and personality trump polish and formality in building engaged online communities, highlighting the importance of a consistent brand voice.
Real-Time Engagement and Competitor "Roasts"
Wendy's fearless approach to Twitter conversations, particularly their playful "roasting" of competitors, creates entertainment value that extends far beyond their product offerings. Their quick-witted responses to trending topics and customer interactions generate massive engagement while showcasing their distinctive brand personality.
Balancing Humor with Value
While humor defines their approach, Wendy's skillfully balances witty content with practical value through limited-time offers and menu updates. This ensures followers receive tangible benefits alongside entertainment, creating multiple reasons to engage with their channels.
4. GoPro: Turning Customers into Content Creators
GoPro brilliantly leverages user-generated content as the cornerstone of its social strategy. Rather than creating ads about what their products can do, they showcase what customers create with them, building an aspirational community around adventure and exploration, much like effective web design strategies focus on user engagement.
Hashtag Strategy That Builds Archives
Through branded hashtags like #GoPro, the company collects a constant stream of customer-created content that dramatically extends their reach while providing authentic proof of their products' capabilities. The best submissions often get featured on their official channels, incentivizing more creation and participation, and creating immersive branded experiences for users.
Visual Consistency Across Platforms
Despite featuring content from countless sources, GoPro maintains a recognizable visual style across platforms. Their signature fish-eye perspective, vibrant colors, and action-focused imagery create instant brand recognition, even without a logo. This visual consistency strengthens brand recall in a crowded digital landscape.
5. Airbnb: Selling Experiences, Not Properties
Airbnb uses social media to showcase transformative travel experiences rather than merely listing properties. Their strategy positions them as enablers of authentic adventure rather than simply accommodation providers.
Host and Guest Spotlights
By featuring real host and guest stories, Airbnb creates emotional narratives around the connections its platform facilitates. These human-centered stories showcase unique properties while emphasizing the genuine relationships and cultural exchanges that make travel meaningful.
Wanderlust-Inducing Visual Content
Airbnb's carefully curated feed features stunning photography of unique properties and locations, sparking travel dreams and saving behavior. Their visual strategy focuses on immersive, experiential imagery that transports viewers momentarily to faraway destinations, creating powerful desire before any booking occurs, utilizing unique visual content.
6. Glossier: Building a Beauty Community
Glossier revolutionized beauty marketing by creating a social-first brand that is built on community participation, rather than aspirational celebrity endorsements. Their approach treats customers as active community members rather than passive consumers.
User-Generated Content as Social Proof
Glossier prominently features real customers using their products across social channels, creating authentic social proof while celebrating diverse definitions of beauty. This strategy makes their offerings seem accessible rather than intimidating, driving both trust and trial.
Consistent Visual Aesthetic
The brand maintains a distinctive millennial pink palette and minimalist aesthetic across all platforms, creating immediate recognition and a cohesive brand experience. This visual consistency helps them stand out in cluttered feeds while reinforcing their brand identity with every impression, exemplifying consistent brand messaging.
7. Dove: Purpose-Driven Content That Resonates
Dove has successfully integrated purpose into their social strategy, creating meaningful conversations around beauty standards and self-acceptance that transcend product promotion. Their approach demonstrates how brands can align branding with values, connecting with social causes authentically.
Real Beauty Campaign Evolution
Their pioneering Real Beauty campaign continues to evolve across social channels, featuring diverse, unretouched women and challenging narrow beauty ideals. By consistently championing this message for years, Dove has built credibility and emotional connections that purely product-focused brands struggle to achieve, in part by using inclusive stock imagery.
Educational Content That Empowers
Dove balances purpose messages with educational content about body care and self-confidence, providing practical value alongside inspiration. This approach ensures followers receive tangible benefits while engaging with their broader mission of redefining beauty standards.
8. Netflix: Mastering Pop Culture Relevance
Netflix maintains cultural relevance through social content that extends beyond mere promotion to become entertainment in its own right. Their strategy turns marketing into shareable moments that audiences actively seek out, leveraging engaging visual content for maximum impact.
Meme-Driven Engagement
Netflix creates and shares memes using content from its shows, making its marketing as entertaining as its programming. This approach generates massive organic sharing while keeping their content library top of mind through playful references.
Cross-Promotion Between Shows
Their social strategy cleverly connects different shows through character comparisons and thematic links, encouraging viewers to explore more of their catalog. This cross-promotion feels natural rather than pushy, presented as recommendations from a knowledgeable friend rather than sales pitches.
Their ability to stay current and adapt demonstrates the importance of evolving social strategies in maintaining audience engagement.
9. Apple: Minimalist Visual Strategy
Apple's social presence reflects its product design philosophy: clean, minimal, and focused. Their restrained approach stands out precisely because it avoids common social media tactics in favor of quality over quantity.
Product as Hero
Apple's social content places their products center stage with minimal distractions, highlighting design and functionality through clean visuals. Their use of minimalist typography reinforces their brand identity through typography, complementing their clean visual strategy.
User Creativity Showcase
Through campaigns like #ShotOniPhone, Apple highlights user creativity while simultaneously demonstrating product capabilities. This approach provides social proof through authentic user experiences while building a community around creative expression.
10. So Worth Loving: Authentic Community Engagement
Despite being on a smaller scale than global brands, clothing company So Worth Loving demonstrates that a genuine connection trumps budget when building social communities. Their approach proves that responsiveness and authenticity create more meaningful engagement than polish or production value.
Personal Responses Create Loyalty
So Worth Loving replies to almost every comment, creating genuine two-way relationships with followers. This level of engagement transforms casual browsers into passionate advocates who feel a personal connection to the brand and its mission.
Mission-Driven Content Balance
The brand skillfully balances self-worth messaging with product promotion, ensuring commercial content feels like a natural extension of their values rather than disconnected selling. This integration makes purchasing feel like supporting a movement rather than simply buying products.
11. Patagonia: Environmental Activism as Strategy
Patagonia demonstrates how consistent values-based content can build passionate communities while differentiating from competitors. Their approach treats environmental activism not as a separate CSR initiative but as core to their brand identity.
Conservation Stories That Educate
Patagonia shares compelling conservation stories that educate followers about environmental issues while inspiring them to take action. These stories position them as genuine environmental advocates rather than opportunistic cause marketers.
Transparent Supply Chain Messaging
Their social content frequently highlights sustainable manufacturing processes and repair programs, demonstrating a commitment to environmental principles through business practices. This transparency builds credibility, making their activism feel authentic rather than performative.
12. Wayfair: Social Shopping Innovation
Wayfair demonstrates how social commerce features can transform platforms from inspiration channels to direct sales environments. Their approach seamlessly connects discovery with purchase, removing friction from the customer journey.
Shoppable Home Inspiration
Wayfair excels at creating aspirational home vignettes that showcase products in context while using platform shopping features for instant purchasing. This strategy turns scrolling into shopping without disrupting the user experience.
Room Solution Approach
Rather than promoting individual products, Wayfair presents complete room solutions that help followers visualize possibilities, while also increasing the average order value. This approach positions them as helpful design partners rather than just furniture sellers.
13. Gymshark: Influencer Strategy Excellence
Fitness apparel brand Gymshark built a global presence primarily through strategic influencer partnerships, before such collaborations became more common. Their approach demonstrates how authentic influencer relationships can drive brand growth more effectively than traditional advertising.
Athlete Community Development
Rather than one-off influencer posts, Gymshark built lasting relationships with fitness influencers, creating a recognizable "Gymshark Athlete" community that provides consistent, authentic promotion. This approach creates a deeper association and credibility than transactional influencer marketing.
Event-Based Content Creation
Gymshark regularly hosts pop-up events that generate massive social content from both influencers and customers. These gatherings create content surges while fostering real-world community connections that strengthen online engagement.
14. Sephora: Educational Content That Converts
Sephora demonstrates how educational content can drive purchase behavior more effectively than direct promotion. Their strategy positions them as helpful beauty experts rather than merely product sellers.
Tutorial-Based Value Delivery
Sephora creates regular tutorials across platforms that solve real beauty challenges while subtly showcasing products. This approach provides genuine value while naturally highlighting their offerings in context.
Beauty Community Facilitation
Beyond creating their content, Sephora facilitates connections between beauty enthusiasts through questions, challenges, and user-generated content features. This community-building approach keeps followers engaged between purchases while creating social proof.
15. Amazon: Platform-Specific Adaptation
Despite their size, Amazon demonstrates agility in adapting content strategies for each social platform's unique environment. Their approach shows that understanding platform culture is more important than simply cross-posting identical content, emphasizing the importance of platform adaptation strategies.
Platform-Native Shopping Experiences
Amazon creates shopping experiences that feel natural to each platform's environment rather than forcing uniform approaches across channels. This adaptation improves user experience while maximizing each platform's unique features.
Review Integration Strategy
Amazon skillfully incorporates customer reviews into social content, creating authentic product endorsements that drive confidence. This strategy leverages their most excellent marketplace advantage, verified user experiences, in social environments.
Lessons from the Best in Social Media
The brands that master social media today understand that platform dominance comes not from broadcasting messages but from creating value, fostering a community, and maintaining authentic voices. Their success stems not from massive budgets but from strategic consistency, genuine engagement, and visual distinction that makes every post instantly recognizable.
These social standouts demonstrate that effective strategy begins with understanding audience needs rather than brand messages. They've built loyal communities by providing entertainment, education, inspiration, and a sense of belonging, giving far more than they ask in return. Their approaches vary widely, but their commitment to consistency, quality, and value for the audience unites them all.
Ready to transform your brand presence using insights from these leading companies? At NoBoringDesign, we focus on crafting brand experiences that build emotional ties with your audience, ensuring they keep coming back. Book a meeting today to see how we can help!
Key Takeaways
- Visual consistency across platforms significantly boosts brand recognition and engagement.
- Authentic storytelling and community building create deeper emotional connections than promotional content.
- Platform-specific content strategies yield better results than one-size-fits-all approaches.
- Balancing value-driven content with promotional material keeps audiences engaged without overwhelming them.
FAQs
What makes a brand successful on social media?
Success on social media isn’t just about flashy visuals or big budgets—it’s about consistency, creativity, and connection. The most effective brands understand their audience and create content that provides value, whether through entertainment, education, or inspiration. They maintain a clear and authentic brand voice, tailor content for each platform, and foster a community by engaging in meaningful ways. It’s not about broadcasting messages but about starting conversations and building trust over time. From Nike’s motivational storytelling to Sephora’s educational beauty tutorials, each brand leads with relevance, not reach.
Do smaller brands need big budgets to compete on social media?
Not at all. Many standout brands in the article, like So Worth Loving, prove that genuine engagement can outperform high-budget content. Smaller brands often have the advantage of being more agile, personal, and mission-driven. What matters most is understanding your audience, being consistent in your message and aesthetic, and responding authentically to interactions. High-quality visuals and strategic storytelling can be achieved at any scale. A clear brand purpose, creative execution, and community focus can create strong emotional connections that help smaller brands stand out, even against major players.
How important is visual consistency across platforms?
Visual consistency is crucial for brand recognition and trust. It ensures that followers instantly recognize your content, regardless of where they see it. Brands like Glossier and Apple have built strong visual identities using consistent color palettes, imagery, and tone. This coherence builds familiarity, which strengthens engagement and loyalty. A unified look and feel across platforms helps convey professionalism, reinforces messaging, and makes every post feel like part of a larger brand story. Even user-generated content, like GoPro’s, becomes more powerful when it aligns with a brand’s established visual language.
What can brands learn from these top social media performers?
Brands can learn to focus less on selling and more on serving their customers. Top performers prioritize audience needs, tell meaningful stories, and cultivate a sense of community. Whether it’s Dove championing self-worth or Gymshark building a global fitness community, these brands lead by giving more than they take. They tailor content to platform strengths, use visuals intentionally, and stay culturally relevant. Most importantly, they don’t chase trends; they build brand equity by staying true to their values. For any brand, large or small, these strategies provide a blueprint for more impactful and human-centered social media.

Let's face it, some YouTube channels stand out, while others fall flat. The secret sauce? Mastering YouTube banner dimensions for visual impact across all devices. Nail these dimensions, and your brand becomes a showstopper on every screen. Miss the mark, and you're serving up a pixelated mess that screams amateur hour.
Outdated templates and distorted banners can instantly turn viewers away from your channel. Since your YouTube banner shapes the first impression, getting the dimensions right is critical, not optional.
In this article, we’ll break down everything you need to know about YouTube banner dimensions across all devices, so your channel art lands perfectly on every screen, from phones to flat screens.
Understanding YouTube Banner Dimensions
YouTube banner dimensions refer to the size specifications for the image that appears at the top of your channel page. The recommended size is 2560 x 1440 pixels, which ensures a crisp, professional display across all devices.
The most critical element of your banner design is the “safe area”, a central zone measuring approximately 1546 x 423 pixels. This area is guaranteed to be visible across all devices, including mobile phones and smaller screens.
YouTube crops the banner differently depending on the device, so placing your channel name, logo, tagline, or any essential information within this safe area ensures that viewers see it regardless of how they access your channel.
Why Dimensions Vary Across Devices
YouTube uses responsive design to adapt your banner to different screen sizes, resulting in significant variations in how your banner is displayed:
- TVs display the full banner at 2560 x 1440 pixels.
- Desktops show a horizontal strip approximately 2560 x 423 pixels.
- Mobile devices display only the central safe area, which is about 1546 x 423 pixels.
Because of this cropping behavior, any design elements placed outside the safe area risk being cut off on specific devices.
Key Guidelines for YouTube Banner Dimensions
Minimum and Recommended Sizes
YouTube banners require specific dimensions to display correctly across all devices. The platform recommends 2560 x 1440 pixels (16:9 aspect ratio) for optimal viewing on all devices. This size delivers crisp, professional-quality visuals on large screens like TVs while still working well on smaller devices.
The minimum acceptable size is 2048 x 1152 pixels. Anything smaller triggers errors or appears noticeably poor quality. These precise measurements ensure your banner maintains its visual impact, whether someone is viewing it on a home theater system or glancing at their smartphone. Following these requirements creates that crucial professional first impression that helps convert visitors into subscribers.
File Format and Size Limits
YouTube accepts both JPEG and PNG formats for banner images, each with distinct advantages. JPEG works best for photographs and gradients, striking a balance between good quality and smaller file sizes. PNG delivers superior results for graphics, text, and designs requiring transparency.
Your file must be under 6MB, regardless of the format you choose. Larger files simply won't upload to the platform. If your design exceeds this limit, you'll need to compress the image or choose a different format.
The proper format depends on the content of your banner. Text-heavy designs with crisp graphics benefit from PNG's ability to maintain sharp edges. Photographic backgrounds or smooth color transitions often work well as JPEGs while keeping file sizes manageable.
Balance is key; you need to stay under the file size limit while maintaining sufficient quality. Overly compressed images appear pixelated or blurry, which can undermine your channel's professional appearance. Finding that sweet spot ensures your banner loads quickly while still looking sharp across all devices.
Crafting Your YouTube Banner
Design Principles to Follow
When creating your YouTube banner, simplicity works best. A YouTube banner with too many elements can be challenging to view across different devices. Creative design strategies that focus on simplicity ensure your message is clear.
Use your brand colors consistently. When viewers see the same palette across your content, they develop a stronger sense of recognition for your channel. This visual continuity builds trust and helps your audience immediately identify your content.
Reflect your content focus visually. Using appropriate illustration styles in your banner can help communicate what viewers can find on your channel without needing explanation. Crafting compelling narratives through your banner helps convey your channel's message effectively.
Make text readable at any size. Bold, clean fonts ensure your message comes through even on smaller screens. Fonts that become illegible when scaled down defeat the purpose of your banner.
Creating a clear visual hierarchy by guiding the viewer's eye to your most important elements first is a practical design strategy for engagement. Only use high-resolution visuals; blurry or pixelated images immediately signal amateur quality to viewers.
Examples of Effective YouTube Banners for All Devices
Leading YouTube channels exemplify key design principles for effective banners. Nike’s banner features their iconic "Just Do It" tagline on a bold background, with their logo centered in the safe area (1546 x 423 px) to ensure visibility across devices. This minimalist approach reinforces instant brand recognition.
Marques Brownlee (MKBHD) uses a sleek, tech-aligned design with neutral colors and a centered logo, mirroring his content’s professional tone. His banner includes social links within the safe zone, avoiding mobile cropping — a tactic emphasized in YouTube’s responsive design guidelines.
Educational channels often effectively use soft, inviting colors with centered logos and clear scheduling information. This approach sets viewer expectations and reinforces the channel's academic mission.
These examples share critical features: they use the safe area effectively, integrate text and graphics harmoniously, and maintain perfect consistency with their overall brand. By studying successful channels in your niche, you can identify patterns that resonate with your target audience.
Step-by-Step YouTube Banner Creation Guide
Tools for Design
Several excellent design tools make creating YouTube banners accessible regardless of your skill level:
Canva offers an intuitive drag-and-drop interface with templates perfectly sized for YouTube. Its extensive stock library and AI-powered tools help you create professional designs without a design background.
Adobe Express offers quick-edit templates with seamless integration into the Creative Cloud. If you already use Adobe products, this maintains consistency across all your marketing materials.
Placeit specializes in quick customization with templates designed specifically for YouTube banners. It's powerful for gaming, music, and lifestyle channels needing instant results.
Pixlr gives you browser-based editing without registration. Choose Pixlr X for simple edits or Pixlr E for more advanced capabilities.
Select the tool that matches your skill level and specific needs rather than struggling with overly complex software that might slow down your creation process.
For brands seeking everything design related without the hassle, here at NoBoringDesign, we offer comprehensive brand identity development. Whether you need a stunning YouTube presence or a cohesive visual identity across all platforms, we can give you a custom solution that elevates your brand beyond the limitations of any of these DIY tools.
Process for Creating a YouTube Banner
Start with an appropriately sized template (2560 x 1440 pixels). Most design tools offer templates specifically for YouTube banners, saving you the hassle of setting up dimensions from scratch.
Add your key information, channel name, logo, and tagline. Keep text concise for mobile viewers who will see only the central safe area of your design.
Select high-quality images that represent your content. Avoid cluttering the design with too many elements that compete for attention and confuse your message.
Position critical elements within the safe area (1235 x 338 pixels) to ensure visibility across all devices. This central zone is your prime real estate for communicating with viewers.
Apply your brand colors and fonts for consistency with your channel trailer, thumbnails, and other materials. This visual cohesion strengthens your brand recognition.
Preview across devices before finalizing. Check how your banner displays on desktop, mobile, and TV layouts to catch any potential issues before publishing.
Export as JPEG or PNG, staying within the 6MB size limit. Choose the format that best preserves your design quality while meeting YouTube's requirements.
This streamlined approach creates a banner that effectively represents your channel, working perfectly across all viewing platforms.
Uploading Your YouTube Banner
How to Upload Your Banner
Getting your banner from design to display involves a straightforward process. Sign in to YouTube Studio and click "Customization" in the left sidebar. Select the "Branding" tab and click "Upload" in the channel art section.
Select your banner file from your computer and use the cropping tool to adjust how your banner appears on different devices. Check the preview options to see how your banner looks on TV, desktop, and mobile.
This final preview step confirms that your most important elements remain visible across all devices before you publish, preventing potential visibility issues that could undermine your branding efforts.
Troubleshooting Common Issues with YouTube Banner Dimensions
Even perfectly designed banners sometimes encounter upload problems. If you receive file size errors because your image exceeds 6MB, compress it or save it in a different format. PNGs work well for graphics, while JPEGs usually create smaller files for photographs.
Image corruption occasionally occurs with JPEGs during upload. Uploading thumbnails in PNG format instead of JPG can help preserve image quality, as JPGs may sometimes appear compressed or distorted after being processed by the platform.
When essential elements disappear on specific devices, redesign your banner to keep them within the safe area (1235 x 338 pixels). This ensures that your key messaging remains visible, regardless of the viewing device.
For upload failures, try clearing your browser cache or using a different browser. Temporarily disabling ad blockers and extensions can sometimes resolve persistent upload issues that prevent your banner from processing correctly.
Be aware that changes don't always appear immediately. Wait a few hours before trying to troubleshoot further. If problems persist, try uploading the image again or check YouTube's Help Center for additional guidance.
Enhancing Brand Recognition with YouTube Banners
Maintaining Consistency Across Platforms
Your YouTube banner should feel like a natural extension of your overall brand presence. This consistency creates stronger recognition and trust with your audience.
Implementing effective branding awareness strategies involves using a consistent color scheme across your YouTube banner, website, and social media profiles. Position your logo similarly across platforms and maintain consistent typography in all your brand communications. Ensure messaging and tone align with your overall brand voice.
Standardizing banner production can lead to more efficient workflows and a consistent visual identity across platforms. This consistency helps reinforce brand recognition and fosters greater trust with your audience over time.
When viewers encounter consistent visuals across your YouTube channel, Instagram profile, and website, they subconsciously register this cohesion as a sign of professionalism and reliability.
Adapting to Design Updates for All Devices
While consistency is important, your banner shouldn't stay the same forever. YouTube occasionally updates its platform specifications, and your channel will likely evolve.
Adopting on-demand marketing strategies helps you stay current by periodically updating your banner to reflect seasonal campaigns or new content directions. Incorporate evolving brand elements as your channel grows and keep an eye on relevant design trends in your niche.
Balancing consistency with strategic updates keeps your channel looking fresh and relevant without losing the brand recognition you've built.
Perfecting Your YouTube Banner Dimensions Across All Devices
A well-crafted YouTube banner is your channel's visual handshake with new viewers. Stick to the recommended 2560 x 1440 pixels, with your crucial elements in the 1235 x 338 pixel safe area, and you'll make a good impression on every device.
Less is more with banner design. Clean layouts featuring quality visuals and readable text outperform cluttered designs every time. Keep your core message within the safe zone where everyone can see it, even on smaller screens.
Your banner should capture your channel's personality while connecting visually with your broader brand presence. This visual consistency builds recognition and trust as viewers encounter you across different platforms.
Ready to transform your YouTube channel with a banner that stands out on every screen? At NoBoringDesign, we design brand experiences that go beyond grabbing attention. We build lasting emotional bonds that keep your customers engaged. Schedule a meeting with us to discover how!
Key Takeaways
- YouTube banners require a resolution of 2560 x 1440 pixels for optimal display across all devices.
- The crucial "safe area" (1235 x 338 pixels) ensures visibility of key elements on all screens.
- The file size must be under 6MB in either JPEG or PNG format.
- Simple, brand-consistent designs with strategic placement outperform cluttered alternatives.
FAQs
How do I make a YouTube banner?
To make a YouTube banner, start by creating an image with the recommended size of 2560 x 1440 pixels. Use design tools like Canva, Adobe Express, or Placeit to help create a professional design. Focus on simplicity by including essential elements such as your channel name, logo, and tagline. Keep key elements within the “safe area” (1235 x 338 pixels) to ensure visibility across devices. Ensure the file size is under 6MB and save it as either JPEG or PNG. Once complete, upload the banner to YouTube via YouTube Studio.
What size is a YouTube banner?
The recommended size for a YouTube banner is 2560 x 1440 pixels, with a 16:9 aspect ratio. This ensures that your banner appears crisp and professional across all devices, from TVs to smartphones. The most crucial element to consider is the "safe area," which measures 1235 x 338 pixels. This central area will remain visible on all devices, while other parts of your banner may be cropped depending on screen size. Adhering to these dimensions ensures your banner looks great everywhere and makes a strong first impression.
What are the dimensions for a YouTube banner?
YouTube banners should have dimensions of 2560 x 1440 pixels for optimal display. The central safe area, measuring 1235 x 338 pixels, ensures that critical elements, such as logos and text, are visible on all devices. YouTube uses responsive design, so your banner may appear differently on different devices. On mobile, only the central safe area is visible, while on desktop and TV, the full banner is shown. Following these dimensions helps prevent cropping and ensures your brand is consistently represented across all screen sizes.
Why is the safe area important for YouTube banners?
The safe area of a YouTube banner, measuring 1235 x 338 pixels, is crucial because it ensures that your key information, like logos and channel names, remains visible on all devices, including mobile phones, desktops, and TVs. Since YouTube crops banners differently across devices, placing essential elements within the safe area guarantees they are not cut off. This allows your channel's branding to stay intact and ensures that viewers have a professional experience regardless of the device they use. It’s a key design strategy for maximizing visibility and engagement.

Business clip art has evolved from its humble desktop publishing origins into a powerful design asset that can supercharge your brand's visual identity without draining your wallet. The digital revolution has turned these once-static graphics into accessible treasures anyone can use, putting professional-looking design at the fingertips of businesses everywhere.
For companies watching every penny but still craving a polished professional look, business clip art is a design superhero. Whether you're crafting a killer presentation, creating social media content that stands out, or designing marketing materials that grab attention, the right clip art helps your message leap off the page and reinforces what makes your brand unique.
In this article, you’ll learn how to choose, customize, and apply business clip art in ways that elevate your brand without sacrificing authenticity.
The Major Role of Business Clip Art in Modern Branding
Business clip art has transformed from basic publishing elements into strategic branding tools that help businesses build consistent visual identities across multiple platforms.
Evolution of Design Elements
This transformation mirrors the digital evolution of the design. Before computers, clip art referred to physical illustrations in books used for advertisements and business reports. The 1980s and 1990s desktop publishing revolution digitized clip art, giving business people easy access to visuals for their presentations.
Through the 1990s and 2000s, clip art became ubiquitous when Microsoft Office products included vast libraries. From internal memos to executive presentations, clip art backgrounds, icons, and cartoons became fixtures in the workplace, serving as strategic design elements to enhance communication.
Strategic Brand Components
Today, business clip art serves as a strategic element, rather than just a decoration. Businesses use it for brand consistency, storytelling, and creating a quick, recognizable visual language for their brand.
Perhaps business clip art's most significant impact has been democratizing design. Small companies without design departments can now create professional materials. Modern platforms have replaced traditional clip art libraries with customizable templates featuring professional assets, providing innovative design ideas for businesses.
Key Benefits of Using Business Clip Art for Your Brand
Business clip art offers powerful advantages for brands looking to build their visual identity without draining resources. Here's why it deserves a spot in your design toolkit:
Cost-Effectiveness
Let's cut to the chase, custom illustrations and photography can cost a small fortune. Business clip art delivers high-quality visuals without the eye-watering price tag, making it perfect for small businesses and startups that watch every penny and optimize their design processes.
Many platforms give you access to thousands of high-quality clip art pieces and other design assets for a reasonable monthly subscription. This flat fee lets you experiment with different visual styles across multiple projects without watching costs spiral with each new graphic.
Time-Saving Efficiency
In business, time equals money and opportunity. Business clip art slashes design time dramatically, letting you create professional materials in minutes rather than hours or days. Need a last-minute presentation? Social media content due yesterday? A ready-to-use clip art library means you're never starting from scratch.
With pre-made assets, you can quickly build design prototypes, update marketing materials on the fly, and maintain a consistent visual style across platforms without extensive design work.
Creative Flexibility
Today's business clip art isn't just versatile, it's practically a shape-shifter! From digital presentations to print materials, these graphics resize, recolor, and modify to fit your specific requirements.
Whether you're creating social media graphics, websites, or digital training materials, clip art enhances user engagement by visually simplifying complex messages. Presentation software thrives on visual cues, while e-learning content benefits from graphics that keep learners engaged. On the print side, clip art can elevate brochures, flyers, posters, and even business cards with consistent, branded visuals that grab attention and reinforce messaging.
This flexibility helps you maintain visual consistency across marketing channels, match graphics to your brand colors and style, and create unified visual stories for websites, social media, and print, thereby enhancing brand engagement.
A small business could use the same business clip art elements on their website, social posts, and printed brochures, creating a cohesive brand image while saving valuable time and money.
How to Choose the Best Business Clip Art for Your Brand
Choosing the right business clip art makes all the difference between strengthening your brand and muddying your message. Here's how to pick winners every time.
Define Your Brand Identity
Before downloading any business clip art, get crystal clear about who you are as a brand. What values define your company? What visual style reflects your brand? What's your brand personality? Who are you trying to reach?
Your business clip art choices should feel like a natural extension of these elements, reinforcing what makes your brand unique in every visual communication and contributing to a unified brand identity.
Source Quality Assets
The right source makes finding perfect business clip art much easier. Look for platforms that offer extensive libraries with commercial-use licenses. Consider your budget, how often you'll need assets, and licensing requirements when making your choice. Remember, investing in professional design resources can significantly enhance the quality of your visuals.
Paid sources guarantee quality and clear commercial use rights, while free resources work well for occasional projects if you verify licenses carefully.
Match the Style to Your Brand
Once you've found potential sources, focus on business clip art that aligns with your brand's visual identity. Select graphics that use colors that match your brand, or choose customizable vectors that you can adjust. Whether you prefer flat design, line art, or detailed illustrations, stick with it consistently.
Choose visuals related to your industry or services that reinforce your expertise, and be mindful of picking inclusive, respectful images that avoid stereotypes or potentially offensive content.
Evaluate its Technical Qualities
Not all clip art is created equal. Look for high-resolution vectors that scale without losing quality. Check that graphics work well in both color and black-and-white applications. Ensure the design complexity matches your needs; sometimes, simpler is better.
Your goal is to create a visual language that instantly communicates what your brand stands for, contributing to a cohesive brand identity.
Techniques for Customizing Business Clip Art to Fit Your Brand
Generic clip art? No thanks! The real magic happens when you transform stock graphics into something uniquely yours. Here's how to make business clip art truly reflect your brand's personality.
Master Basic Editing Skills
You don't need a design degree to customize business clip art effectively. Several user-friendly platforms make customization accessible to everyone. Learn to update colors to match your brand palette, resize elements to work in different contexts, mix and match clip art pieces to create something original, and incorporate your brand elements, such as logos or signature text styles.
Apply Brand Color Theory
Making business clip art feel like it was created specifically for your brand requires consistency. Apply your brand colors using official color codes for perfect matching. This simple change makes generic business clip art instantly recognizable as yours, helping to build emotional connections with your audience.
Adapt Style Consistency
Stay true to your style. If your brand identity features a minimalist design, choose clean business clip art that can be easily simplified. For brands with a hand-drawn aesthetic, look for clip art with similar qualities. The goal isn't just to use business clip art, it's to make it look like it was custom-created for you.
Create Signature Combinations
Create unique combinations by combining different clip art elements in signature ways. This might mean removing details from complex designs, adding your brand's unique touches, or combining several pieces into something new. Always reference your brand guidelines during customization to guide not just your color choices but the overall feel of your visual assets.
Develop Multi-format Versions
Prepare your customized business clip art for different applications by creating versions optimized for various formats and sizes. Having web-optimized, print-ready, and social media-specific versions ensures your visuals always look their best, regardless of where they appear.
Push creative boundaries with your business clip art. With imagination and the right tools, even basic clip art can transform into sophisticated, brand-specific graphics that elevate your communications.
Optimize Clip Art for Different Formats
To maintain a consistent brand presence, your business clip art needs to work across all touchpoints, from social posts to brochures. That means optimizing your graphics for various media formats.
Create high-resolution, scalable versions in vector formats like SVG or EPS to ensure they retain quality, whether used on screens or in large-format print. Adapt complex graphics into simplified versions for smaller spaces, such as favicons or app icons, while preserving your brand's visual language. This approach keeps your materials feeling cohesive, no matter where your audience sees them.
Establish a Business Clip Art Brand System
Strong visual consistency starts with a well-defined internal system. Develop a lightweight brand guide that clearly outlines how business clip art should be used, including preferred illustration styles, color treatments, and placement rules. This ensures team-wide alignment on how visuals support your brand voice.
Pair that with a centralized asset library where approved graphics are organized by use case (such as social, print, or presentation) and tagged for easy searching. Whether you’re a team of two or twenty, this helps reduce duplicated work, prevent off-brand visuals, and ensure all your materials feel connected.
Turning Clip Art into Brand Art
Business clip art has evolved from simple desktop graphics into a strategic branding powerhouse that helps create professional visuals without breaking the bank. Modern business clip art seamlessly blends affordability, efficiency, and adaptability.
The right graphics save money, accelerate your design workflow, and look great on any platform you need. By thoughtfully selecting and customizing these visuals to match your brand identity, you can create stunning materials that maintain cohesion from digital posts to printed materials.
Ready to transform your visual branding? Start exploring how business clip art might enhance your next project. At NoBoringDesign, we create brand experiences that captivate and resonate, building emotional connections that encourage repeat engagement. Reach out today to learn more!
Key Takeaways
- Business clip art offers cost-effective visual solutions that work across multiple platforms.
- Strategic customization transforms stock graphics into unique brand assets.
- Consistent application builds recognition and strengthens your visual identity.
- When selected thoughtfully, clip art enhances rather than dilutes your brand message.
FAQs
Can I use clip art for my business logo?
While it's technically possible to use clip art for your business logo, it’s generally not advisable if you want to build a strong, recognizable brand. Clip art is often freely available and widely used, which means there’s a high chance your logo could end up looking similar to another company’s, or worse, the same. This can undermine your credibility and make it difficult or impossible to trademark your logo. A business logo should be unique, scalable, and timeless. Instead of using clip art as the centerpiece, consider using it to complement other brand visuals. Your logo deserves original design attention to represent your brand's values and identity truly.
Can you use clip art on business forms?
Yes, you can use clip art on business forms; when used thoughtfully, it can enhance the overall readability and visual appeal of otherwise dry or dense documents. Clip art can serve as section headers, instructional icons, or background visuals to improve the user experience without overpowering the form's functionality. For example, using a small graphic of a credit card near a payment section can guide the user more intuitively. The key is to choose graphics that align with your brand style and keep them simple and unobtrusive. Just ensure that any clip art used is licensed for commercial use and doesn’t compromise professionalism or clarity.
Where can I find clip art that is free for commercial use?
There are several reliable platforms where you can find clip art that is free for commercial use, but it's essential to carefully review licensing terms before downloading and applying the graphics to business materials. Websites like Openclipart, Pixabay, Vecteezy (with the right filters and attributions), and unDraw offer high-quality visuals with licenses that often allow for commercial use. However, even when a resource claims to be “free,” there can be restrictions, especially around redistribution or use in logos. Always double-check for commercial use approval, and when in doubt, look for clip art libraries with clear Creative Commons or royalty-free licenses that align with your business needs.
How can I choose the right clip art images for my business??
Choosing the right clip art images for your business starts with a clear understanding of your brand identity, its values, tone, and target audience. Once that's established, seek visuals that align in style, color, and subject matter. Stick to high-resolution, vector-based clip art that can be resized without losing quality. Look for images that feel modern and avoid using overused or outdated styles, as this could make your brand seem unprofessional. Whenever possible, select editable graphics that allow you to apply your brand colors and tailor the imagery to specific campaigns or platforms. Cohesiveness is key; consistent visual elements across channels reinforce brand recognition and trust.

Twitter’s July 2023 makeover was more than a cosmetic change; it marked a bold reimagining of the platform’s identity and ambitions. Elon Musk’s transformation of Twitter into “X” involved retiring the iconic blue bird logo and the Twitter name, signaling a move away from its legacy as a real-time news and conversation hub.
The new vision for X is to become an “everything app,” integrating social networking, payments, shopping, media, and more. The rebrand, one of the most audacious in tech history, has sparked intense debate and offers insights into branding strategies for tech companies.
In this article, we’re unpacking Twitter’s X logo rebranding, from the strategic vision behind the shift to the ripple effects on users, advertisers, and the tech industry as a whole.
The Strategic Vision Behind Twitter's X Rebrand
The Everything App Dream
Elon Musk's vision for X as an "everything app" is well-documented and is being actively implemented, with features and partnerships, such as X Money and Visa, supporting ambitions to integrate payments, shopping, media, and more. The rebranding and expansion strategy is bold and targets younger, tech-savvy users, mirroring the WeChat model in China.
This isn't just slapping on a fresh logo and calling it a day. The master plan stretches way beyond 280 characters into a digital playground where you can send money, shop till you drop, share rich media, and maybe even handle your banking, all without switching apps, showcasing ambitious brand positioning strategies.
By flexing its muscles in new directions, X wants to break out of the social media box and become your go-to digital companion. It's a bold wink to younger users who expect their apps to juggle multiple talents with flair.
From Bird to Blank Slate
To truly appreciate how massive this leap is, let's take a quick trip down memory lane. Twitter entered the world in 2006 as "twttr," with all green bubbles and vowel-free swagger. Over time, it blossomed into the Twitter we knew, that iconic blue bird symbolizing our collective pulse on what's happening now.
But while other platforms soared, Twitter struggled to expand its user base and generate new revenue streams. Musk's rebrand isn't a gentle nudge; it's a confident shove into new territory, fueled by the belief that sometimes you need to break the mold rather than just reshape it.
Swapping the beloved blue bird for the stark 'X' signals more than a costume change. It's Twitter reshaping its visual identity completely to emerge as something entirely new and ambitious, joining the ranks of the best tech logos that embody innovation. While the jury's still out on whether fans are cheering or jeering, one thing's crystal clear: X has no intention of living in Twitter's shadow.
Major Shifts in Brand Identity After Twitter Became X
From Friendly Bird to Mysterious X
The leap from Twitter's cheerful blue bird to X's bold black-and-white logo is like trading your favorite cozy sweater for a sleek leather jacket. The new X logo brings minimalism, abstraction, versatility, and a futuristic feel, capturing good logo characteristics. Less "what's happening now" and more "what happens next."
This dramatic wardrobe change wasn't accidental. Branding experts note that "Unlike the bird, which was loaded with themes of freedom and lightness, X signals rupture, an intentional move away from the brand's origins and a declaration of a new, more expansive vision." The X invites mystery and possibility, the perfect visual blank slate for Musk's grand ambitions.
The shift to stark black and white further hammers home this fresh-start approach. By ditching Twitter's iconic blue, the platform visually declares it's breaking free from its past life as just another social media platform, utilizing micro-interactions in design to enhance user experience.
Breaking Brand Evolution Norms
Twitter’s rebrand to X diverges sharply from the incremental approaches of Meta and Alphabet. While Meta retained Facebook/Instagram and Alphabet kept Google as its core subsidiary, X erased all Twitter branding overnight, a high-stakes gamble that prioritizes Musk’s 'everything app' vision over legacy recognition.
Language and Communication Overhaul
X’s rebrand aimed to erase Twitter’s legacy vocabulary, replacing "tweets" with "posts" and "handles" with "X accounts." However, these changes have faced resistance, with users and media largely retaining the original terminology.
While the move reflects Musk’s vision for X as an 'everything app,' the language change represents more than semantic nitpicking. It signals a fundamental shift in how the platform views itself and how it wants to be perceived by others, demonstrating the impact of great website copywriting.
Market and Advertising Implications of the X Rebrand
Billion-Dollar Brand Value Shift
The X rebrand came with a price tag that would make even Elon wince. Branding experts warned that altogether scrapping Twitter's established identity risked billions in brand value, with estimates of potential losses ranging from $4 billion to $20 billion, just for swapping a bird for a letter.
User numbers and engagement also took a hit, with industry analysts predicting significant declines. Companies that had built their social strategies around Twitter suddenly faced a marketing plot twist, with many having to adjust their search strategies to stay visible, adding surprise expenses to already tight budgets.
Advertising Exodus and Cautious Return
X’s relationship with advertisers has been rocky since the rebrand. Many major brands paused their spending due to concerns about content moderation. Still, by late 2023 and early 2024, a significant number, including over 1,700 advertisers and 90 of the top 100 ad spenders, had returned, exploring new ad formats and improved brand safety controls.
This partial comeback was driven by innovations in static, animated, and video ads, as well as enhanced brand safety and more precise targeting. X has also expanded beyond text-only content, now offering more visual, video, and shopping features, reflecting broader advancements in social media ad design and aiming to make the platform more attractive to advertisers focused on engagement.
From Text-Based to Visual-First
The platform's evolution extends beyond its name and logo to the core content experience. X now embraces longer-form content, rich media, and advanced formats that Twitter's original design couldn't accommodate, aligning with current marketing design trends. This transformation caters to changing user preferences for visual content while creating new advertising opportunities.
For marketers, this means rethinking content strategy for the platform. Posts that would have performed well on Twitter might not do as well on X, which favors visual elements and more immersive experiences. The change forces brands to develop X-specific approaches rather than repurposing content from other platforms.
New Revenue Streams Beyond Advertising
While X has rolled out subscription services like X Premium (formerly Twitter Blue), advertising remains its bread and butter. However, the "everything app" vision opens doors to diversified revenue streams that weren't possible under Twitter's more limited scope.
Payment processing, e-commerce integration, and premium content subscriptions represent potential money makers that align with X's expanded vision. As Linda Yaccarino, CEO of X, stated, they want to go "beyond posting, messaging, and following other accounts" to become your one-stop digital destination.
These new revenue opportunities could eventually reduce X's dependence on advertising dollars, a goal many social platforms share but few have achieved.
Dimensions of Consumer Response to Twitter's X Rebrand
Measurable User Dissatisfaction
When Twitter became X, users weren’t exactly popping champagne. In a major survey of over 11,000 people across Australia, the US, and the UK, 31% had a negative view of the rebrand. In contrast, only 22% responded positively, a nine-point gap that underscores the challenge X faces.
The sentiment wasn’t just talk: 23% of surveyed users said they would use the platform less after the rebrand, and subsequent data confirmed declines in web visits, app downloads, and overall engagement.
Implementation Criticism
Several specific issues fueled the digital eye-rolling around X's implementation. For weeks, old and new branding played an awkward tug of war, creating a jarring experience that undermined the professionalism of the change.
The "X" name raised eyebrows for its adult content connections and similarity to existing brands like Xbox, creating confusion rather than clarity. Many felt the rebrand lacked a compelling "why." Without understanding the destination, users struggled to enjoy the journey.
Branding experts widely caution that simply changing a logo does not constitute an actual rebranding. As one strategist put it, “A rebranding process involves much more than changing logos and colors; it's about redefining purpose.” This sentiment echoed across the industry, with many warning that such dramatic changes risk diluting the brand and alienating core users without proper execution.
From Twitter to X
The Twitter-to-X metamorphosis stands as one of the boldest brand gambles in social media history. This daring transformation replaced a universally recognized symbol with something entirely new, sacrificing billions in brand equity for the promise of a digital everything app. In doing so, X teaches us invaluable lessons about the delicate balance between innovation and tradition in brand evolution.
The mixed response, from curious intrigue to outright rejection, highlights how deeply users connect with the brands they love. As the dust settles, X's success will ultimately depend not on its logo or name, but on whether it delivers experiences compelling enough to make users forget the blue bird they once cherished. Only time will tell if this audacious rebrand will soar to new heights or remain grounded in controversy.
Ready to reinvent your brand without alienating your audience? We're passionate about creating brand transformations that excite rather than confuse. At NoBoringDesign, we don’t just create memorable brand experiences, we forge emotional connections that keep customers coming back. Let’s talk about how we can elevate your brand!
Key Takeaways
- Twitter's rebrand to X represents one of social media's most dramatic identity shifts, aiming to transform a simple messaging platform into an "everything app," and illustrating bold moves in tech company branding.
- The change risked billions in established brand equity and initially alienated both users and advertisers.
- The public response was largely negative, with research showing that 31% felt negatively about the rebrand versus only 22% who felt positively.
- The rebrand offers valuable lessons about balancing innovation with brand continuity and user expectations.
FAQs
Why did Elon Musk rebrand Twitter to X?
Elon Musk rebranded Twitter to X as part of his long-term vision to build an “everything app”—a single platform that combines social media, payments, shopping, content, and more. The move signals a strategic shift away from Twitter’s origins as a real-time conversation tool. By scrapping the iconic bird and name, Musk aimed to position X as a futuristic digital ecosystem, breaking out of the traditional social media mold. The rebrand is both a branding reset and a message: X isn’t evolving from Twitter, it’s replacing it with something much broader in scope.
What are the main visual differences between Twitter and X?
The most noticeable change is the logo; Twitter’s friendly blue bird has been replaced by a stark, black-and-white “X.” This minimalist, abstract design strips away any warmth or nostalgia, opting instead for a futuristic and versatile identity. Color, typography, and interface elements have also evolved to reflect a bolder, more mature tone. Where Twitter leaned into community and conversation, X’s design points to structure, functionality, and scale. The branding change aligns with Musk’s broader vision: to depart from Twitter’s social platform roots and signal a new era of multi-functional digital engagement.
How did users react to the Twitter-to-X rebrand?
User response was largely negative. A multinational survey of over 11,000 people showed that 31% disapproved of the rebrand, while only 22% viewed it positively. Many users expressed confusion, frustration, or indifference, mainly due to the abruptness of the transition and the lack of a straightforward narrative. Some disliked the logo and name, associating "X" with other brands or adult content. Others missed the familiar features and language of Twitter. The result: measurable drops in engagement, web visits, and app downloads. While some early adopters embraced the change, the sentiment leaned more skeptical than supportive.
What impact has the rebrand had on advertisers and brands?
Initially, the rebrand created uncertainty for advertisers. Many paused their campaigns due to concerns about content moderation and an unclear brand direction. Estimates suggest the shift may have cost the platform billions in brand equity. However, by early 2024, many major advertisers had returned, drawn by improved safety tools, new ad formats, and broader media options. X’s move toward visual and immersive content also attracted marketers exploring video, shopping, and rich media experiences. While the rebrand disrupted short-term strategies, it’s opened doors for long-term growth, if the platform can deliver on its expanded capabilities and regain user trust.
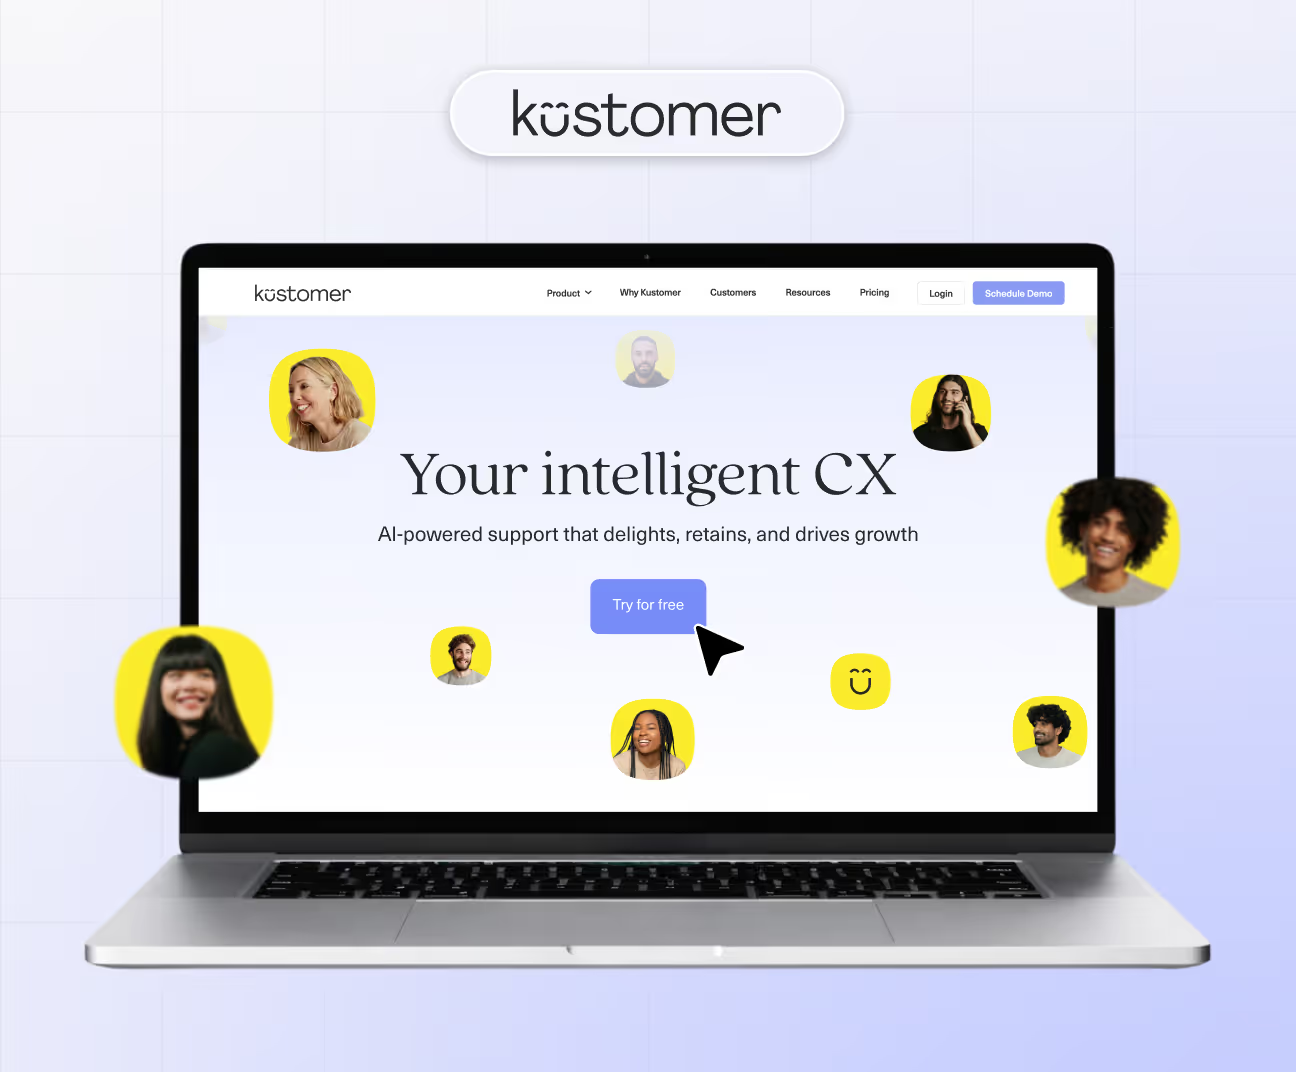


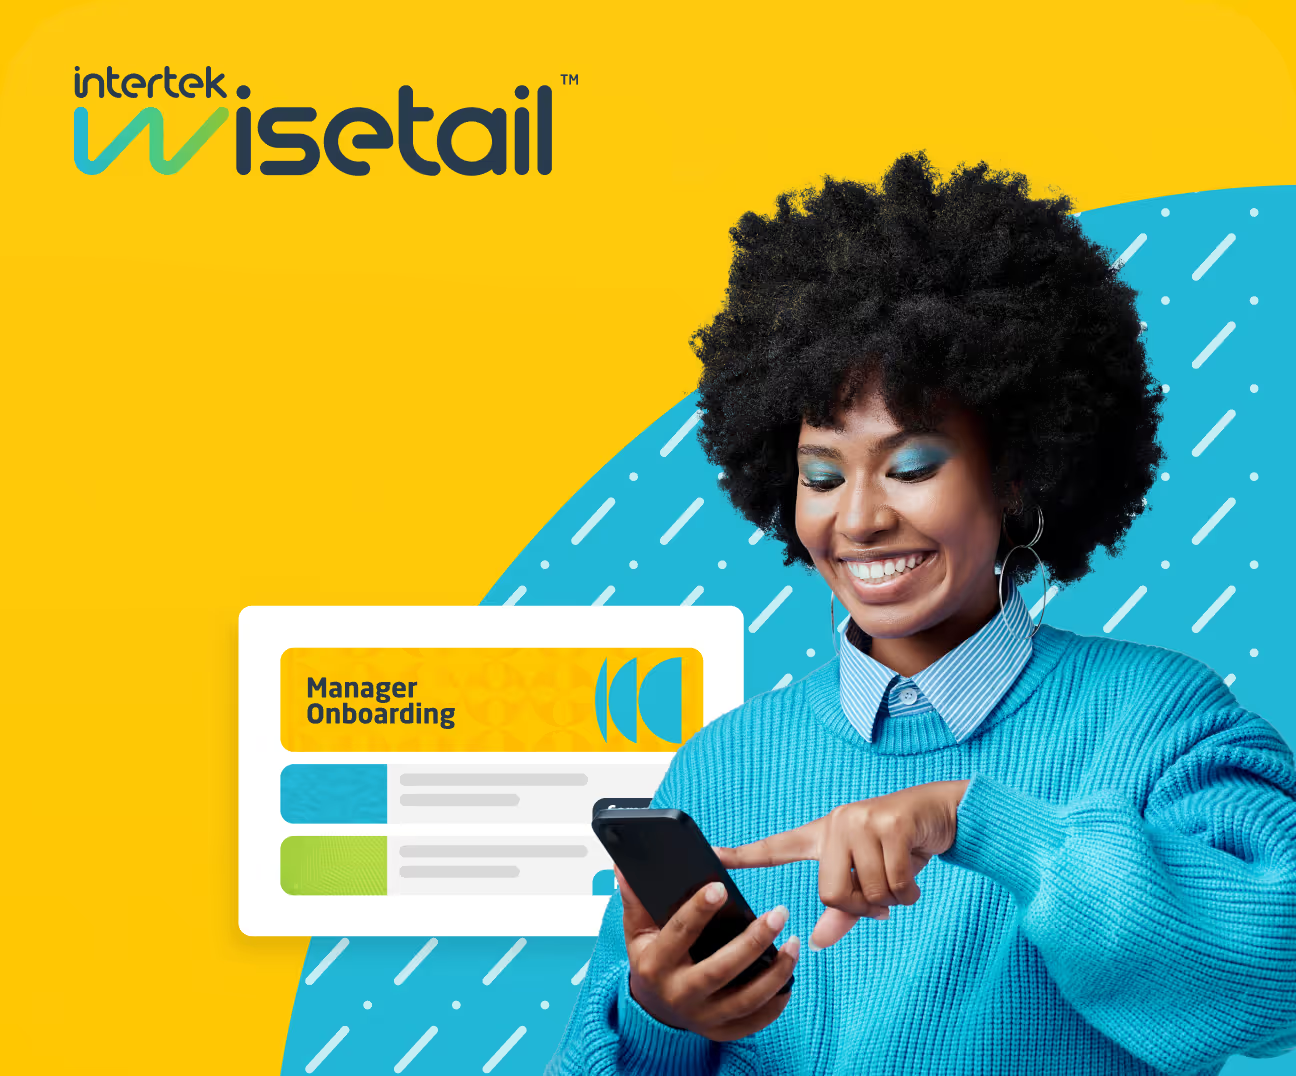


.avif)

.avif)
.avif)
.avif)

